Quick Start Guide: GoDaddy Poynt Smart Terminal V3.0
Review basic setup instructions for your GoDaddy Poynt Smart Terminal V3.0.
| Step 1 |
|---|
 |
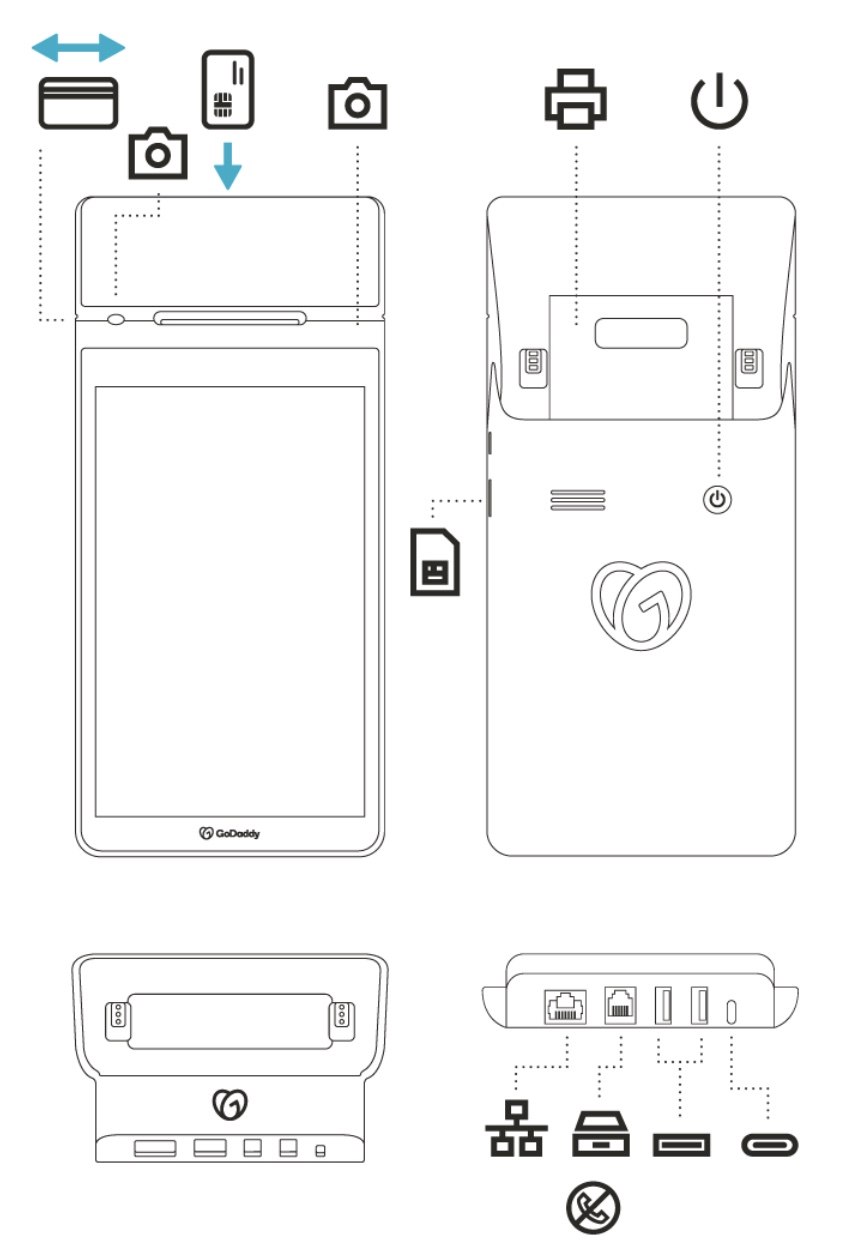
Remove the protective screen cover and familiarize yourself with the different ports and parts of your Smart Terminal. Your customers can swipe or insert their card into the card reader slot, or tap their card or device on the
|
| Step 2 |
|---|
 |
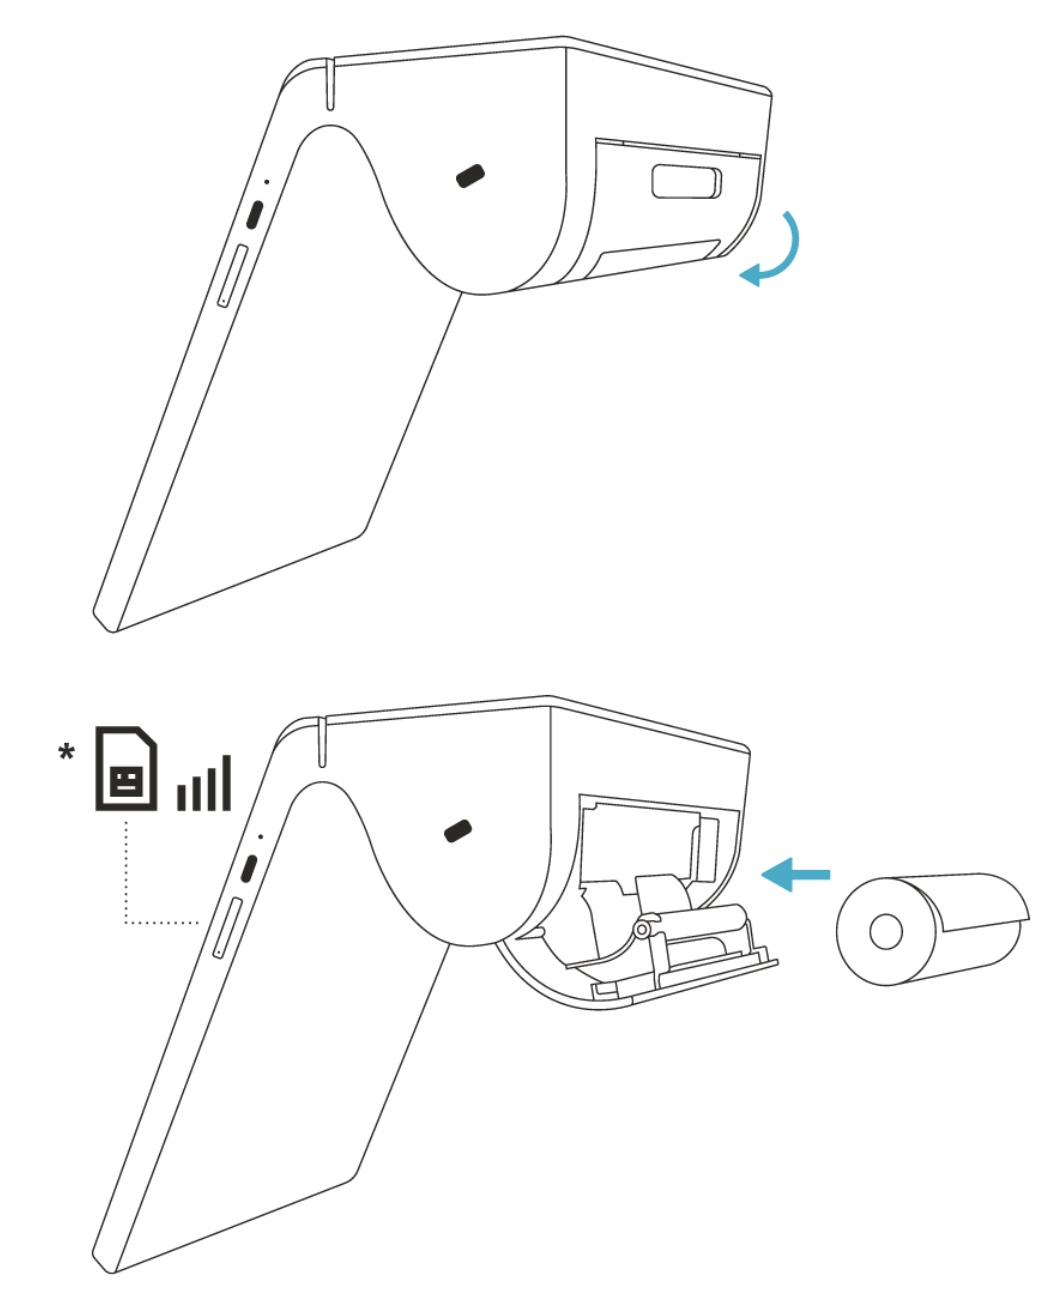
Open the printer compartment. Insert a roll of thermal printer paper with the paper rolling down from the top and the end of the roll facing away from the compartment. * A SIM card and cellular data plan (sold separately) are required to connect to a mobile network. A SIM card is not necessary for Wi-Fi connection. |
| Step 3 |
|---|
 |
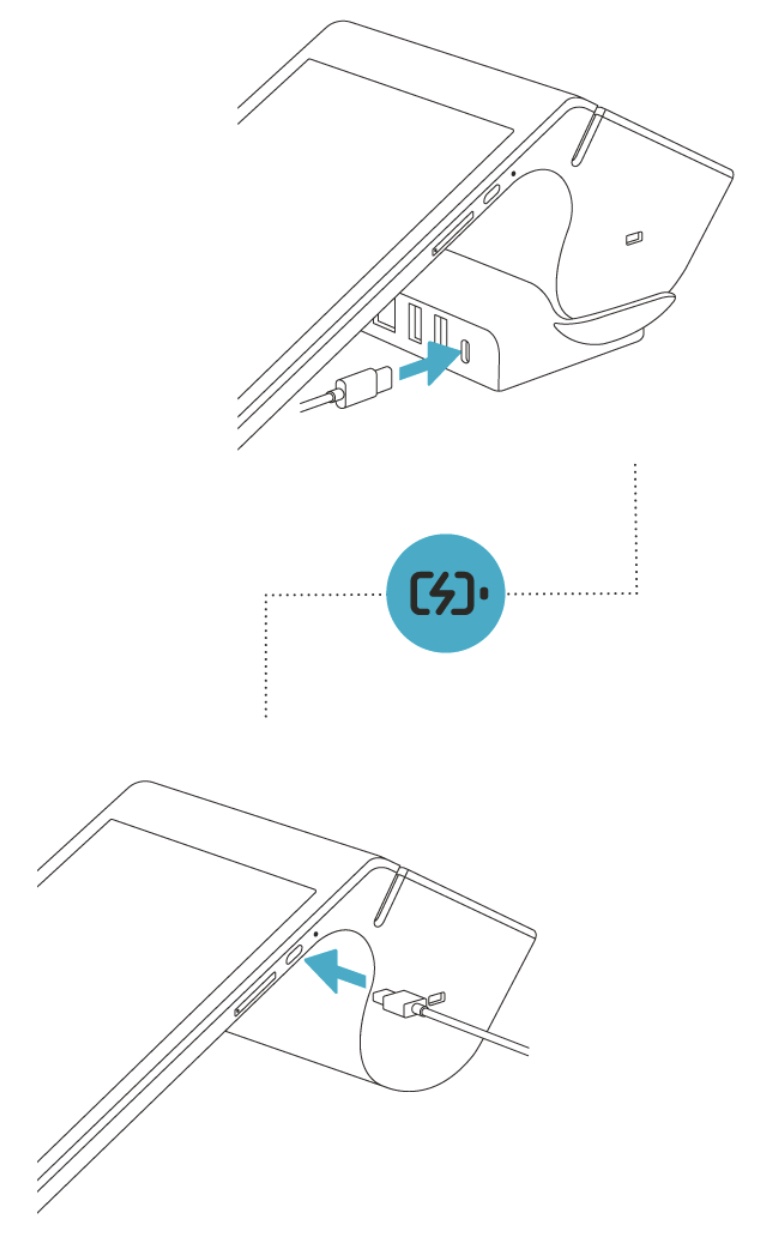
Plug the USB-C cord into the power adapter and into the USB-C port on the Smart Terminal or docking station. Connect the power adapter to a power source. |
| Step 4 |
|---|
 |
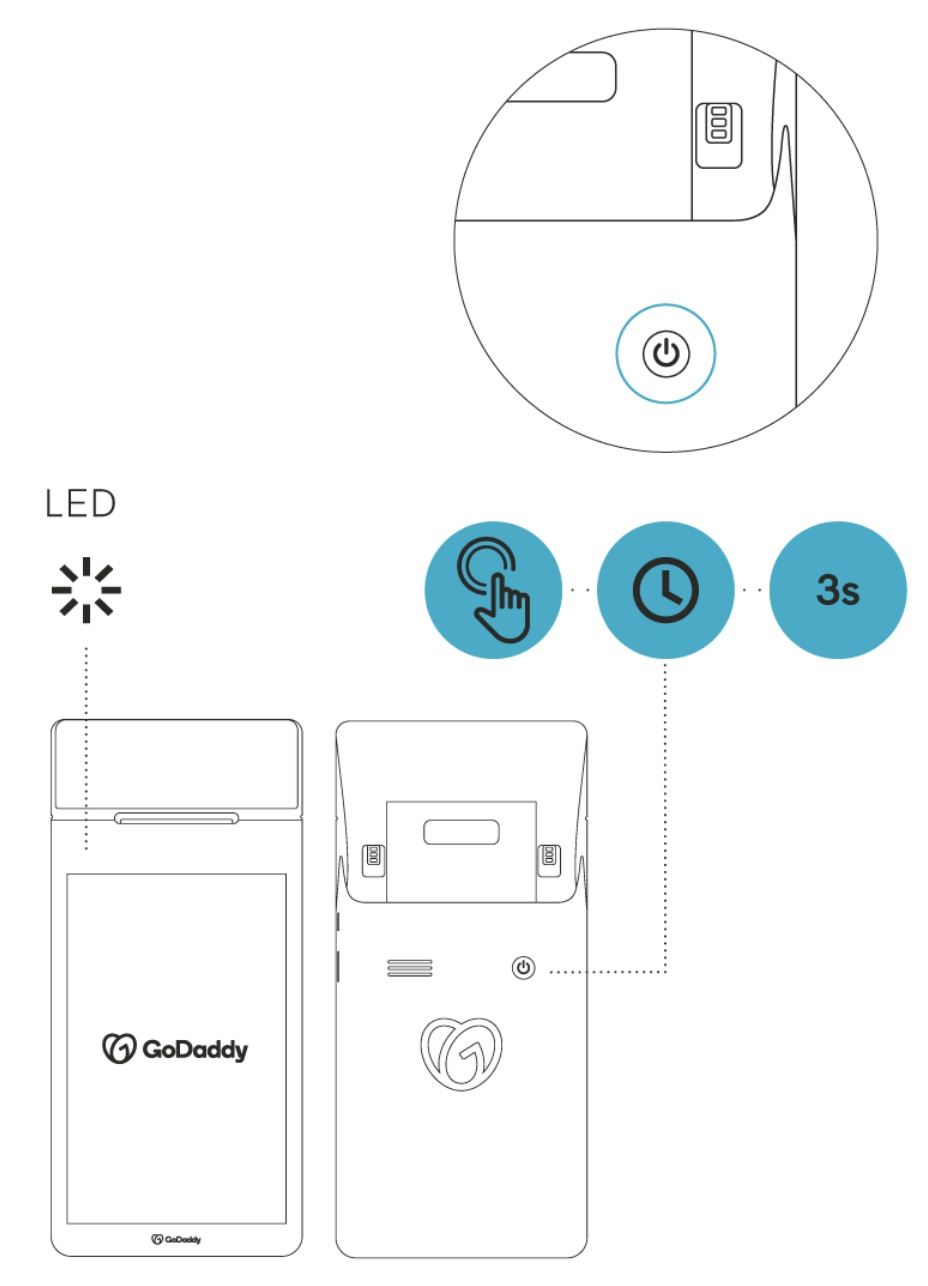
Allow the Smart Terminal to charge for about one hour. When the LED light turns green, press the power button for three seconds to turn it on and begin first-time setup. |
More info
- Learn how to set up your GoDaddy Poynt Smart Terminal.
- Need to replace something? You can order replacement accessories, like more printer paper rolls.
- Find out more about compatible accessories for your GoDaddy Poynt Smart Terminal.