Schedule an email in Outlook
Schedule a message to be sent later using Outlook on the web, Outlook for Windows or Mac. Set a time and date for the email to be sent. That way, you’re in control of when your messages are received by your recipients.
Select the appropriate tab based on the email platform that you're using.
- Sign in to Outlook on the web. Use your Microsoft 365 email address and password (your GoDaddy username and password won't work here).
- In the upper-left corner, select New Mail.
- Compose your message.
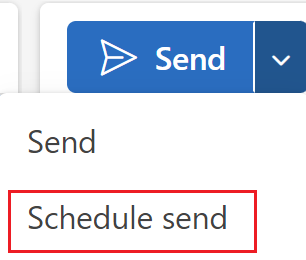
- In the upper-left corner of your message, next to Send, select the arrow, and then Schedule send.

- Select the suggested date and time. Or, to choose a different date and time, select Custom time, and then Send.

To view or cancel your scheduled send, select the email in the Drafts folder. The message will have a banner with the scheduled date and time. To cancel the message, select Cancel send.
Your message will be saved in the Drafts folder until your scheduled time and date. When your selected time and date arrives, the email will be sent even if Outlook on the web is not open in your browser.
There are now 2 versions of Outlook for Windows: new Outlook and classic Outlook. Before continuing to the steps below, check which version you’re using.
New Outlook
If the steps in this section don't work, you might not be using new Outlook yet. Try the steps in the Classic Outlook section instead.
Upon activation, you can add additional email plans, such as Email Essentials, Email Plus, or Online Business Essentials.
- Open Outlook.
- In the upper-left corner, select New Mail.
- Compose your message.
- In the upper-left corner of your message, next to Send, select the arrow, and then Schedule send.

- Select the suggested date and time. Or, to choose a different date and time, select Custom time, and then Send.

Your message will be saved in the Drafts folder until your scheduled time and date. When your selected time and date arrives, the email will be sent even if Outlook is not open.
To view or cancel your scheduled send, select the email in the Drafts folder. The message will have a banner with the scheduled date and time. To cancel the message, select Cancel send.
Classic Outlook
If the steps in this section don't work, you might not be using classic Outlook. Try the steps in the New Outlook section instead.
- Open Outlook.
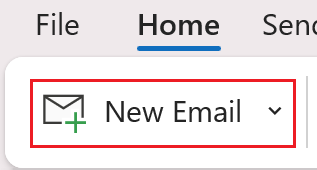
- Select New Email.

- Compose your message.
- Determine whether you're using the Classic or Simplified ribbon.
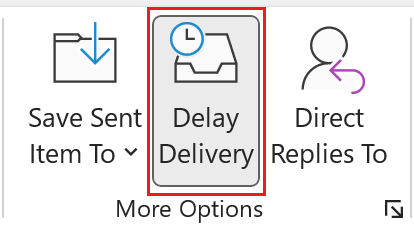
- If you're using the Classic ribbon: From Options, select Delay Delivery.

- If you're using the Simplified ribbon: From Options, select
 More commands, and then Delay Delivery

- Under Delivery options, next to Do not deliver before, enter your desired date and time. By default, next to Do not deliver before, the checkbox should be selected.

- Select Close.
- After you're taken back to your composed message, select Send.
Your message will be saved in the Outbox folder until your scheduled time and date. When your selected time and date arrives, the email will be sent even if Outlook isn't open on your computer.
- Open Outlook.
- Select New Mail.
- Compose your message.
- Next to Send, select the arrow, and then Schedule Send.

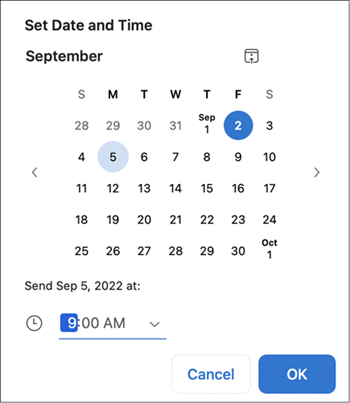
- Choose a desired date and time for the email to be sent, and then select OK.

Your message will be saved in the Drafts folder until your scheduled time and date. When your selected time and date arrives, the email will be sent even if Outlook isn't open on your computer.
To view or cancel your scheduled send, select the email in the Drafts folder. The message will have a banner with the scheduled date and time. To cancel the message, select Cancel send, and then Yes, to confirm.
Related steps
- Find out how to switch to the new Outlook for Windows from Microsoft.
- To access Outlook on the web, sign in to your Microsoft 365 account.