Microsoft 365 accounts are disconnected from Apple Mail on iOS
Currently, there's an issue where Microsoft 365 email accounts are being disconnected from Apple Mail. We understand the frustration that comes with disruptions to your email, and we're here to help. To solve this issue, we need to remove and re-add your email account on Apple Mail. If you don't know or forgot your Microsoft 365 password, reset it before following these steps.
If you need immediate access to your email, you can sign in to Microsoft 365 on your phone or computer's web browser.
Step 1: Remove your account from Apple Mail
First, we need to remove your Microsoft 365 account from Apple Mail.
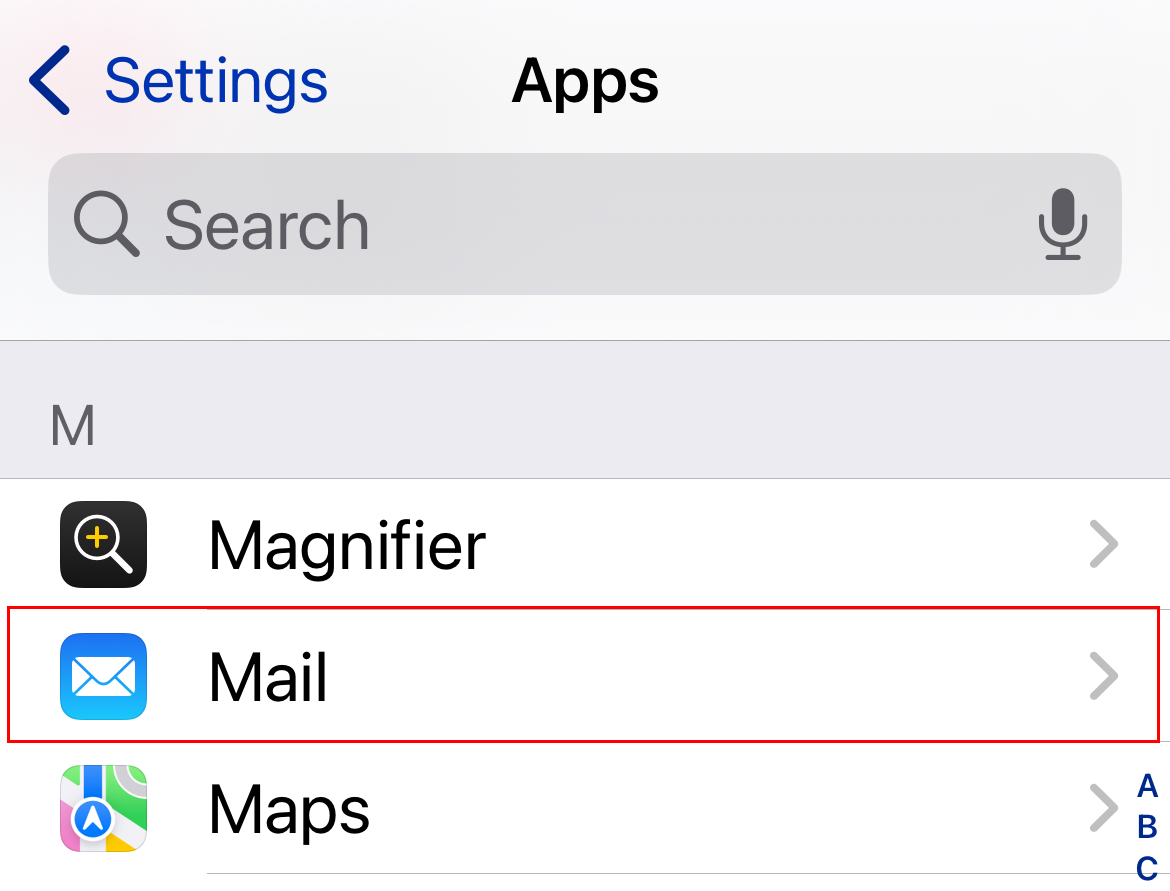
- On your iPhone or iPad, open
 Settings.
 - Scroll down and tap Apps, and then Mail.
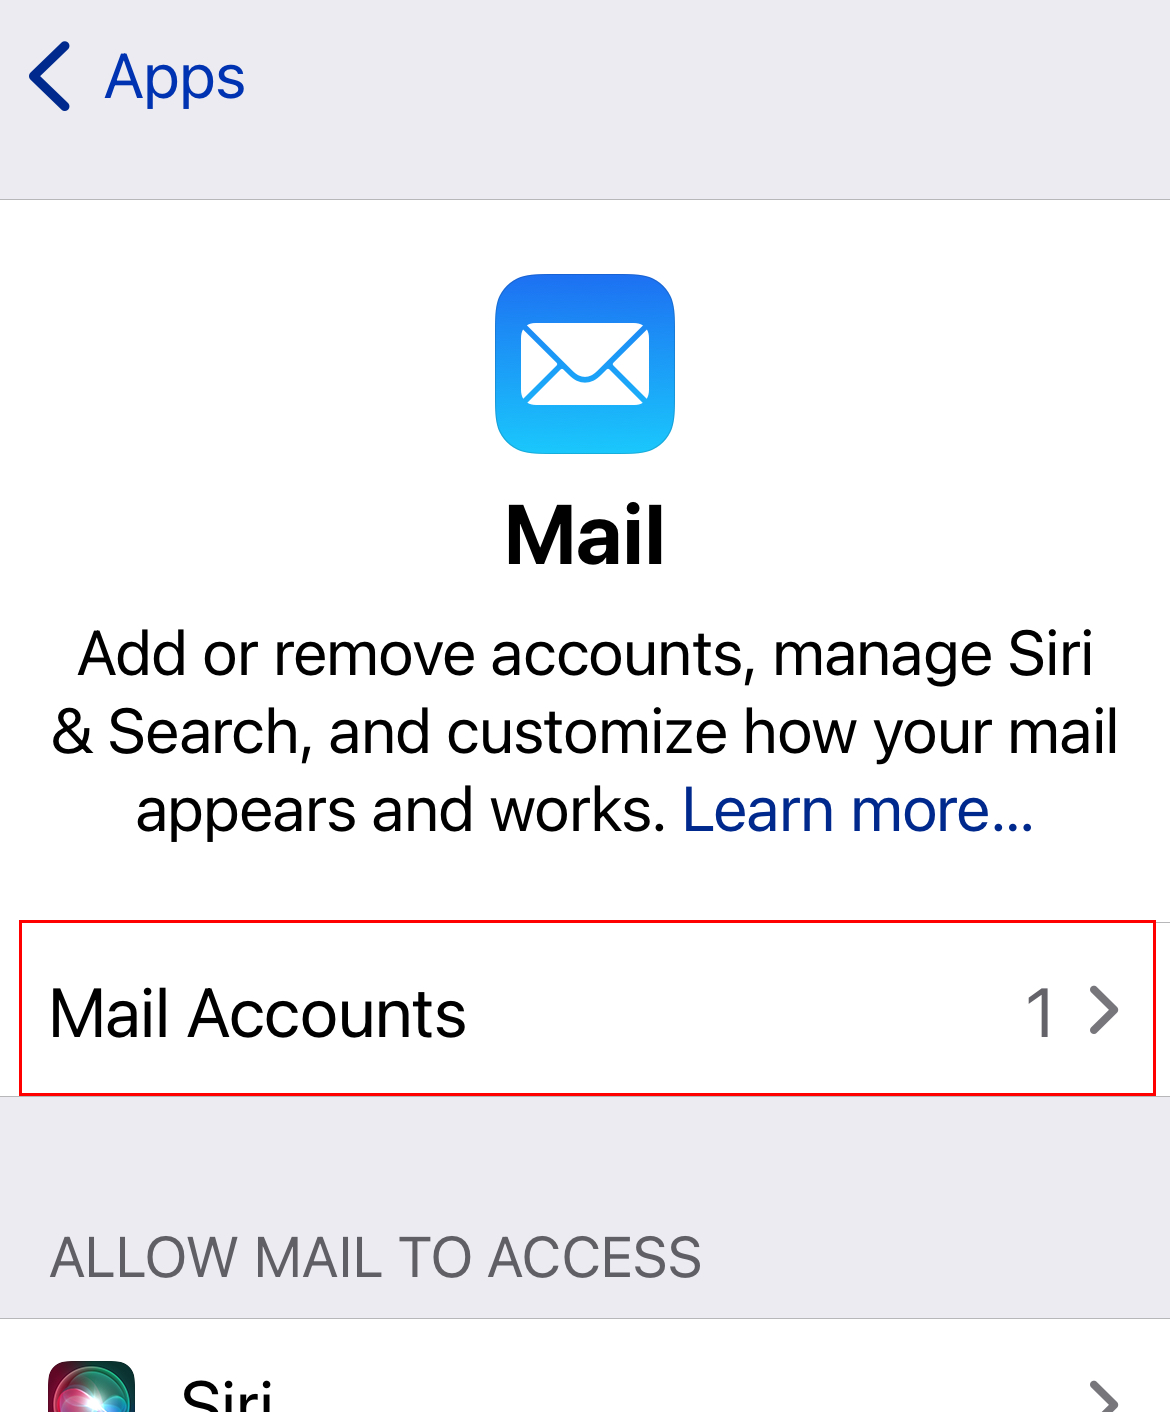
- Tap Mail Accounts.
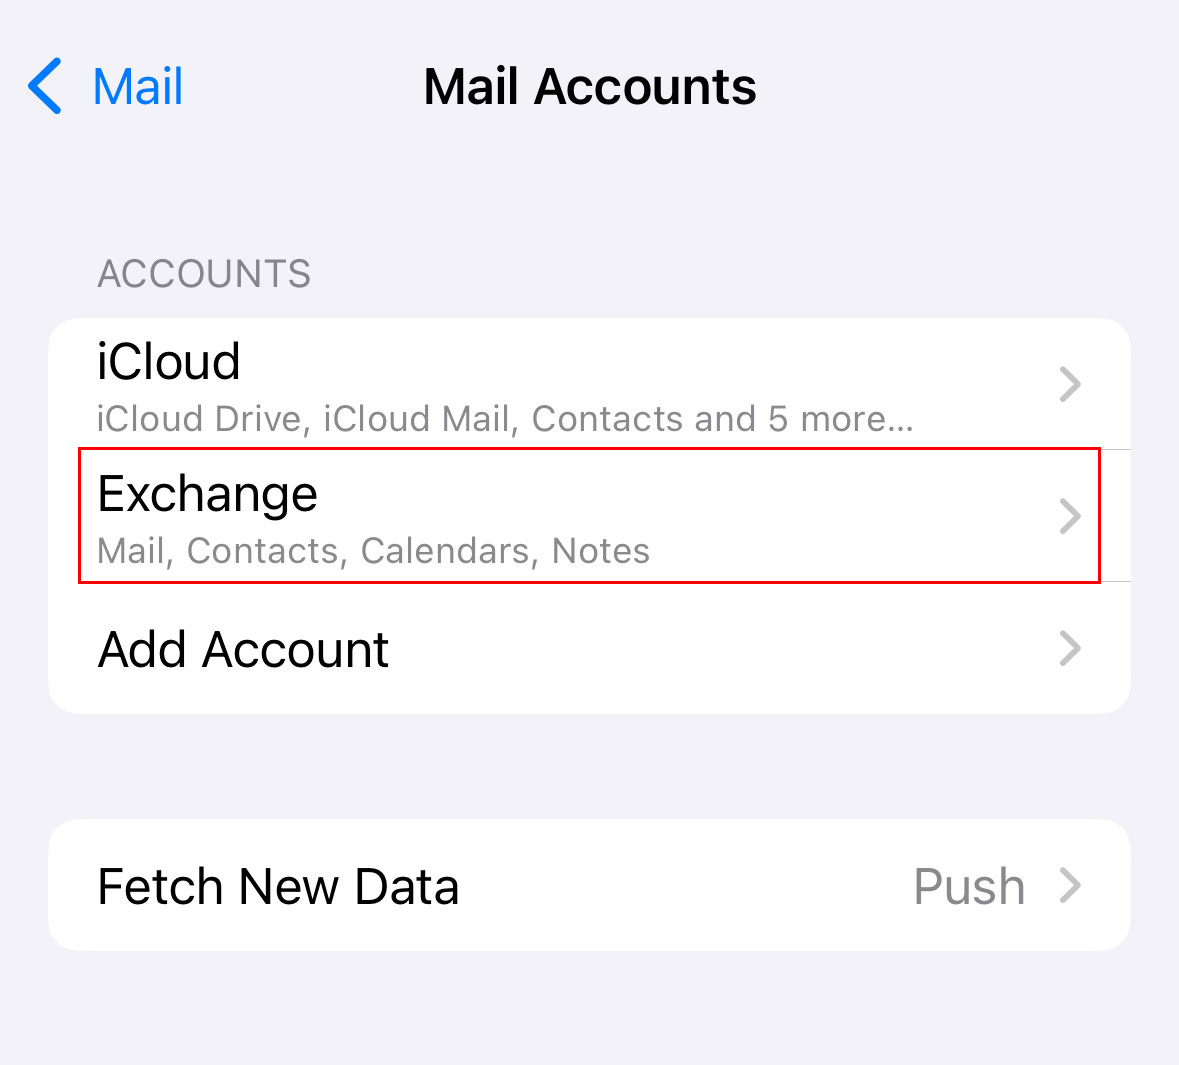
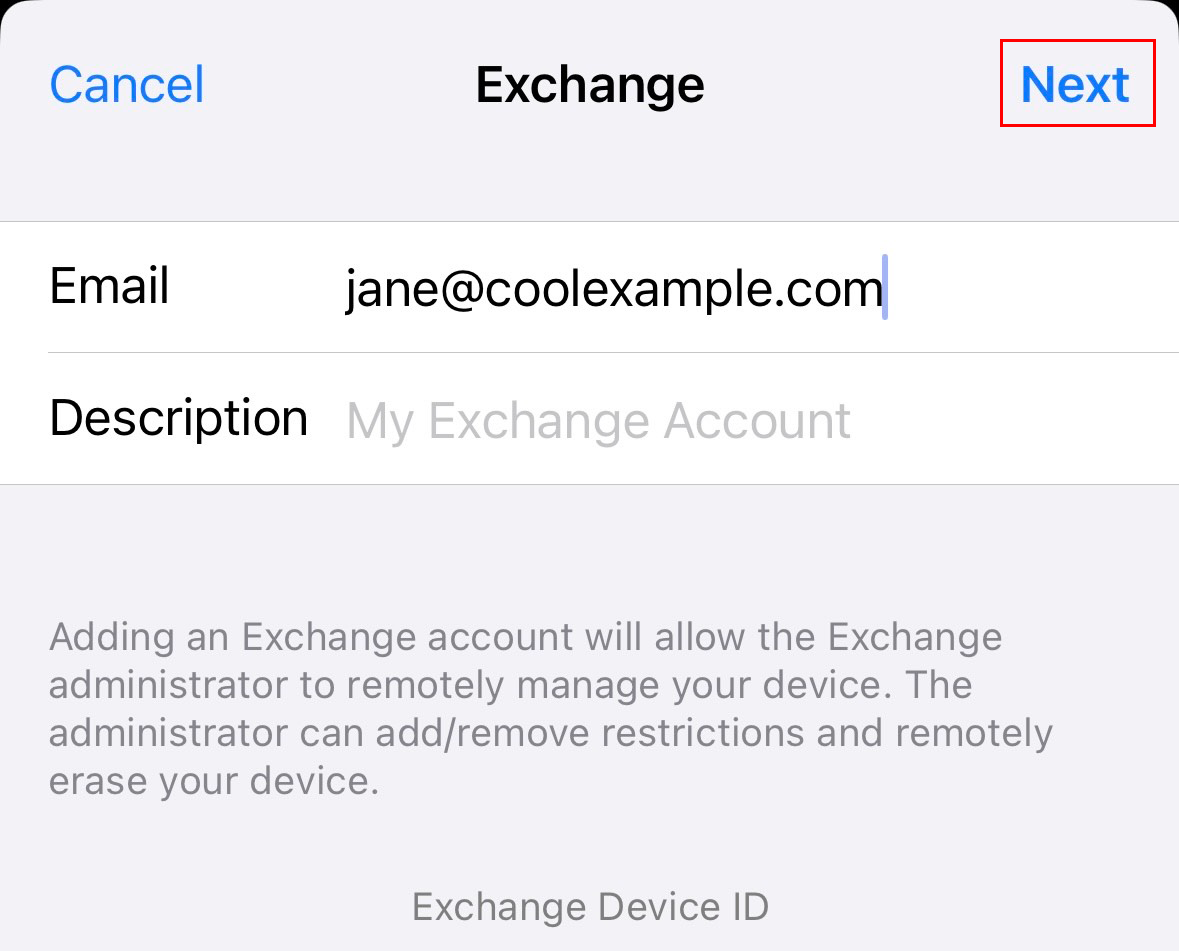
- Tap Exchange.
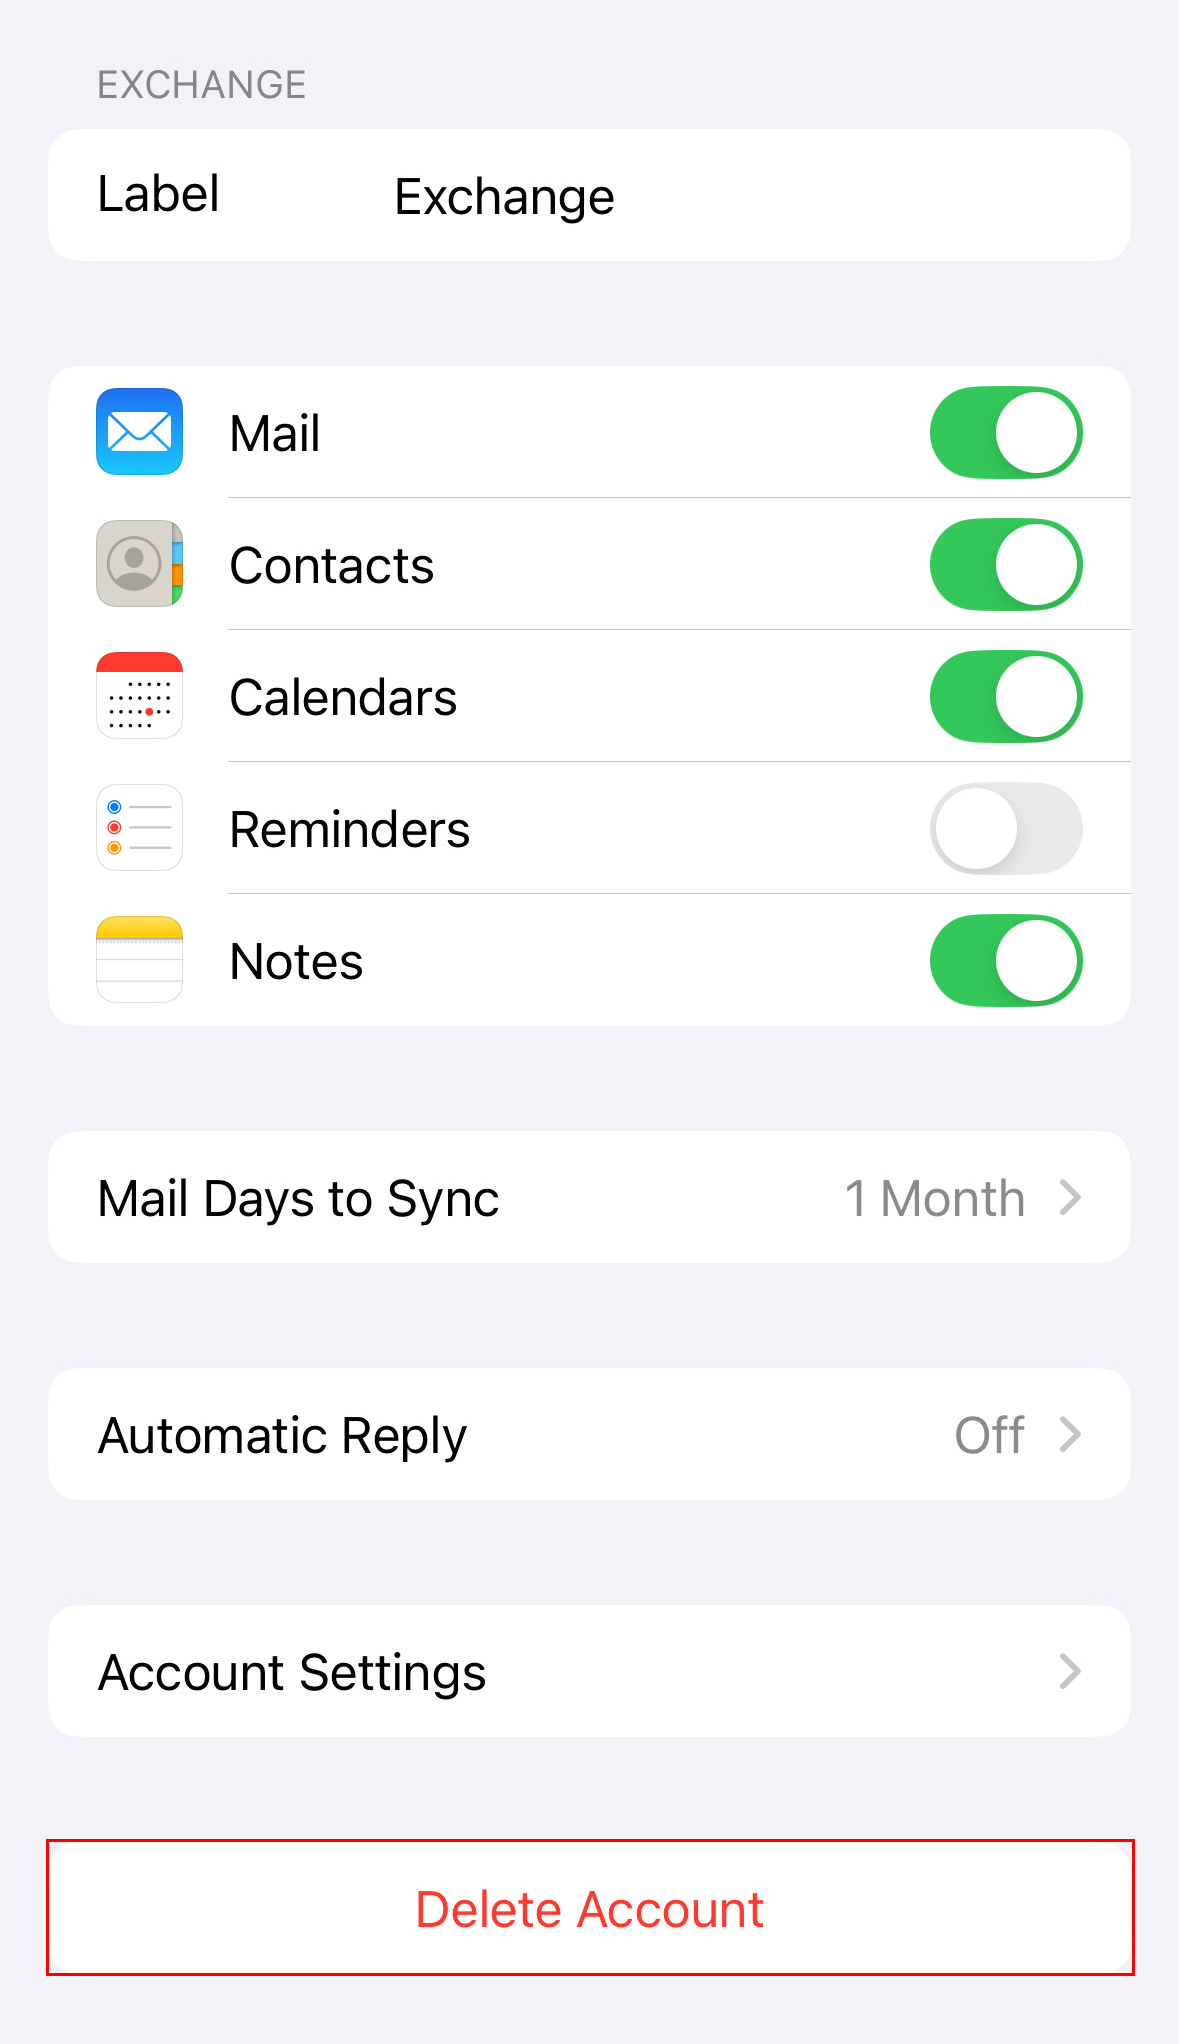
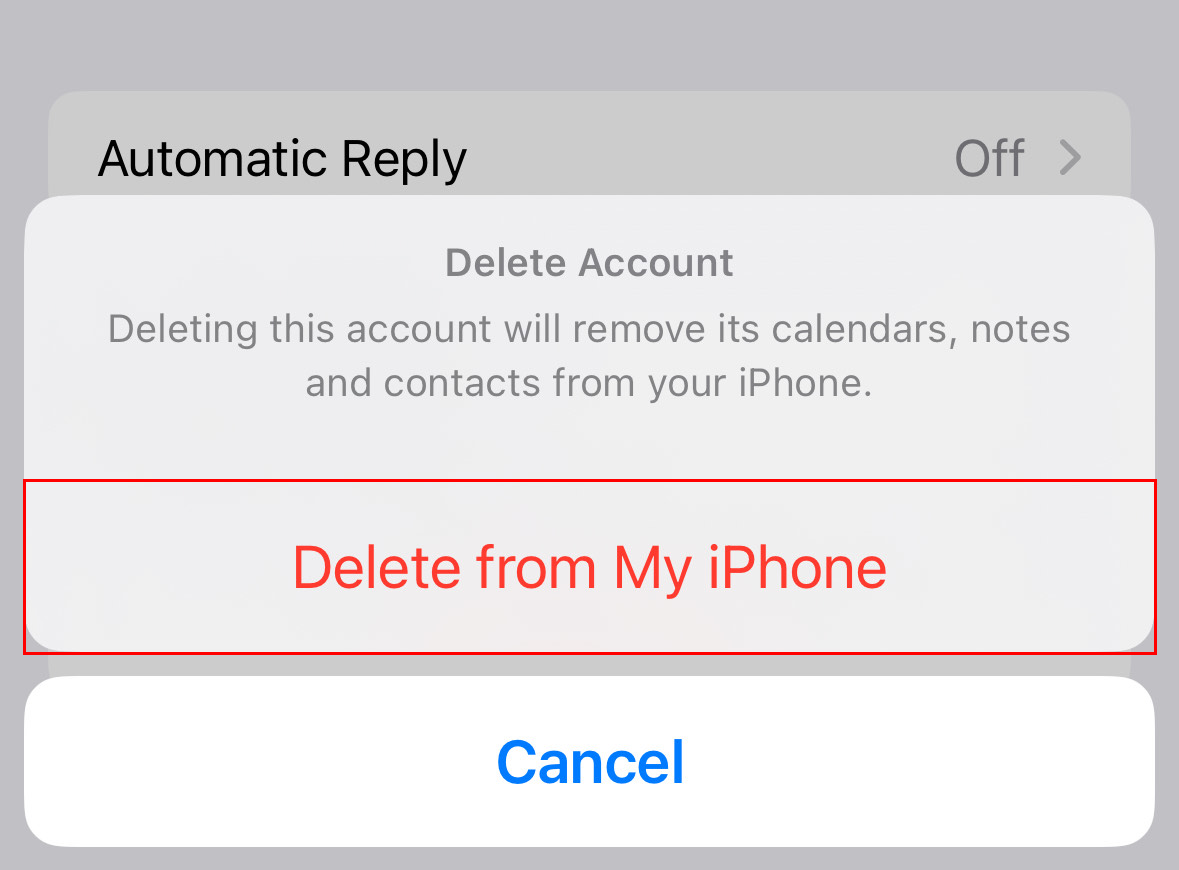
- At the bottom of the page, tap Delete Account.
- To confirm you want to remove your account from Apple Mail, tap Delete from My iPhone.
Your Microsoft 365 account is now removed from Apple Mail.
Step 2: Re-add your account to Apple Mail
Next, we'll add your Microsoft 365 account back to Apple Mail.
To check whether you know your password (or for immediate acccess to your email), try to sign in to Microsoft 365 through your phone's default web browser first. If you successfully sign in, it'll save you a few steps when you re-add your account to Apple Mail. If you don't know or forgot your Microsoft 365 password, reset it before re-adding your account.
- Open Settings.
- Tap Apps, and then Mail.
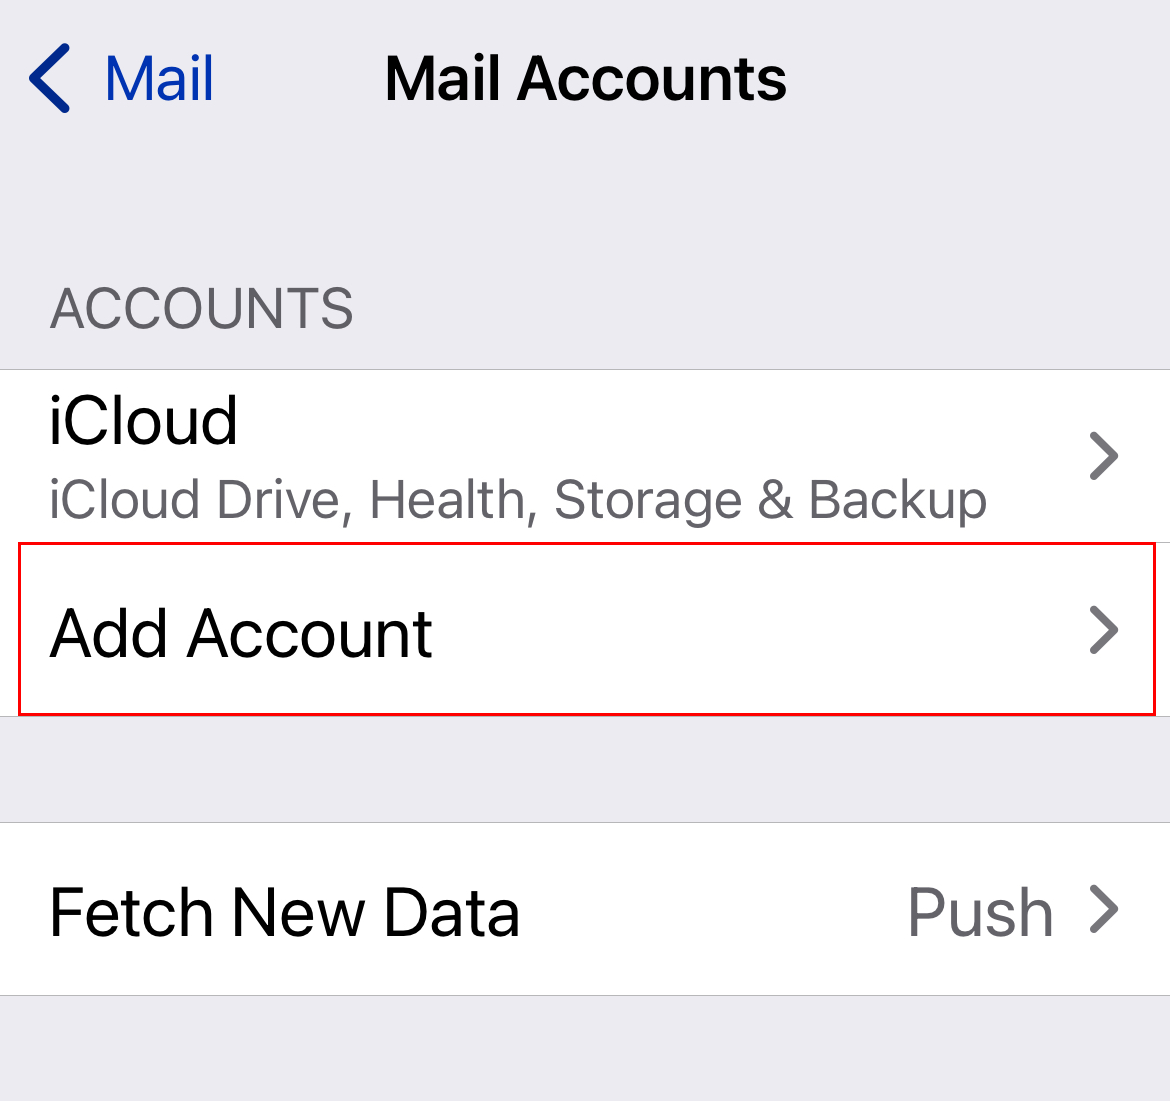
- Tap Mail Accounts.
- Tap Add Account.
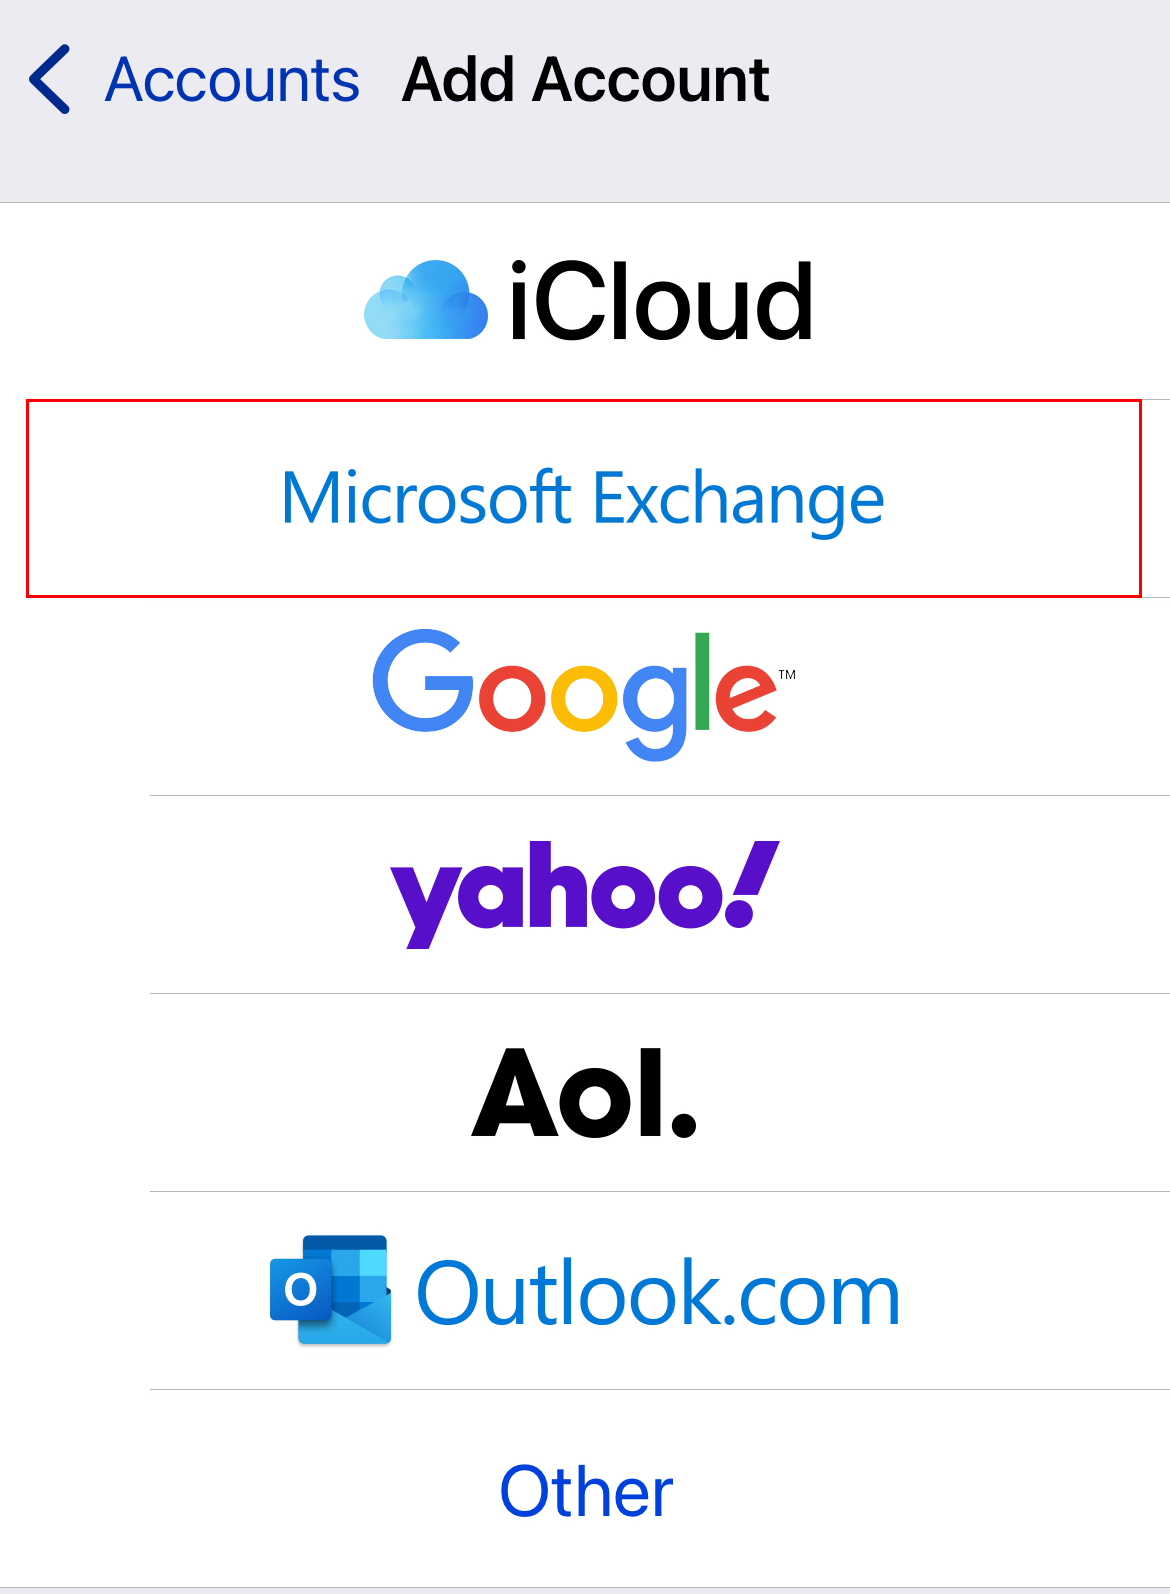
- Tap Microsoft Exchange.
- Enter your Microsoft 365 email address, and then tap Next.
- To confirm you want to use your account, tap Sign In. You’ll see a message saying that Settings wants to use microsoftonline.com to sign in.
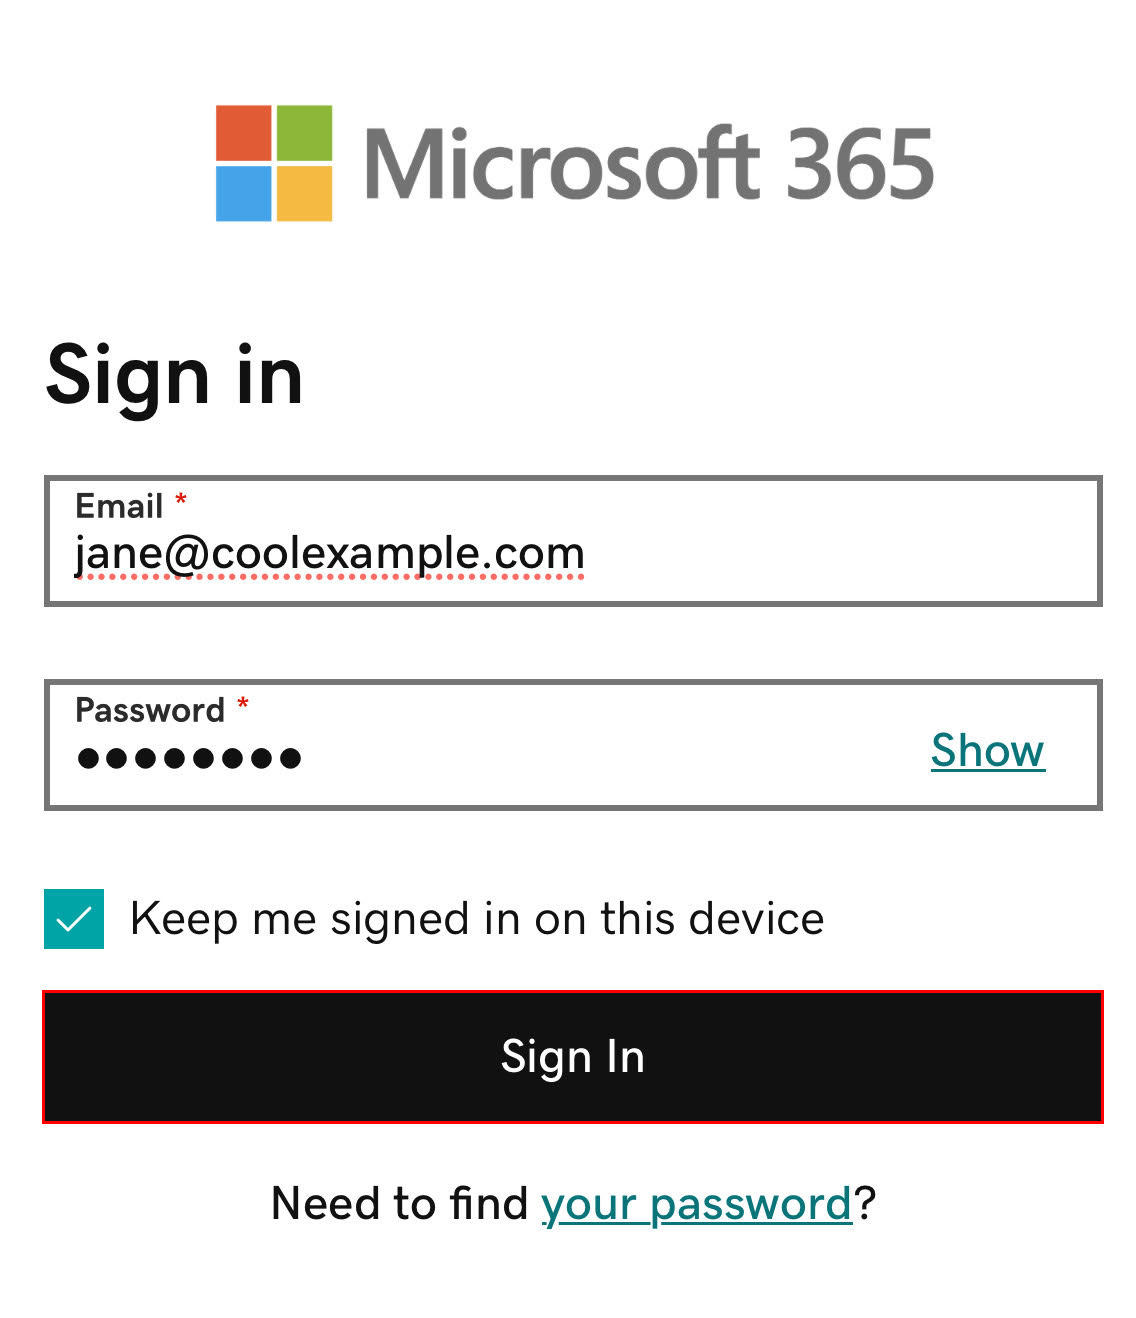
- Tap Continue. The GoDaddy sign-in page will open.
- Enter your email password, and then tap Sign In. If the Sign In button is grayed out, in the upper-right corner, tap the
 refresh icon to reload the page.
- If you forgot your Microsoft 365 email password, tap the forgot password link (it says, "Need to find your password?") or follow the steps in our article.
- If you see a message that says, "This browser is a bit unusual," you might need to turn off iCloud Private Relay. Find out how to turn off Private Relay from Apple.
- If you're asked to trust the domain, tap Continue.
- If your admin enabled multi-factor authentication (MFA), verify your account using your authentication method.
- You might be asked to accept permissions, which allows Microsoft 365 and the Apple Mail app to work together. Tap Accept. (To accept for your organization, next to Consent on behalf of your organization, select the checkbox.)
- Tap Save.
Your Microsoft 365 account will be added to Apple Mail, and you can continue to use your email as usual.
If you're still running into problems removing and re-adding your account, our GoDaddy Guides are here to help.
