Run a message trace in the Exchange admin center
A message trace will show email sent into, out of, and within an email organization, which means you can track what happens to all emails involving your users and if they were successfully delivered.
- Sign in to the Exchange admin center. Use your Microsoft 365 email address and password (your GoDaddy username and password won't work here).
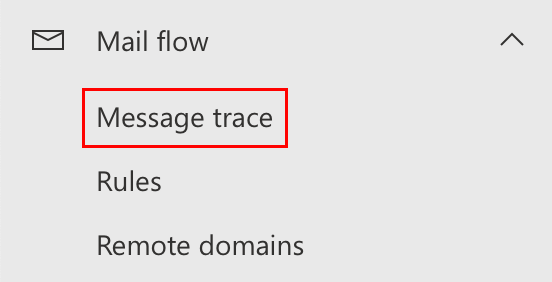
- Select Mail flow, and then Message trace.
- Select + Start a trace. The message trace page will open.
- (Optional) By default, the Try New Message Trace toggle is on. We recommend leaving it as-is, but you can turn off the toggle if you want to use the old message trace. Learn about the new message trace capabilities from Microsoft.
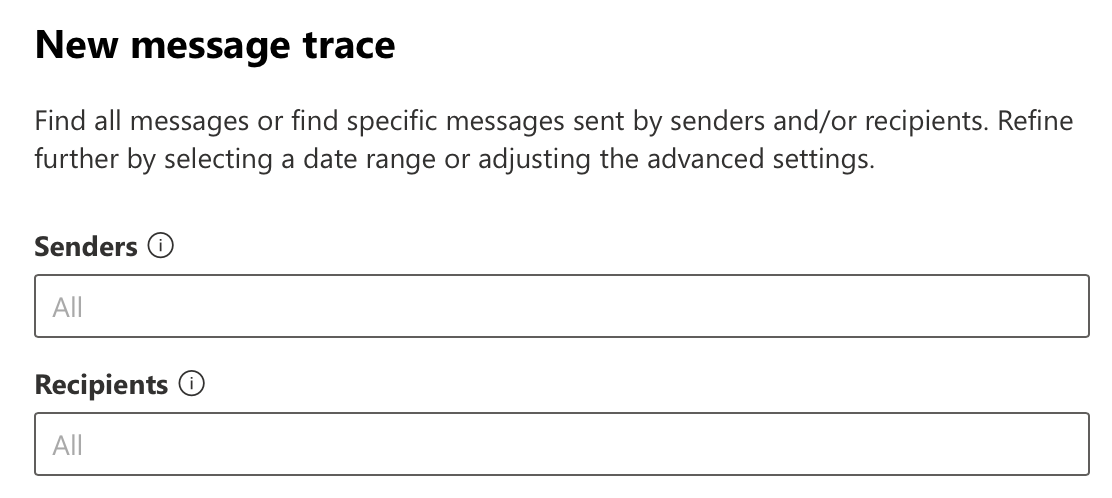
- Filter messages by senders or recipients:
- To find messages sent by a user, under Senders, select or enter their email address.
- To find messages sent to a user, under Recipients. select or enter their email address.
Note: To see all messages to or from a specific domain, add an asterisk (*) followed by at (@) and then the domain name.Example: If you want to see all messages sent to email addresses ending in coolexample.com, under Senders, enter *@coolexample.com.
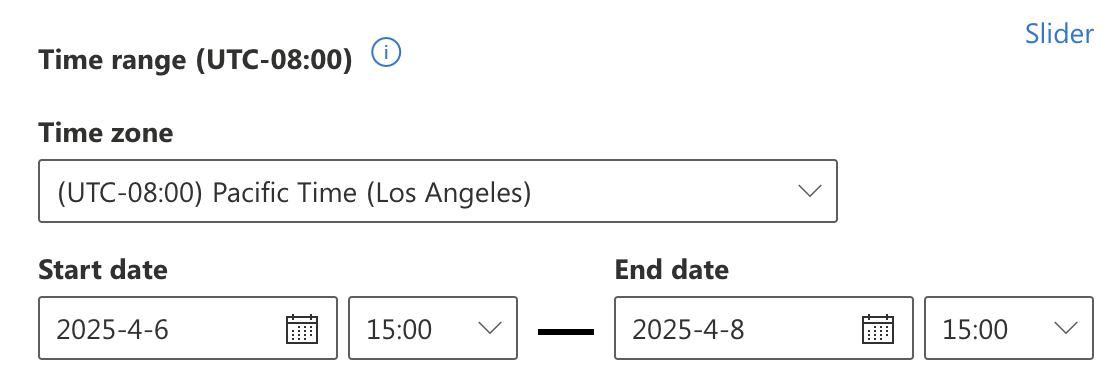
- Under Time range, to choose a custom time range, select your time zone, and then a start and end date and time for the message trace.
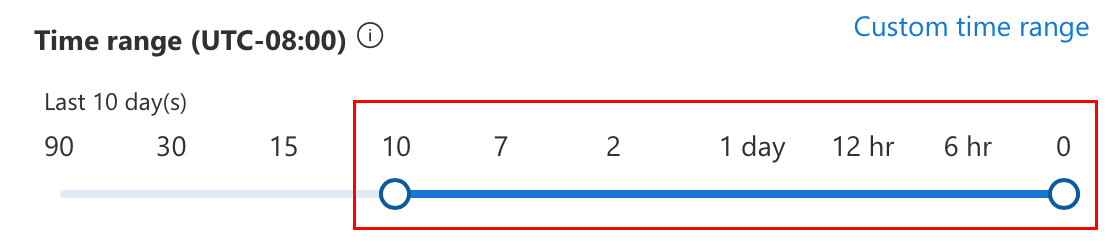
- To specify a relative time range (for example, the last 10 days from today), select Slider, and then choose a time range.
Note: To generate a Summary report, which is available immediately online, you can search historical data within the past 90 days. However, you can only access up to 10 days' worth of data per report. If you need to search for more than 10 days' worth of data, you can do so through a downloadable .csv file generated by the other report types detailed in step 8.
- To specify a relative time range (for example, the last 10 days from today), select Slider, and then choose a time range.
- (Optional) If desired, edit the detailed search options, like Subject or Delivery Status. To learn more about each option, select
 Info.
Info.
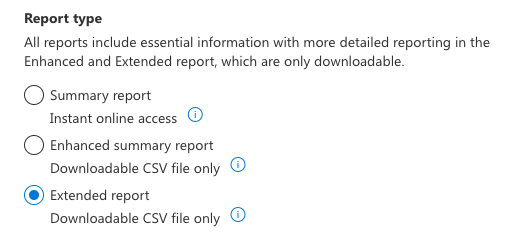
- Under Report type, select the report you would like to generate:
- Summary report: Available immediately after selecting Search. It includes message summary details like date, sender, recipient, subject and status. This report is not available for time ranges exceeding 10 days' worth of data.
- Enhanced summary report: Includes the same information as a summary report, as well as details like direction and original client IP address. The results are provided in a .csv file, but it could take some time to generate.
- Extended report: Includes the same information as an enhanced summary report, as well as details like routing and message event specifics. The results are provided in a .csv file, but it could take a few hours to generate.
- The next step varies based on your report type:
- If you selected Summary report, to run the report, select Search.
- If you selected Enhanced summary report or Extended report, select Next. If desired, change the report title and the email that'll be notified when the report is ready to download, and then select Prepare report.
To check the progress of your Enhanced summary or Extended report, go to the Downloadable reports tab on the Message trace page.
When you can view the report, next to each message, you'll see its delivery status, including Delivered, Failed, Pending, and Filtered as spam.
- Delivered: The message was successfully delivered to the intended destination.
- Pending: The message is being attempted or re-attempted to be delivered. The status might be unknown.
- Quarantined: The message was quarantined. This might happen if it’s been identified as spam, bulk, or phishing.
- Filtered as spam: The message was identified as spam and was rejected or blocked (but not quarantined).
Related step
- After running a message trace, view the details of each message to see what happened to it.
