Create and edit inbox rules in Outlook
Use inbox rules to automatically perform actions on incoming email, like moving them to a specific folder or changing the importance level of individual messages. Rules allow you to organize, direct and clean up your messages without having to manually move them.
Select the appropriate tab based on the email platform you're using.
Create a new rule
- Sign in to Outlook on the web. Use your Microsoft 365 email address and password (your GoDaddy username and password won't work here).
- In the upper-right corner, select
 Settings.
 - Select Mail, and then Rules.
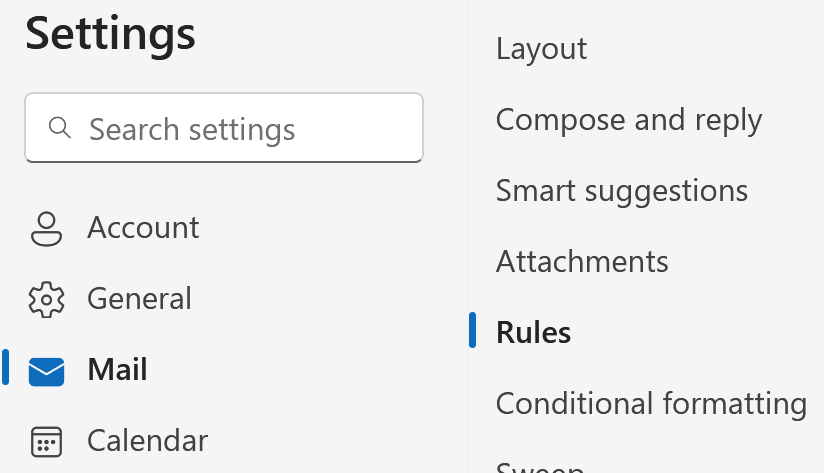
- Select + Add a new rule.
- Enter a name for the rule. Use a title that will help you easily identify what the rule does.
- Select a condition that will trigger the rule to run. For example, run the rule on all messages, or messages from a specific date or sender.
- Select an action that will occur when the rule is triggered. For example, when the rule is run, it'll forward the message, mark it as read or move it to another folder.
Note: Depending on the type of rule you're setting up, you might be able to add exceptions and additional conditions.
- Next to Stop processing more rules, select the checkbox if you don't want any other rules to run after this one. Any subsequent rules will be ignored, even if they apply to the message.
Warning:
Example: If you have a rule that moves any email messages from your boss to a folder and a rule that deletes any messages with an attachment, you might not want messages from your boss with attachments to be moved and deleted.
- (Optional) Next to Run rule now, select the checkbox if you want to run the rule on messages already in your inbox.
- Select Save.

Edit or run an existing rule
- Sign in to Outlook on the web. Use your Microsoft 365 email address and password (your GoDaddy username and password won't work here).
- In the top right corner, select
 Settings.
 - Select Mail, and then Rules.
- Find the rule that you want to edit or run.
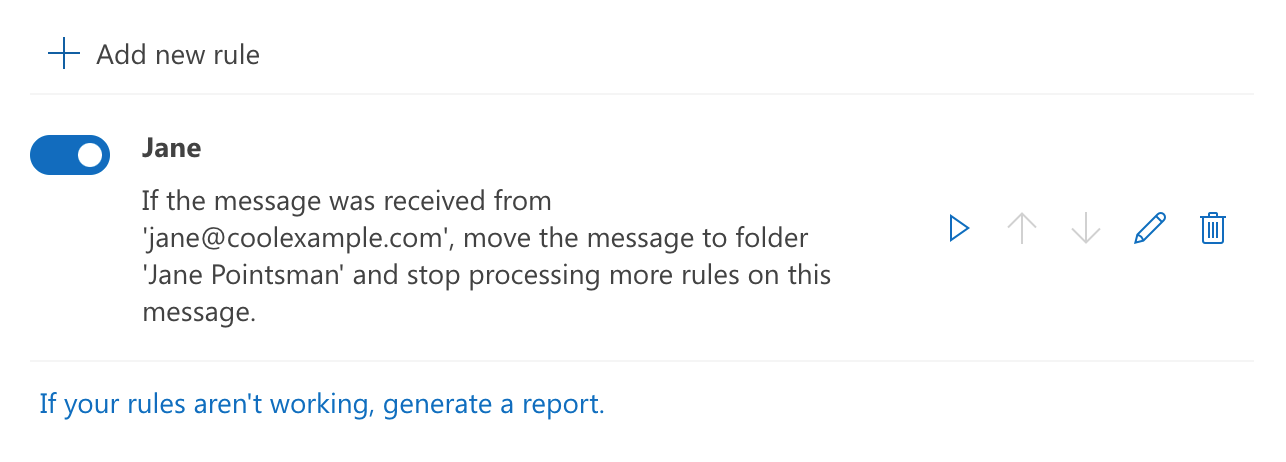
- Next to the rule, you can:
 Disable or enable rule: Switch the toggle to turn the rule off or on.
 Run rule now: Apply your rule to all relevant messages.
 Edit rule: Change the name, condition or action of the rule.
 Delete rule: Delete the rule so it no longer applies to incoming messages.
There are now 2 versions of Outlook for Windows: new Outlook and classic Outlook. Before continuing to the steps below, check which version you’re using.
New Outlook
If the steps in this section don’t work, you might not be using the new Outlook yet. Try the steps in the Classic Outlook section instead.
Upon activation, you can add additional email plans, such as Email Essentials, Email Plus, or Online Business Essentials.
Create a new rule
- Open Outlook.
- Right-click a message in your message list that you want to create a rule for, select Rules, and then Create rule.
- Choose the folder where you want all messages from that sender or set of senders to be moved, and then select OK.
- If you’d like to do more than just move the message from a specific sender or set of senders to a folder, select More options. The Rules window will open.
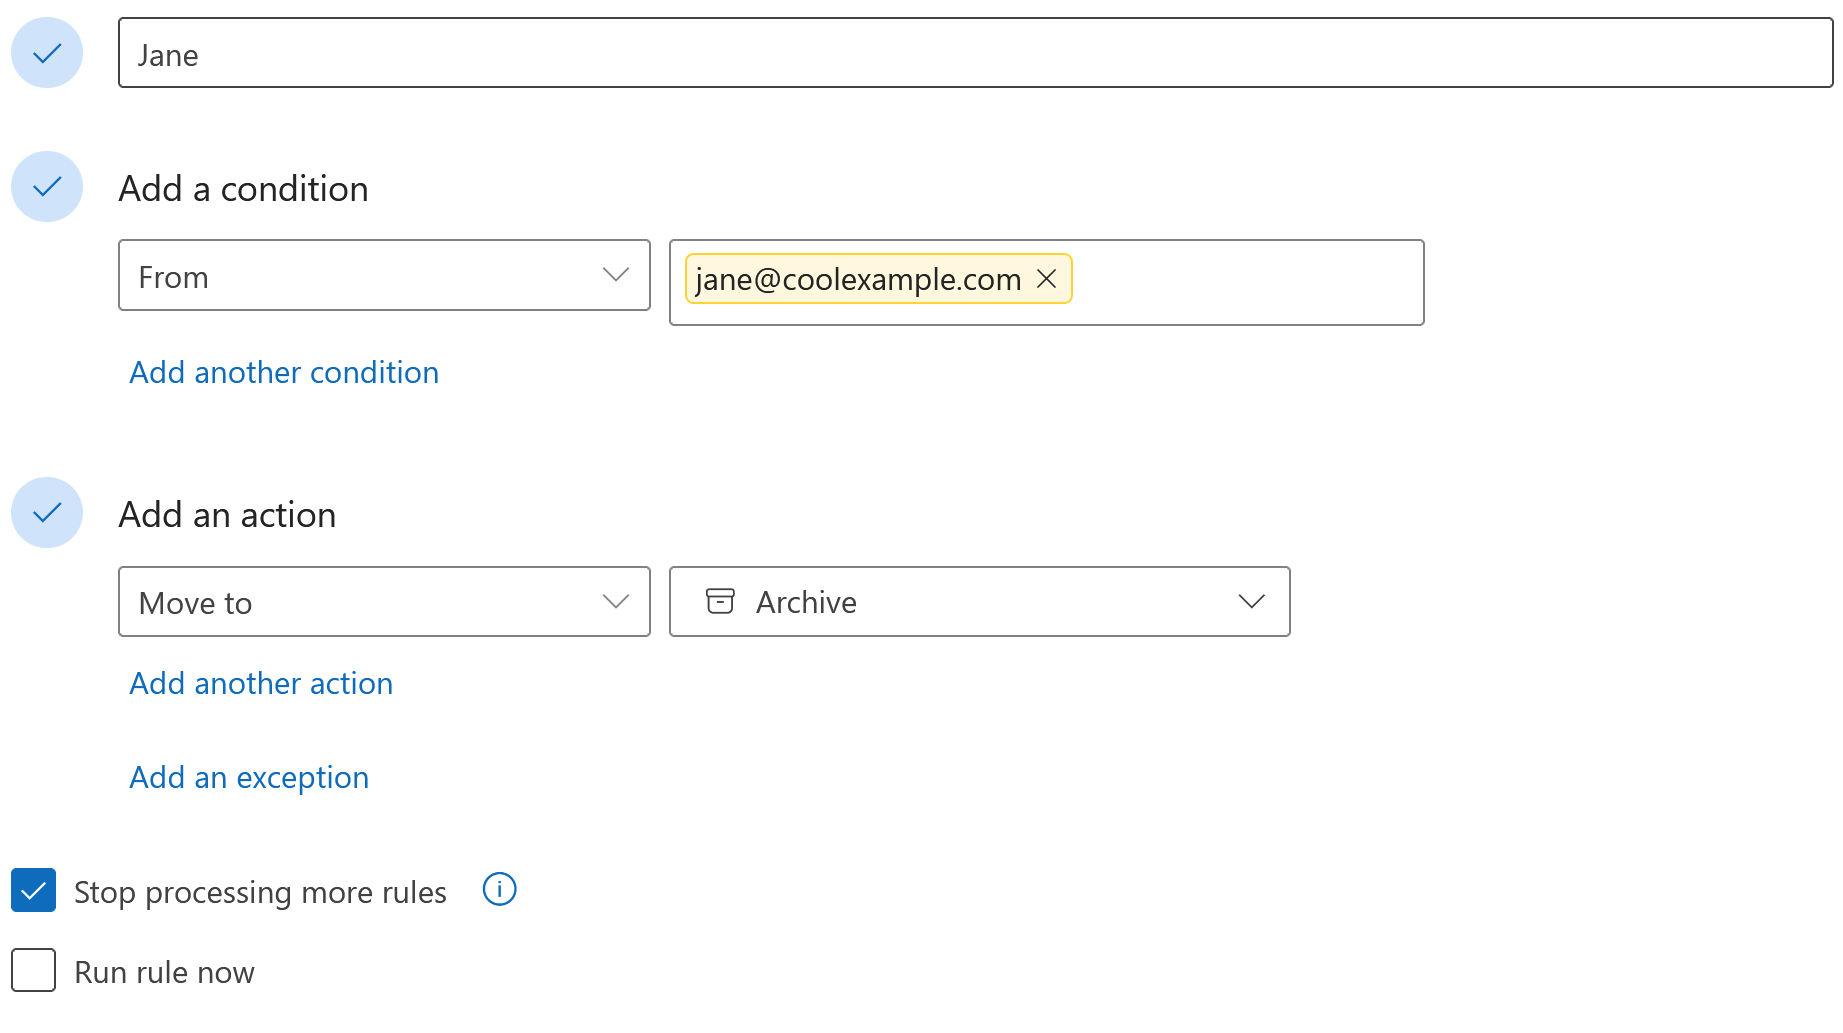
- Enter a name for the rule. Use a title that will help you easily identify what the rule does.
- Select a condition that will trigger the rule to run. For example, run the rule on all messages, or messages from a specific date or sender.
- Select an action that will occur when the rule is triggered. For example, when the rule is run, it'll forward the message, mark it as read or move it to another folder.
Note: Depending on the type of rule you're setting up, you might be able to add exceptions and additional conditions.
- Next to Stop processing more rules, select the checkbox if you do not want any other rules to run after this one. Any subsequent rules will be ignored, even if they apply to the message.
Warning:
Example: If you have a rule that moves any email messages from your boss to a folder and a rule that deletes any messages with an attachment, you might not want messages from your boss with attachments to be moved and deleted.
- (Optional) Next to Run rule now, select the checkbox if you want to run the rule on messages already in your inbox.
- Select Save.
Edit or run an existing rule
- Open Outlook.
- At the top of the page, select Settings.
- Select Mail, and then Rules.
- Next to the rule, you can:
- Disable or enable rule: Switch the toggle to turn the rule off or on.
- Run rule now: Apply your rule to all relevant messages.
- Edit rule: Change the name, condition or action of the rule.
- Delete rule: Delete the rule so it no longer applies to incoming messages.
Classic Outlook
If the steps in this section don't work, you might not be using classic Outlook. Try the steps in the New Outlook section instead.
Create a new rule
- Open Outlook.
- Select File, Manage Rules & Alerts, and then New Rule.
Note: If you have more than 1 account added to your profile, it’ll ask you to choose an account after selecting Manage Rules & Alerts.
- Select a template.
- Edit the rule description.
- Select Next.
- Select condition(s) that will trigger the rule to run. For example, run the rule on all messages, or messages from a specific date or sender.
- Select Next.
- Add any exceptions to the rule, and then select Next.
- Enter a name for the rule. Use a title that will help you easily identify what the rule does.
- Next to Run this rule now on messages already in “inbox,” select the checkbox if you want the rule to apply to existing messages. Depending on the rule and how many messages it applies to, this could take a while.
- Select Finish. If you see an alert telling you that certain rules will only run while Outlook is running, select OK.
Edit or run an existing rule
- Open Outlook.
- Select File, and then Manage Rules & Alerts.
Note: If you have more than 1 account added to your profile, it’ll ask you to choose an account after selecting Manage Rules & Alerts.
- Next to the rule you want to edit or run, select the checkbox.
- Depending on the change you want to make, select an option:
- Enable or Disable: Next to the rule, select the checkbox.
- Change Rule: Change the name, condition, action or priority.
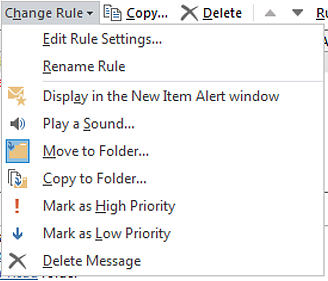
- Delete: Delete the selected rule so it no longer applies to incoming messages. To confirm you want to delete the rule, select Yes.
- Run Rules Now: Apply your selected rule to all relevant messages. Depending on the rule and how many messages it applies to, this could take a while.
There are now 2 versions of Outlook for Mac: new Outlook and Legacy Outlook. Before continuing to the steps below, check which version you’re using.
New Outlook
If the steps in this section don’t work, you might not be using the new Outlook yet. Try the steps in the Legacy Outlook section instead.
Upon activation, you can add additional email plans, such as Email Essentials, Email Plus, or Online Business Essentials.
Create a new rule
- Open Outlook.
- Select Outlook, and then Settings.
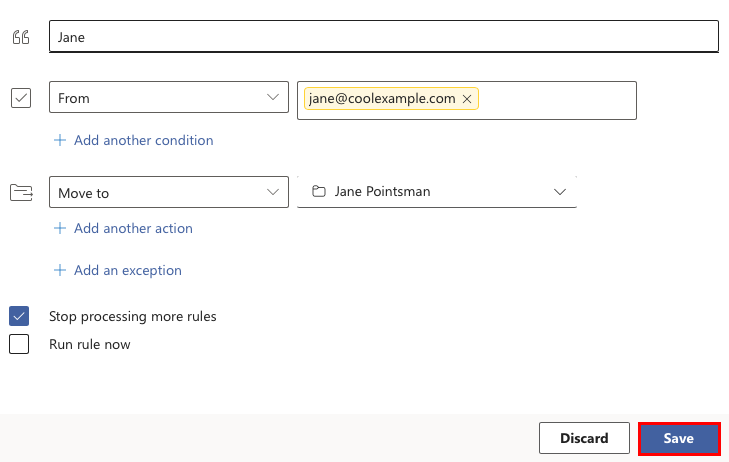
- Under Email, select + Add New Rule.
- Enter a name for the rule. Use a title that will help you easily identify what the rule does.
- Select a condition that will trigger the rule to run. For example, run the rule on all messages, or messages from a specific date or sender.
- Select an action that will occur when the rule is triggered. For example, when the rule is run, it'll forward the message, mark it as read or move it to another folder.
Note: Depending on the type of rule you're setting up, you might be able to add exceptions and additional conditions.
- Next to Stop processing more rules, select the checkbox if you do not want any other rules to run after this one. Any subsequent rules will be ignored, even if they apply to the message.
Warning:
Example: If you have a rule that moves any email messages from your boss to a folder and a rule that deletes any messages with an attachment, you might not want messages from your boss with attachments to be moved and deleted.
- Next to Run rule now, select the checkbox if you want to run the rule on messages already in your inbox.
- Select Save.
Edit an existing rule
- Open Outlook.
- Select Outlook, and then Settings.
- Under Email, select Rules.
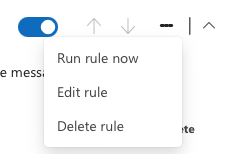
- Next to the rule, you can:
- Disable or enable rule: Switch the toggle to turn the rule off or on.
- Run rule now: Apply your rule to all relevant messages.
- Edit rule: Change the name, condition or action of the rule.
- Delete rule: Delete the rule so it no longer applies to incoming messages.
Legacy Outlook
If the steps in this section don't work, you might not be using classic Outlook. Try the steps in the New Outlook section instead.
Create a new rule
- Open Outlook.
- On the Home tab, select Rules, and then Create Rule.
- Enter a name for the rule. Use a title that will help you easily identify what the rule does.
- Under When a new message arrives, edit the conditions that will trigger the rule to run.
- Under Do the following, select an action that will occur when the rule is triggered. For example, when the rule is run, it'll forward the message, mark it as read or move it to another folder.
Note: Depending on the type of rule you're setting up, you might be able to add exceptions and additional conditions.
- Next to Do not apply other rules to messages that meet the same conditions, select the checkbox if you don’t want any other rules to run after this one. Any subsequent rules will be ignored, even if they apply to the message.
- (Optional) By default, the checkbox next to Enabled is selected. Clear the checkbox if you want to do not want to enable the rule now.
- Select OK.
Edit an existing rule
- Open Outlook.
- On the Home tab, select Rules, and then Edit Rules.
- Depending on the change you want to make, complete the following:
- Disable or enable rule: Double-click the rule, and then select or clear the checkbox next to Enabled.
- Edit rule: Double-click the rule, and then change the name, condition or action of the rule.
- Delete rule: Select the rule, – (minus), and then Save to delete the rule so it no longer applies to incoming messages.
More info
- Check out Microsoft's article on creating and editing inbox rules.
- Set up out-of-office auto-reply in Outlook
- Forwarding options for my Microsoft 365 email address