Update my email settings to Exchange in Outlook on Windows
If you migrated a POP or IMAP email account to Microsoft 365, export your previous locally saved data and set up your new account with Exchange settings. Using Exchange ensures your data — including mail, contacts and calendars — stays connected with your email and is recoverable from the server whenever needed.
Select a tab to view the appropriate steps for switching from IMAP or POP to Exchange.
Export calendar or contacts
To ensure that your data stays connected with your email and is recoverable, export your data, create a new profile and then import it. Your email and folders are already synced to the server and don't require exporting.
- Open Outlook.
- To export your calendar, go to
 Calendar. Or, to export your contacts, go to
  Contacts.
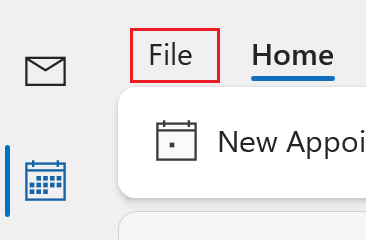
 - In the upper-left corner, select File.
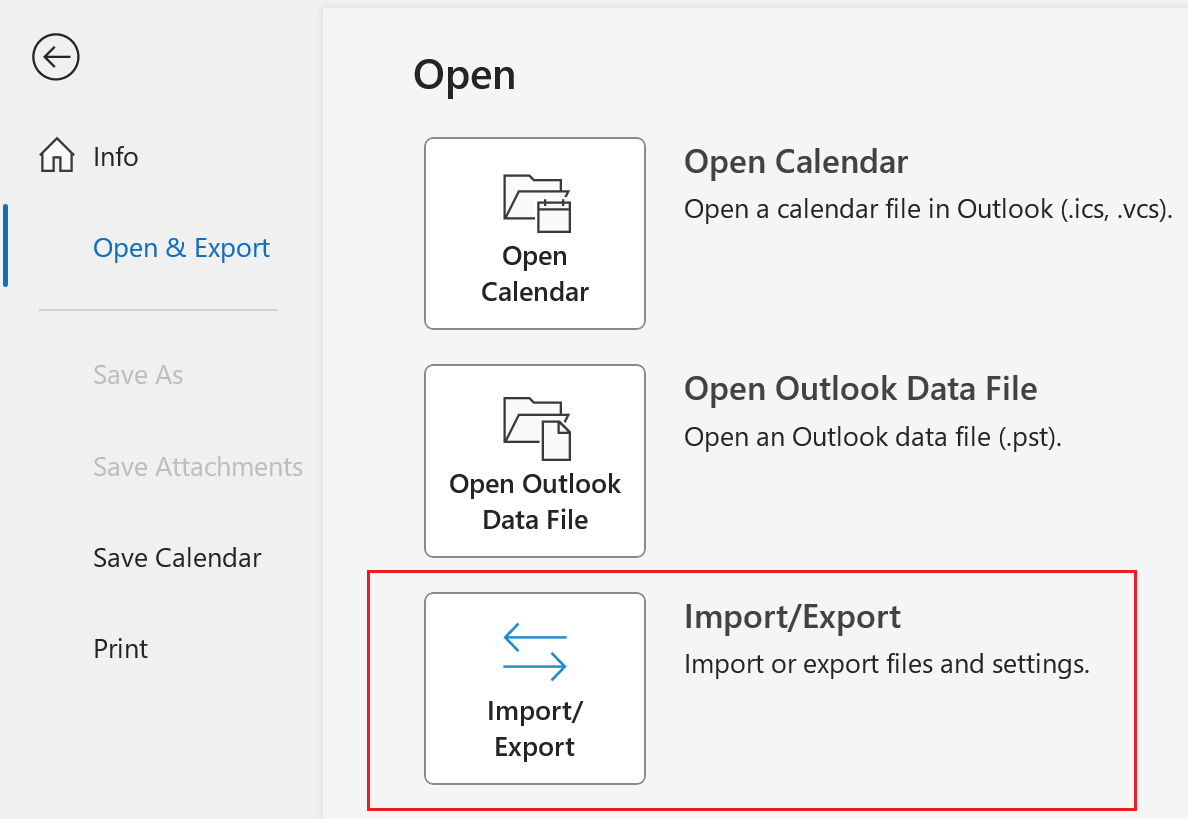
- Select Open & Export, and then Import/Export.
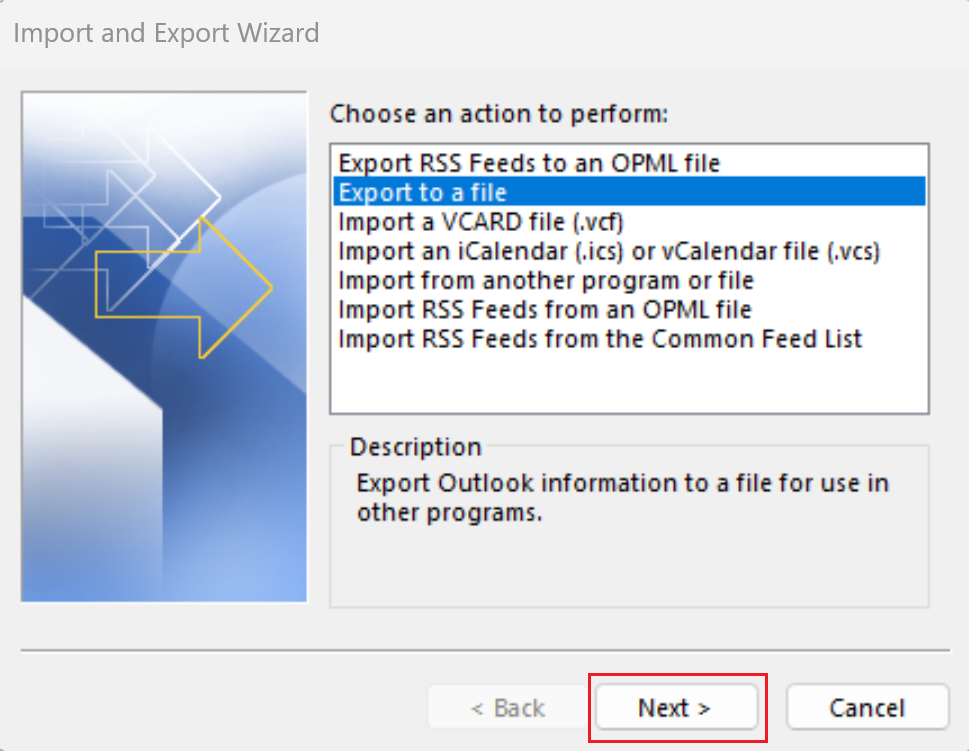
- Select Export to a file, and then Next.
- Select Outlook Data File (.pst), and then Next.
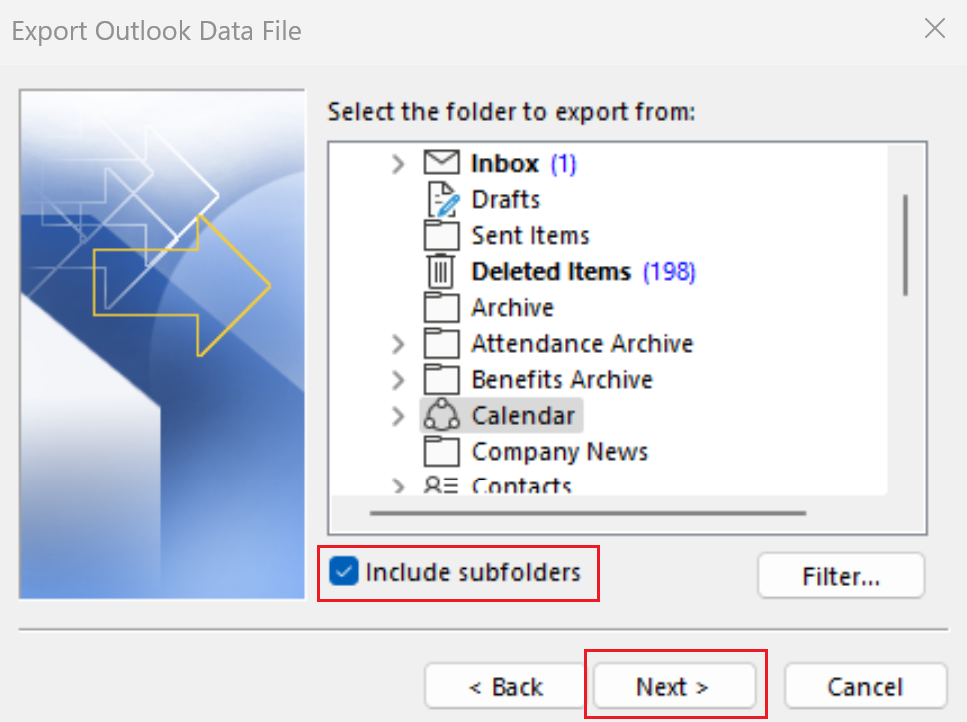
- Under your email account, your calendar or your contacts will be selected. Verify the checkbox next to Include subfolders is also selected, and then select Next.
- Select Browse.
- Choose where you want to save the backup file, change the file name, and then select OK.
- Select Finish.
- You have the option to password protect the backup file. If you want to skip this, select OK.
Repeat these steps to back up both your contacts and your calendar. Afterward, move on to the next section to create a new Outlook profile.
Create a new Outlook profile
- Open Outlook.
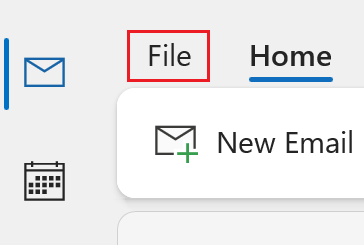
- In the upper-left corner, select File.
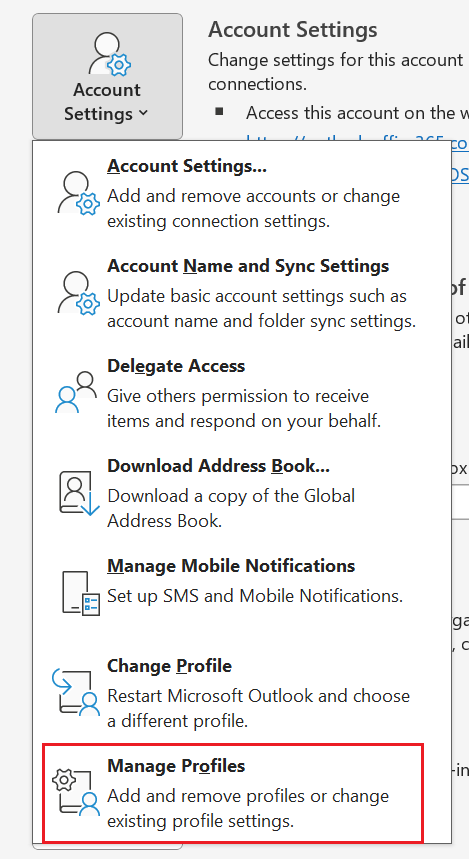
- Select Account Settings, and then Manage Profiles.
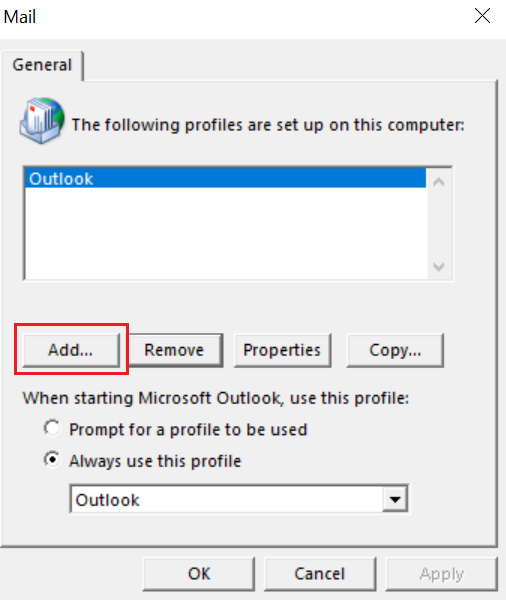
- Under Profiles, select Show Profiles.
- Select Add.
- Enter a name for the new profile, and then select OK.
- If the correct account is not auto filled, enter your name, email address and password, and then select Next.
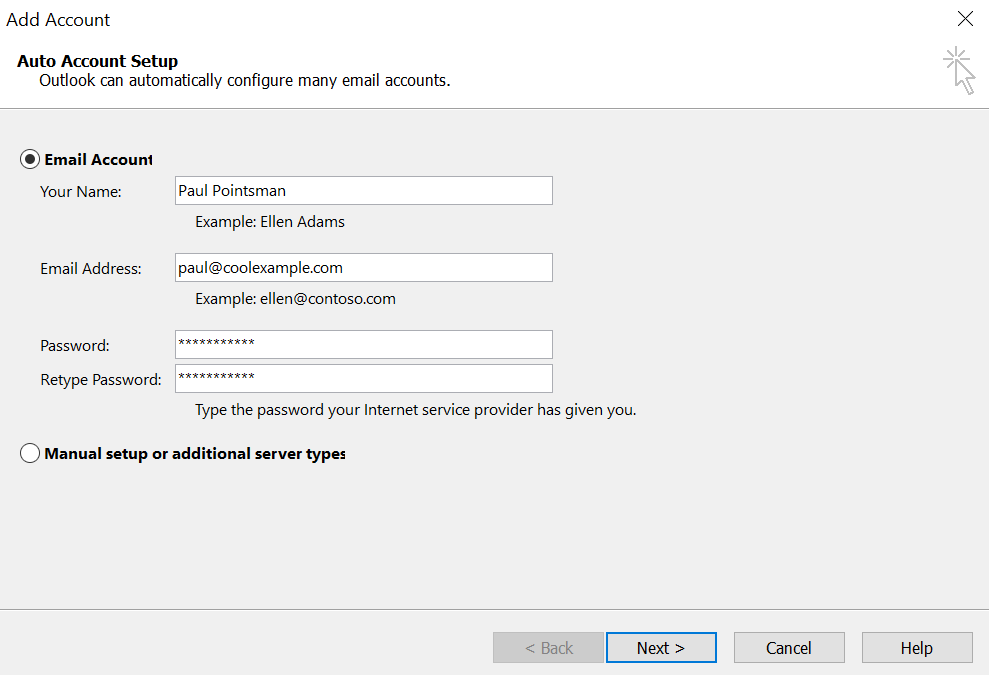
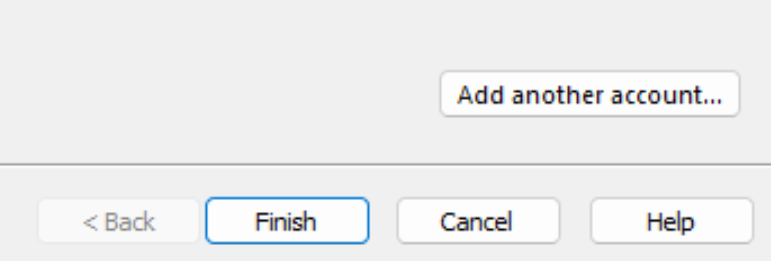
- If your account is set up successfully, select Add another account to add email addresses to your new profile. Otherwise, select Finish.
- You'll need to re-add any other email accounts you had in Outlook. This can be completed by selecting Add another account during this step.
- To manage profiles, locate the new profile name in the list, select Apply, and then OK.
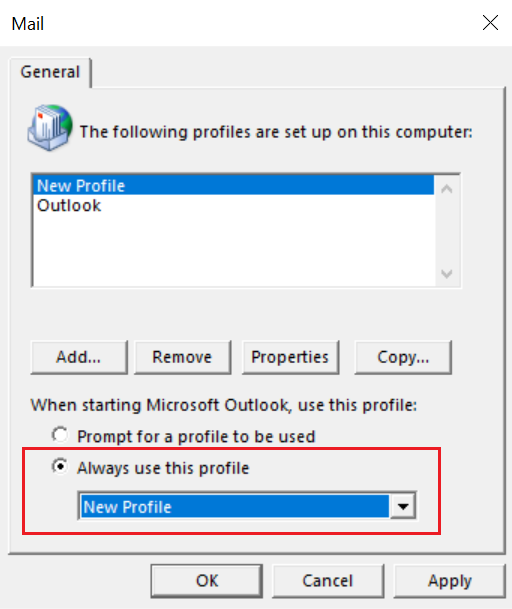
- To apply your new settings, close and then re-open Outlook.
Import calendar or contacts
- Open Outlook.
- To import your calendar, go to
 Calendar. Or, to import your contacts, go to
  Contacts.
 - In the upper-left corner, go to File.

- Select Open & Export, and then Import/Export.

- Select Import from another program or file, and then Next.
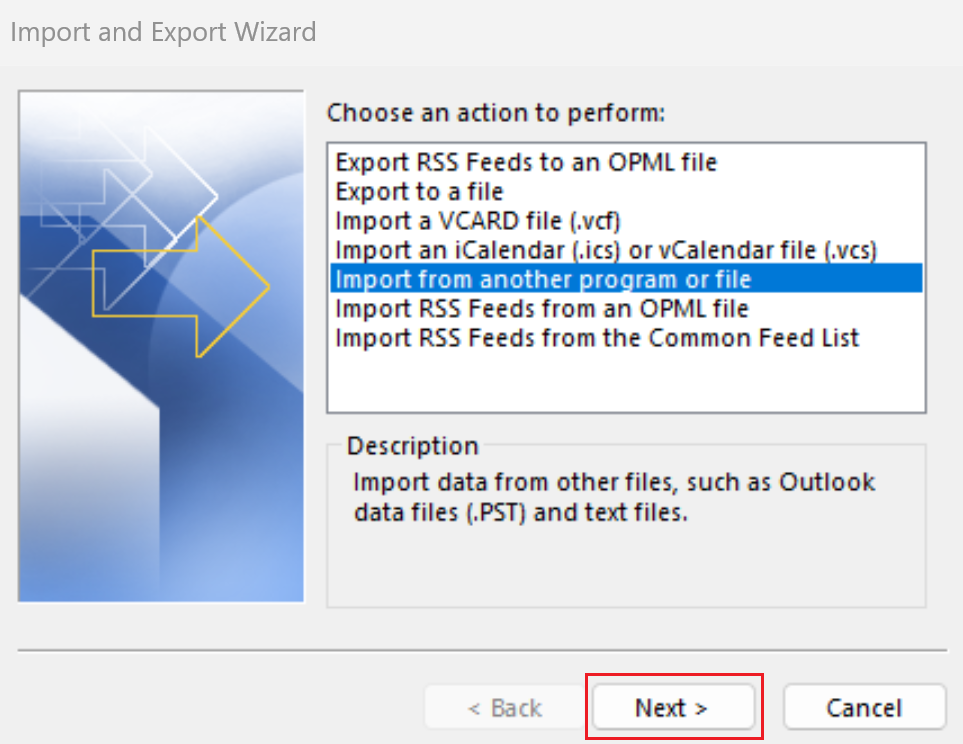
- Select Outlook Data File (.pst), and then Next.
- Select Browse, find and select your backup file, and select Open. Select Next.
- Select Outlook Data File, and then Calendar or Contacts. Select Import items into the current folder, and then Finish.
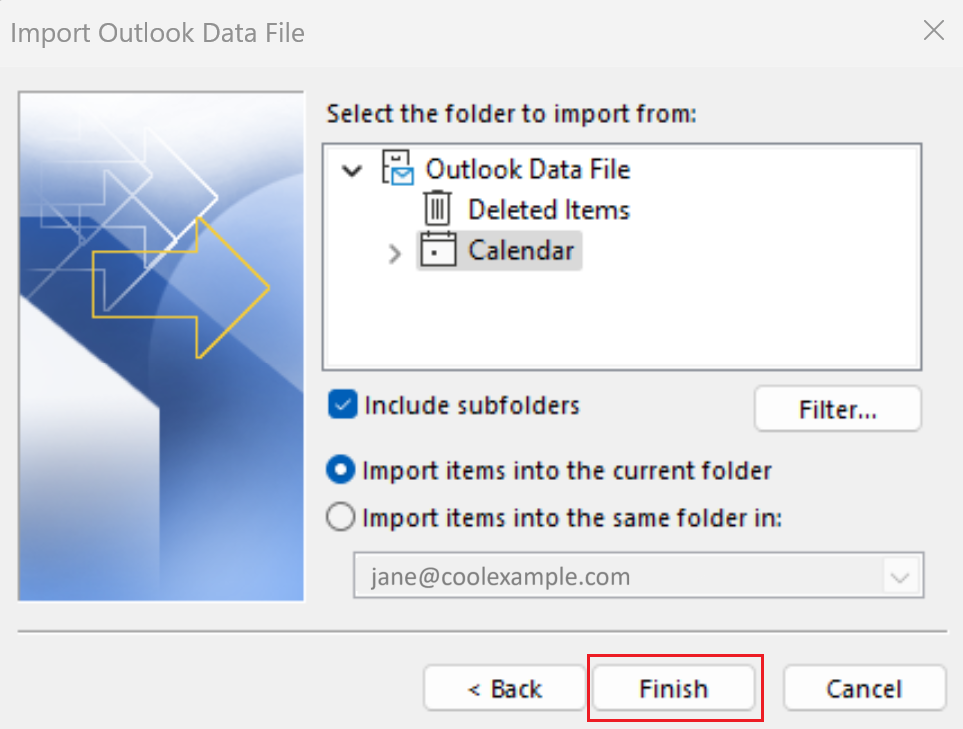
Repeat these steps until you've imported both your contacts and your calendar. Your data is now on the Exchange server.
To access your data, you’ll need to open the .pst file in your new Outlook profile. This does not connect your POP data to the server but will allow you to access the folders that remain saved on your device.
Create a new Outlook profile
- Open Outlook.
- In the upper-left corner, select File.

- Select Account Settings, and then Manage Profiles.

- Under Profiles, select Show Profiles.
- Select Add.

- Enter a name for the new profile, and then select OK.
- If the correct account is not auto filled, enter your name, email address and password, and then select Next.

- If your account is set up successfully, select Add another account to add email addresses to your new profile. Otherwise, select Finish.
- You'll need to re-add any other email accounts you had in Outlook. This can be completed by selecting Add another account during this step.

- To manage profiles, locate the new profile name in the list, select Apply, and then OK.

- To apply your new settings, close and then re-open Outlook.
Open the Outlook data file
- Open Outlook.
- In the upper-left corner, select File.

- Select Open & Export, and then Open Outlook Data File. The file explorer window will open.

- Select a file, and then select OK.
The file will open as its own set of folders in the folder pane of Outlook. Your data is now on the Exchange server!
Related steps
- Set up Exchange on your other email clients.
- Check which version of Outlook you’re using from Microsoft.
More info
- Don't have the Outlook? Download it.
- Create a backup file of your contacts, calendar and email.
- See more about importing a backed up file.