Exportar ou fazer backup dos meus contatos, calendário, email e tarefas
Observação: essas instruções servem apenas como referência. A equipe de guias de orientação da GoDaddy não pode ajudar você a exportar os dados.
Crie um arquivo de backup do Outlook para salvar e exportar mensagens de e-mail, contatos, informações de calendário e tarefas. Depois, importe seu backup para um novo plano ou serviço de e-mail, ou uma nova versão do Outlook. A exportação não inclui metadados, como propriedades da pasta (visualizações, permissões e configurações de AutoArquivar), regras de mensagens e listas de remetentes bloqueados. A Microsoft não oferece mais suporte a versões do Outlook anteriores a 2016.
Obrigatório: para garantir a exportação de toda a sua caixa de correio, desative o modo Cache do Exchange, caso contrário, a exportação incluirá apenas os últimos 12 meses.
Selecione a guia apropriada com base na plataforma de email que você está usando.
- Faça login no Outlook na internet. Use o endereço e senha do seu Microsoft 365. Seu nome de usuário e senha da GoDaddy não funcionarão aqui.
- Na extremidade lateral esquerda da página, selecione
 Pessoas.
 - Selecione Gerenciar contatos e, em seguida, clique em Exportar contatos.
- Opte por exportar todos os contatos ou apenas os contatos de uma pasta específica e selecione Exportar.
Seus contatos serão salvos em um arquivo no formato .csv, que pode ser importado em outros aplicativos de e-mail (como o Gmail) ou para outras versões do Outlook.
- Abra o Outlook.
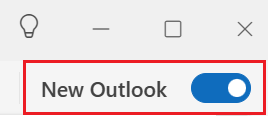
- Se você estiver usando o novo Outlook, retorne para o Outlook clássico. No canto superior direito, desative a opção Novo Outlook. É possível que você tenha que confirmar que deseja reverter para a versão anterior.

- No canto superior esquerdo, selecione Arquivo.
- Selecione Abrir e exportar e, em seguida, Importar/Exportar.
- SelecioneExportar para um arquivo e clique em Avançar.
- Selecione Arquivo de dados do Outlook (.pst) e clique em Avançar.
- Para exportar toda a caixa de correio, selecione o nome da conta de e-mail e avance para a próxima etapa. Se quiser exportar apenas seu calendário, contatos ou tarefas, selecione a pasta que você deseja exportar. Só é possível exportar um item de cada vez. Para exportar os contatos, os calendários e as tarefas individualmente, será necessário repetir estas etapas.
- Ao lado de Incluir subpastas, certifique-se de que a caixa de seleção esteja marcada e, em seguida, clique em Avançar.
- Para escolher onde salvar o arquivo de dados do Outlook (.pst), clique em Procurar. Insira um nome para o arquivo e selecione OK.
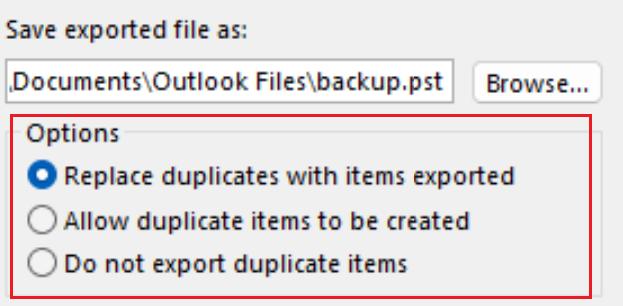
- Se você estiver exportando para um arquivo de dados do Outlook (.pst), em Opções, especifique o que fazer ao exportar itens que já existem no arquivo.

- Selecione Concluir.
- A exportação inicia imediatamente, a menos que ocorra uma das situações a seguir:
- Na caixa de diálogo Criar arquivo de dados do Outlook, digite a senha nos campos Senha e Confirmar senha e, em seguida, clique em OK. Se preferir continuar sem configurar uma senha, basta deixar os campos de senha em branco e clicar em OK.
- Se você estiver exportando para um arquivo de dados do Outlook (.pst) protegido por senha, na caixa de diálogo Senha do arquivo de dados do Outlook, insira a senha e clique em OK.
- Abra o Outlook.
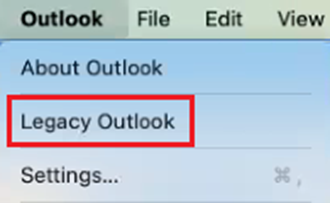
- Se você estiver na nova versão do Outlook, retorne para a versão anterior. Clique em Outlook e, em seguida, selecione Outlook clássico. É possível que você tenha que confirmar que deseja reverter para a versão anterior.

- Selecione Arquivo e, em seguida, clique em Exportar. A janela Exportar para arquivo morto (.olm) abrirá.
- Se você não encontrar a opção Exportar, clique em Ferramentas e depois em Exportar.
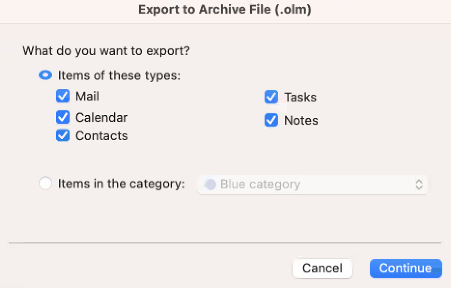
- Selecione o que deseja exportar. Todos os itens são selecionados por padrão.
- Para exportar qualquer um desses tipos individualmente, marque a caixa de seleção ao lado de cada item.

- Selecione Continuar .
- Escolha onde você gostaria de salvar o arquivo no seu computador, nomeie-o e, em seguida, clique em Salvar. Seus itens serão exportados.
- Selecione Concluir.
Etapa relacionada
- Agora que seus dados do Outlook foram exportados em um arquivo de backup, importe-os para o Outlook.
Saiba mais
- Descubra como exportar um calendário para um arquivo .ics da Microsoft.
- Veja mais detalhes sobre exportação e importação de arquivos no Outlook da Microsoft.
- Consulte este artigo da Apple sobre como importar e exportar caixas de correio no Apple Mail, no Mac.