An online presence is a “must-have” for ventures of all sizes.
One of the best ways to improve your positioning across all social networks is through consistency of voice and branding.
This includes finding the right social media image sizes for your campaign.
Your top priority should be making sure your voice matches the target audience for each social channel. However, providing a consistent appearance for your brand is vital, which makes determining the right size graphics necessary at the start of your project.
One of the best ways to accomplish both of these brand identity goals is through visual design.
As you visit the major social media platforms, you might initially see little consistency in social media image sizes. However, as these websites evolve and update their offerings, it becomes easier and easier to use your design skills to create a recognisable brand across the spectrum of sites.
Learning the best image sizes will take you far.
We’ve created this cheat sheet to give you a single reference guide for multiple social media sites, including Facebook, Instagram, LinkedIn, YouTube, X, TikTok, Threads, and Bluesky.
With this information at your fingertips, you can develop a consistent branding presence while meeting the required dimensions of the website. Knowing what each platform has to offer is the first step in managing social media for small businesses.
Let our experts handle your digital marketing campaigns.
Disclaimer: All known trademarks contained herein are the property of their respective owners and their inclusion does not represent any affiliation, endorsement, or sponsorship.
Tips for optimising images for social media
Before we jump into the ideal dimensions for social media images, let’s discuss some handy tips on how to optimize your images first.
Use the recommended aspect ratios
An aspect ratio is defined as the proportional relationship between the width and the height of an image. It’s typically displayed as two numbers separated by a colon, like 16:9 (width:height).
Aspect ratios are used by each of the platforms we’ll be covering in this guide, and it’s important to stick to those ratios to ensure that your images display without distortion or unwanted cropping.
Looking to create a professional logo? Check out GoDaddy's Logo Maker.
Keep the safe zones in mind
It’s also important to keep in mind that, even if you follow aspect ratios closely, the individual devices used to view your content may skew or crop your images. To counter that, try to keep the important elements like text or logos in the centre of your image.
Use high-resolution images
While each platform will recommend a minimum resolution size for images, it’s a good idea to use images that exceed the minimum size. This ensures that, as technology continues to improve, your images can continue looking sharp well into the future.
Be aware of maximum file upload sizes
In your quest to upload the highest resolution image possible, don’t forget to check on the maximum file upload size for your platform of choice. It won’t do you any good to have a crisp his-res image if you can’t actually upload that image.
Make sure that you adhere to your brand’s visual style
Brand is everything on social media, so you’ll need to be sure to establish a distinctive style and then use that style on any images that you upload to social media. This is especially important if you’re cross-promoting on social media, as it’ll help create strong brand recognition anywhere your content lives.
Social media image sizes and requirements
Now that we’ve covered the basics for creating images for social media, let’s take a look at the requirements for each social platform.
Keep in mind that the requirements for social media images can change regularly. However, if you create your websites with a website builder, social media integration is usually built in by default.
Facebook image sizes
Facebook offers a wide variety of opportunities for sharing images. Although personal accounts are generally limited to profile photos and cover photos, running advertisements, and using business pages create even more opportunities for sharing visual content.
Facebook is the most popular of all social media platforms, both worldwide and in Australia itself, according to a study from Statista.com. Facebook is primarily used by people ages 25 to 50, making it the perfect platform for advertising to a wider audience. Since the site is used rather casually (unlike workplace-centred social media platforms like LinkedIn), Facebook ads are ideal for selling home goods, clothing, and gift items.
Facebook image requirements
- Supported file formats: JPG (best for photos) and PNG (best for mixed media/text)
- Maximum file size: 30MB
| Image type | Recommended size |
| Facebook profile picture | 320x320px minimum, 1:1 aspect ratio |
| Facebook cover image | 400x150px minimum, 16:9 aspect ratio |
| Facebook Feed image | 600x600px minimum, 1:1 aspect ratio600x750px minimum, 4:5 aspect ratio |
| Facebook shared link image | 1200x630px minimum, 1.91:1 aspect ratio |
| Facebook Stories cover image | 1080x1920px minimum, 9:16 aspect ratio |
Instagram image sizes
Instagram is famous for its visuals, so the platform has very specific guidelines for what works and what doesn’t in terms of social media image sizes. While it’s easy to edit your photos directly on the app, if you’re running sponsored posts or advertisements for Instagram’s global audience, it’s smart to have them already scaled and planned before posting.
Since its inception, Instagram has become a massive platform for advertisements and sponsored partner posts. Instagram is mainly used by people ages 25 to 34, making it
Instagram image requirements
- Supported file formats: JPG and PNG
- Maximum file size: 30MB
- Strict resolution requirements: 1080px minimum width required
| Image type | Recommended size |
| Instagram profile picture | 320x320px, 1:1 aspect ratio |
| Instagram content image | 1080x1080px, 1:1 aspect ratio1080x1350px, 4:5 aspect ratio1080x566px, 1.91:1 aspect ratio |
| Instagram Story/Reels | 1440x2560px, 9:16 aspect ratio |
YouTube image sizes
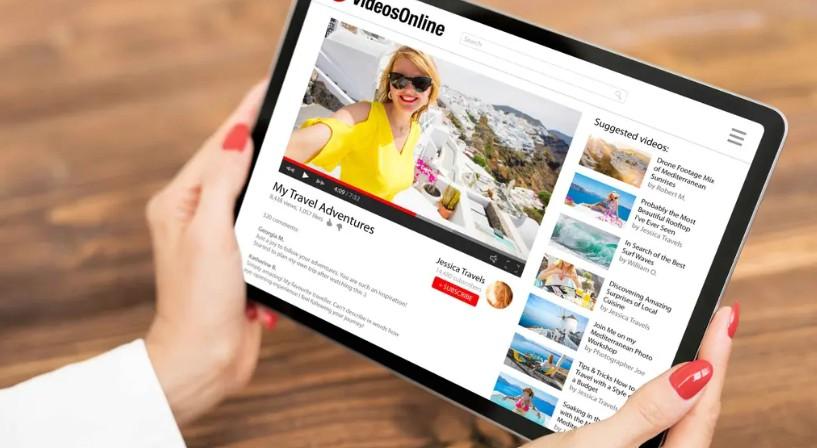
YouTube is all about visuals, and designing your thumbnails is essential for a successful video.
Show off your brand's tone and angle with bright colours and simple, eye-catching text.
YouTube boasts users across all age groups, but is particularly popular among younger audiences. Because of the potential reach across age groups, YouTube runs a significant advertising operation, with businesses either purchasing ads to be played before or during videos or directly sponsoring influencers.
YouTube image requirements
- Supported file formats: JPG, PNG, GIF
- Maximum file size: 16MB, 2MB for thumbnails
| Image type | Recommended size |
| YouTube profile picture | 800x800px, 1:1 aspect ratio |
| YouTube cover photo | 2560x1440px, 16:9 aspect ratio |
| YouTube thumbnail images | 1280 x 720px, 16:9 aspect ratio |
| YouTube Community post | 800x800px (minimum), 1:1 aspect ratio |
TikTok image sizes
TikTok is an excellent platform for displaying products briefly to a younger audience. Seemingly random products like lash lift kits and reversible octopus plushies have seen astronomical growth due to virality on TikTok. Make sure your photos and videos on TikTok are spot-on and study the algorithm, and you’ll be set up for viral success.
Coming in as the fifth most popular social media platform, TikTok is a big platform for people in their teens and early 20s. Advertisers often sponsor posts on TikTok from famous influencers, but it’s also possible to create a business account to feature your own products.
TikTok image requirements
- Supported file formats: JPG, PNG
- Maximum file size: 100MB
| Image type | Recommended size |
| TikTok profile picture | 200x200px, 1:1 aspect ratio |
| TikTok thumbnail size | 1536x2048px, 3:4 aspect ratio |
LinkedIn image sizes
Having a distinct image on LinkedIn gives the impression of a cohesive brand, even if you're a new small business. Ensure that you have all your bases covered on LinkedIn, including a profile photo, cover image, and shareable assets for your business LinkedIn page.
LinkedIn is unique because of its professional focus.
Where social media platforms like Facebook and TikTok are generally geared toward casual posts, LinkedIn is all business, making it perfect for companies looking to sell business-related supplies and services.
LinkedIn's user base is largely professionals aged 30 to 55, making it ideal for B2B marketing and networking.
LinkedIn image requirements
- Supported file formats: JPG, PNG
- Maximum file size: 8MB
| Image type | Recommended size |
| LinkedIn profile picture | 400x400px (personal profile), 1:1 aspect ratio300x300px (company logo), 1:1 aspect ratio |
| LinkedIn cover photo | 1584x396px (personal profile), 4:1 aspect ratio1128x191px (company profile), 5.91:1 aspect ratio |
| LinkedIn posts | 1080x1080px, 1:1 aspect ratio1920x1080px, 16:9 aspect ratio |
| LinkedIn article featured image | 1200x644px, 1.86:1 aspect ratio |
X image sizes
X (formerly known as Twitter) is a majorly text-based platform, but photos often help seal the deal for likes, comments and retweets on the platform. Profile pictures and headers should especially be spot-on: Make sure everything lines up the way you want before racking up the followers.
X, which once hosted a very young age group, is now mostly used by men ages 26 to 50, with a not-insignificant portion of men over the age of 50. X would be an effective platform for small businesses looking to amplify their products/services to this audience.
X image requirements
- Supported file formats: JPG, PNG, GIF
- Maximum file size: 5MB
| Image type | Recommended size |
| X profile picture | 400x400px, 1:1 aspect ratio |
| X header size | 1500x500px, 3:1 aspect ratio |
| X shared link graphic size | 800x418px, 1.91:1 aspect ratio |
Threads image sizes
Threads is the newest social platform offering from Meta, springboarded from Instagram, so it shares a similar audience as well as image requirements. There are some differences, however, which we’ll highlight below.
As a text-based platform, providing interesting commentary is key, and impactful images can help build your brand identity.
Threads image requirements
- Supported file formats: JPG, PNG, GIF
- Maximum file size: 8MB
| Image type | Recommended size |
| Threads profile picture | 320x320px, 1:1 aspect ratio |
| Threads feed images | 1080x1080px, 1:1 aspect ratio1080x1350px, 4:5 aspect ratio1080x566px, 1.91:1 aspect ratio |
| Threads feed preview | 1440x1920px, 3:4 aspect ratio |
Bluesky image sizes
Bluesky is a decentralised social media site that launched in 2019. With the intention of making a customisable social media experience, Bluesky is continually adding new features and apps to their lineup.
The user base on Bluesky is primarily younger users, aged 18-24, so it’s a great place to be if your target audience trends younger.
You can even use your own domain on Bluesky.
Bluesky image requirements
- Supported file formats: JPG, PNG, SVG, WEBP
- Maximum file size: 2MB
| Image type | Recommended size |
| Bluesky profile picture | 400x400px, 1:1 aspect ratio |
| Bluesky profile banner | 2560x660px, 3.88:1 aspect ratio |
| Bluesky feed images | No set size, suggested aspect ratios of 1:1, 3:4, 4:5, 9:16 |
Frequently asked questions
Why is it important to use the correct image sizes on social media?
Using correct image sizes on social media prevents awkward cropping and maintains image quality, which in turn makes sure that your content looks professional on any device. Every platform has their own size requirements, so following image sizing guidelines will help you make a better impression on any social network.
What happens if I use the wrong image size for social media?
Unwanted image cropping or compression can happen if the image dimensions don’t meet the platform’s standards. This can cause images to lose important content in the crop or look blurry/pixelated to viewers.
Can I use the same image across all social media platforms?
Yes, you can, but it’s not ideal to use the same dimensions on every social media platform. You’ll want to modify your image dimensions to fit the social media platform you’re posting on to avoid unwanted cropping or quality loss.
What is the best file format to use for social media images?
For most social media platforms, JPG and PNG are the best file formats. JPG works well for photographs and complex images, while PNG is ideal for graphics with text and limited colours. For the best balance between quality and loading speed, JPG is usually your best bet.
Do social media platforms compress images when I upload them?
Yes, most social media platforms will automatically compress uploaded images to save on bandwidth and storage space. The compression is usually more noticeable when these images exceed the platform’s recommended dimensions.
What is the difference between aspect ratio and image size?
Aspect ratio is the proportional relationship between an image's width and height (like 16:9 or 1:1), while image size refers to the actual pixel dimensions (like 1200×628 pixels). Aspect ratio determines the shape of your image, regardless of its size. For example, a square image has a 1:1 ratio, whether it's 800×800 or 1080×1080 pixels.


