You are planning to take your business to an altogether new level and want to make your own website for this. Definitely, this is not a tough task any longer with the advances in technology. Read the instructions below to learn how to do it using GoDaddy Website Builder.
Make your own website in 6 steps
Making a website is not difficult as it was earlier. Just follow these steps.
-
Begin a free trial.
-
Sign in or create an account.
-
Choose a business category.
-
Customize your website.
-
Adjust your site settings.
-
Preview and publish.
Continue reading to learn how to make your website.
Steps involved in building a website
Here are steps you can use to make your own website using Website Builder from GoDaddy. Website Builder requires no technical skill.
1. Begin a free trial
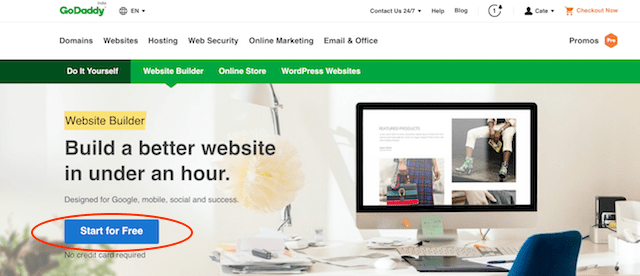
To make your own website, first go to Website Builder product page and click on Start for Free. You may try it first, with no need to enter payment information until after 30 days of use. If you are satisfied, you can then add your payment information.
2. Sign in or create an account
Next, a sign in form appears on the screen. If you already have a GoDaddy account, you can sign in directly or through your Facebook account. Alternatively, you can create a new account by clicking on Create an account. As stated, you will not be asked to enter payment information at this time.
3. Choose a business category
Your account is created within seconds, and then on the Welcome page, you will be asked to choose a category for your website. You can enter the first few letters of your business type — for example, Consultancy — and a drop-down list of options appears. Select one to finish the entry. Then enter the name of your business in the next field. (Read this post for help with naming.)
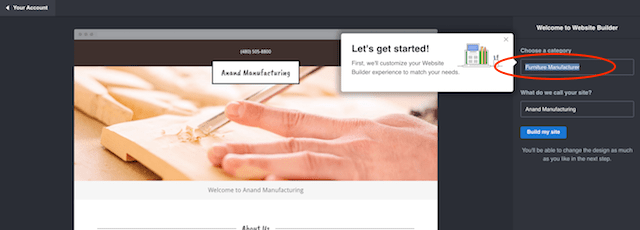
In a few moments, a template of your website with the name on the top and various sections will appear on the screen.
4. Customize your website
Click the Customize button. In a few seconds, a sidebar appears on the right with the tools to change the theme, pages and site settings.
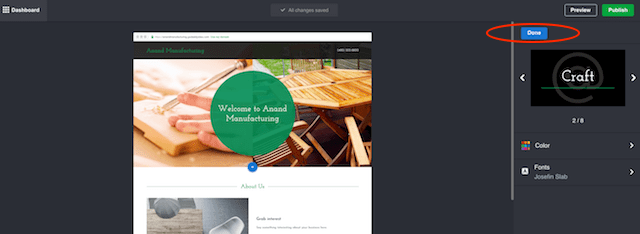
By clicking on the Theme panel, you can reset the theme, main colour of the website and font. Click through the available themes until you are happy with the look. Click Done after making the changes.
Similarly, you can change the Pages and Home settings to reorder your site navigation and to group items using the drop-down menu.
5. Adjust your site settings
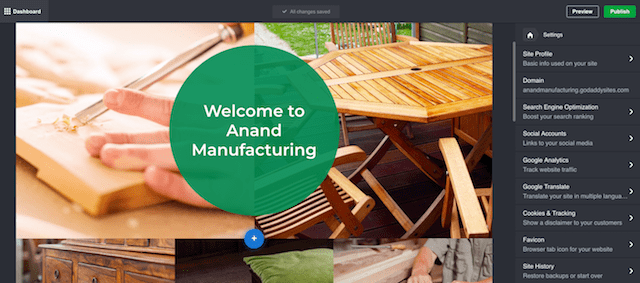
Located below Theme and Pages, the Site Settings tab allows you to make alterations in your:
- Site Profile (business name, street address, email ID, phone, etc.),
- Domain name associated with the website,
- Search Engine Optimization (to boost your search engine ranking),
- Social Accounts (for linking your social media),
- Google Analytics (to track the website traffic),
- Google Translate (for translating your site in multiple languages),
- Cookies, tracking options and more.
You can return to Site Settings to make changes at any time — if you should move locations, for example.
6. Preview and publish
After customizing, you can click on the Preview button in the top right side to check the results. This will show you what your website will look like on a desktop computer, as well as on a smartphone. Continue making changes to your site for as long as you wish utilizing the Edit button in the top right.
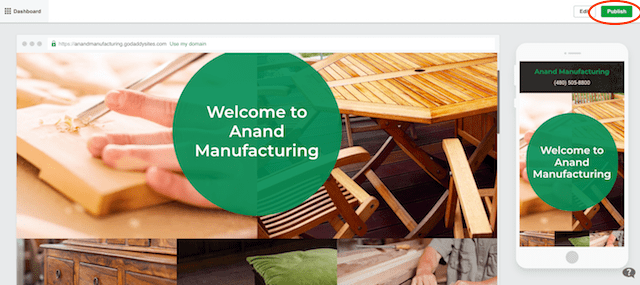
When you are ready to make the changes public, click the Publish button in the top right corner. Your website is up and running!
Most important sections of your website
Depending on the content your customers will be looking for, you can feature some variation of the following sections on your website:
Home page
The homepage of your website creates the first impression on the visitor, and as they say, the first impression is everything. It will decide the future interaction of the visitor with your website. It is the “sales” or introduction section that states the ‘what’ and ‘where’ of your business. Include trust indicators such as customer reviews here.
About Us
This section tells your story, ‘who’ you are and ‘why’ the visitors should buy your products or services. It might contain the mission or purpose, details of staff, working hours and recently completed projects. Include your success indicators such as logos of client companies here.
Products/services
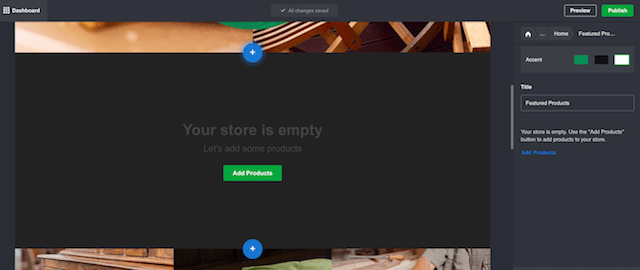
It is always a good idea to categorize your products or services, with an introduction to each category and the detailed description of each item. With Website Builder, simply click Add Section then choose Featured Categories to add products.
Contact Us or Request a Quote form
Make it easy for the visitors to contact you by providing your location details with directions. Your email ID with a phone number and alternate numbers should also be readily available to the visitors. If they want to get a quote for the product or service, provide them with the option to fill the form to request a quote.
Frequently Asked Questions (FAQs)
Visitors might have some common concerns that could affect your sales. Instead of answering the same queries of your visitors over and over again by email or phone, you can save a lot of time by placing these questions with their answers on the website and then keep adding on to them.
Apart from the above sections, you can also add a subscribe form, blog articles, a search feature, surveys, events calendar, photo gallery, return/refund policy, site map, media information, privacy policy and copyright information.
Editor’s note: GoDaddy’s Website Builder comes with all of these sections pre-loaded.
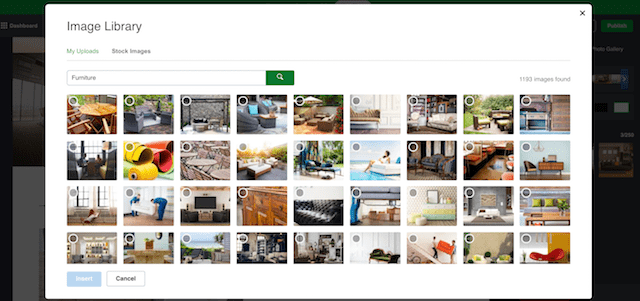
While the design, graphics, colour, and fonts play a significant role in determining the aesthetics of your website, you’ll also need to provide useful and descriptive content. The content should be concise, simple and jargon-free, and allow the visitors to know more about the skills and specializations of your business. Use high-quality photos, images and videos that add value to the text rather than detracting from it.
Make your own website now
It is not a tough task any longer to build a website as it used to be earlier. With the advances in technology, anyone can easily make a website using the steps explained above. So, what are you waiting for? Make your own website now.


