Having a personal website is a great way to start creating a name for yourself. It doesn’t matter if you want to start a company or simply want a safe place online to showcase your interests.
If you’re struggling with how to make a website, this handy guide will show you how to do it.
Below, we’ll discuss how to start building a personal website using GoDaddy’s free Website Builder. It’s simple to use, even if you don’t have any web design experience. It has a ton of cool templates to get you started and marketing tools to help you share your new website with the world.
Here are just a few ways you can use Website Builder:
- Expand your clientele
- Increase traffic to your local shop
- Become an online influencer
How to make a personal website with GoDaddy Website Builder
GoDaddy’s free website builder is ideal for those who are just starting out or don't want to invest money into a standard website just yet.
Feel free to create a personal website with GoDaddy, using the following steps.
Step 1: Getting started
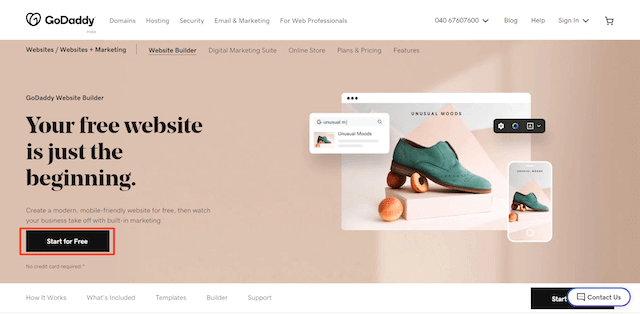
Visit GoDaddy’s Website Builder and click on “Start for Free.”
Step 2: Signing up
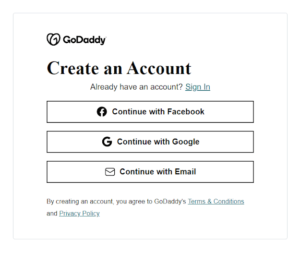
Create a free account using your email, Gmail address or Facebook account.
Step 3: Choosing a category
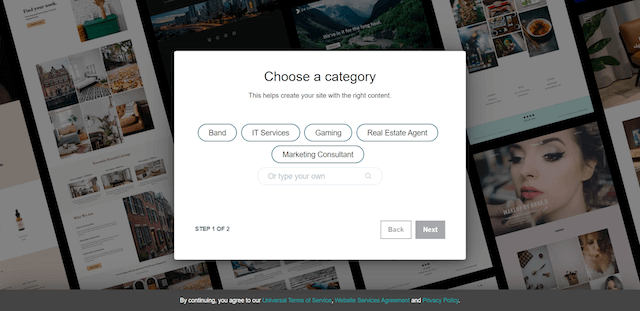
Follow the prompt to choose a category that fits the theme of your content.
For example, I've selected "Marketing Consultant" as my website's category.
When you’re finished, select Next.
Step 4: Identifying your site topic
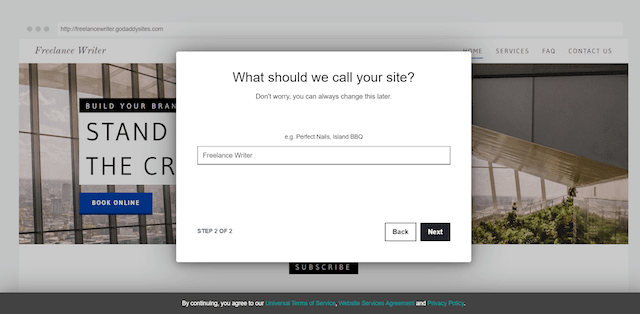
The next prompt will give you the option to enter a topic for your website, such as "freelance writer." Don’t worry if you’re not sure on this just yet – you can always adjust this later on. Select Next when you’re finished.
Step 5: Entering the dashboard
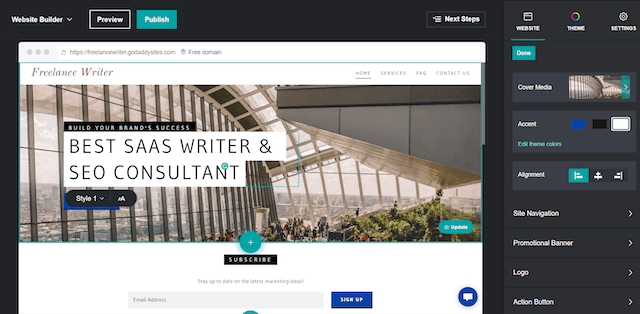
Now you’ll be taken to the dashboard. Here, you can make changes to any and all parts of your new website.
For example, I changed the text in the top section to read "Best SAAS Writer & SEO Consultant” by clicking on the text box to edit. This is the first thing that people will see when they come to your website.
You can also change the alignment, color and font in a matter of seconds from this screen.
Step 6: Editing the background image
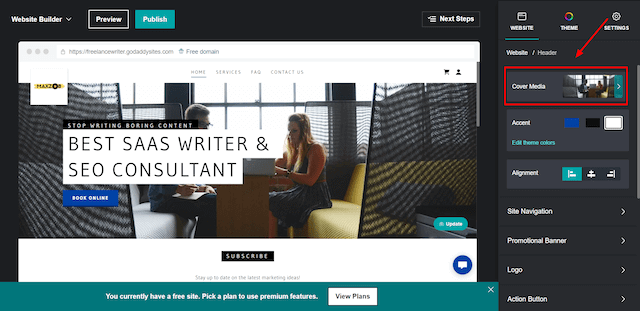
If you want to change the cover picture of your website, all you have to do is click on the “Cover Media” section within the “Website” tab on the right menu to open up the media library.
Click the Add Images button on the screen that opens or use the drag and drop function to upload a photo from your phone or computer.
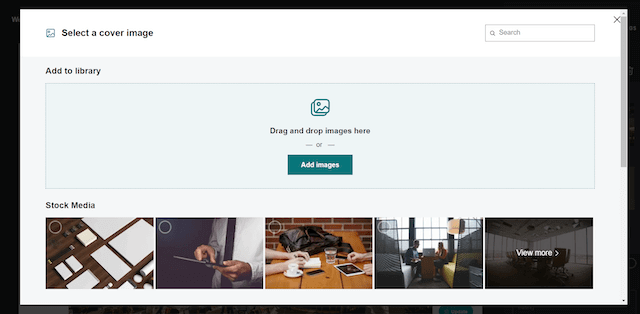
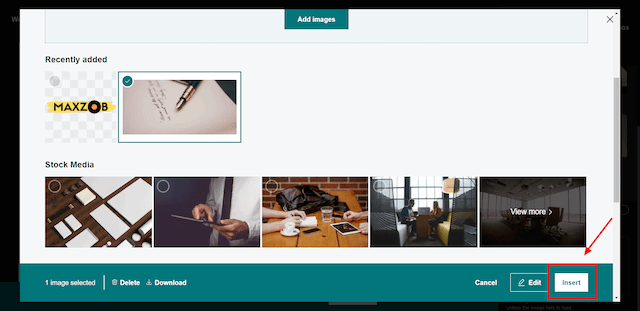
You can also use any of the many free stock images included with Website Builder, if you choose. Once you select the photo you want, click on Add Images.
After uploading the image click on Insert.
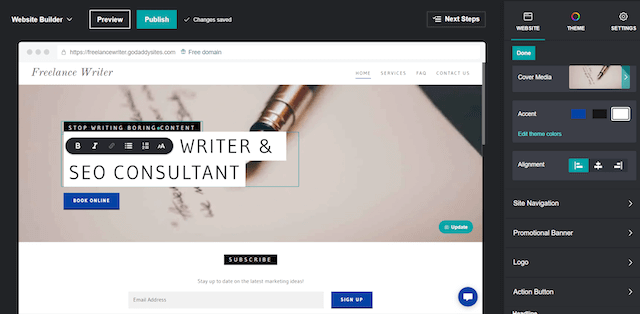
Your new background photo should automatically update like my example below.
Step 7: Adding your own logo
It’s useful to have a logo on your website, especially if you are starting a business. When used in all your marketing materials (e.g. website, social media profiles, brochures), your logo comes to represent your business in the eyes of customers.
To add your logo to your website, simply click Upload a logo within the “Website” menu on the right-hand side of the dashboard.
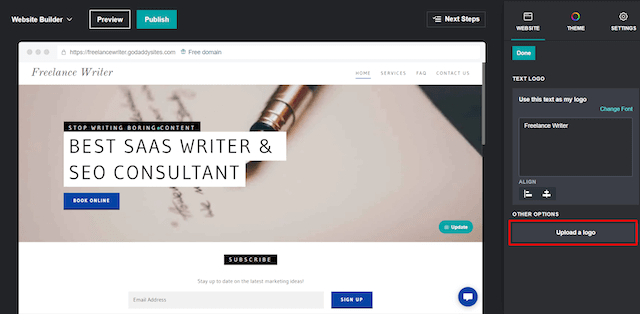
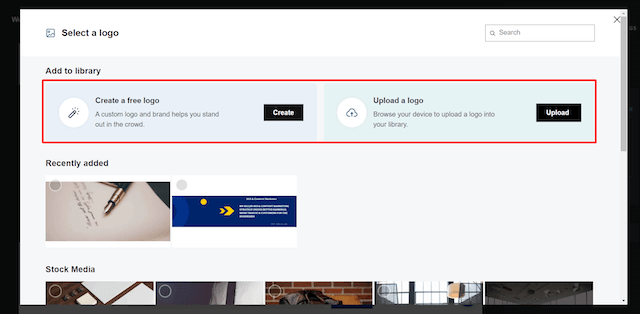
The next prompt will allow you to either upload a logo you already have or use GoDaddy's free built-in logo builder to create one. This easy tool comes with hundreds of templates, graphics and fonts – no design experience necessary.
Step 8: Making a new page
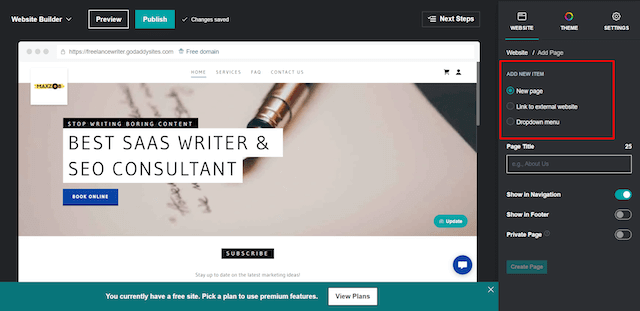
You can quickly make a new page by clicking on Add new item within the “Website” menu on the right side of the dashboard. Then, select the radio button for “New page” and click the Create page button at the bottom.
So, how many pages should you add? Well, the list could go on and on indefinitely. In the end, it is up to you to decide what to include.
The key is to think about the information your site's users need most.
This will help you determine the number of pages to include, plus any relevant visuals like:
- Videos
- Images
- Podcast audio
Make sure to take these materials into consideration while planning your project.
Pro tip: A "Contact Me" page should be mandatory because it’s a method for site visitors to get in touch with you. It should be included on every personal website.
Step 9: Publishing to go live
This is where the fun begins. Be sure to verify your settings again and give your articles, pages, and other content a last proofread before posting them.
After you've made the necessary additions to your website, you can then click the Preview button at the top of your dashboard to see what it will look like to others. Spend as much time as you need toggling between Preview and Edituntil everything looks good.
Once you are satisfied, click Publish button to have it go live.
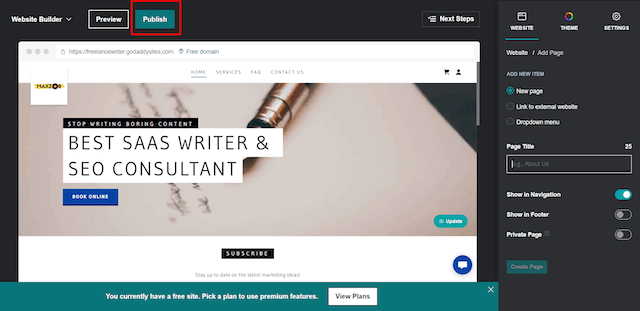
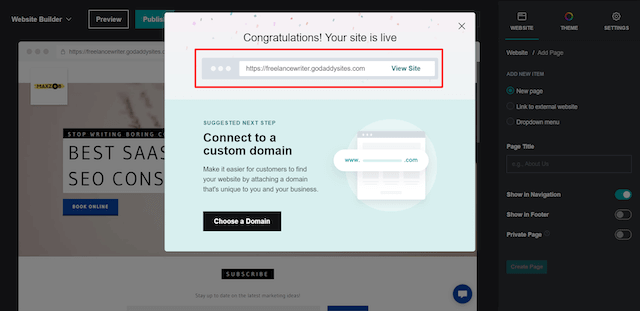
A new prompt will appear to confirm your website is live. You'll also receive a link to your site, so that you can start sharing it on social media right away.
Step 10: Admiring your work
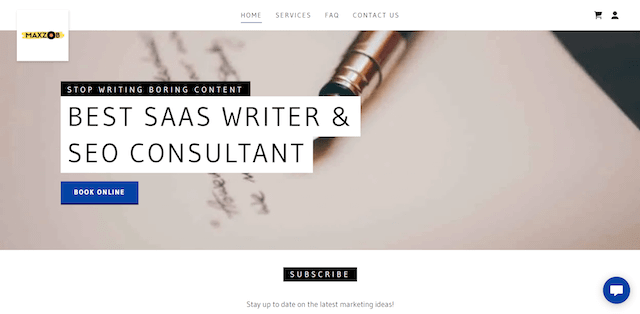
Hooray, you’ve completed the process for making your very own personal website! The final results should look something similar to the example below, but with your own photos and text of course.
Now that you know the basics, you can continue building and improving your personal website however you like.
It’s a good idea to add a monthly or quarterly reminder to check your website to your calendar. This will ensure it is always up to date with any new information you have to offer.
Pro tip: Although you don’t need your own domain name to have a free website, you may want to search and register your desired domain name and use it for better search engine rankings. Here are six good reasons why your business needs a domain for your new website.
Time to promote your new website
Get the word out about your personal website after you've put in the time and effort. Consider including it on your online social media profiles, like Facebook and Twitter.
For even more exposure, think about using paid channels like Google Ads or social media marketing.
Also, ensure your email signature includes a link to your website, so your contacts know where to find it.
Why a personal website site is convenient
Suppose you're looking for a job and you want to compile all your work samples in one place. Instead of sending an employer multiple documents, you could simply provide them a link to your own personal website.
This will allow you to control how your work samples and information are presented.
It's a simple and easy option to show off your personal brand and work samples to anyone you’d like – all in one spot. Oftentimes, clients or employers even prefer personal websites over resumes.
If you’re an artist, UX designer, photographer, web developer or creative professional, get inspired by these seven examples of terrific portfolio websites.
Summary: How to make a personal website
No matter what kind of website you're creating, a personal website conveys your unique personality to visitors. Remember to keep the aforementioned steps and tips in mind to create the best experience for your audience. And, if you choose an easy-to-understand website builder like GoDaddy’s, it won't have to cost you a lot of money or a lot of time to get it done.


