HTML is a key part of every webpage and is an important skill to learn as a web professional. Regardless of the functionality of technologies involved, it’s the core starting point for web development. This article is an easy hands-on guide to learn how to make a website using HTML.
HTML stands for HyperText Markup Language and creates the overall structure of a website.
You can think of it as a placeholder system that defines where all the website elements go and how they will get displayed.
The structure developed by HTML can be further enhanced by other front-end technologies like CSS and Javascript.
4-step guide: How to make a website using HTML
Before writing any code in HTML, it’s important to first understand the concept of tags and attributes.
Tags
Tags are used to mark up the start and end of an HTML element and are typically enclosed in angle brackets.
Most tags must be opened <body> and closed </body>. The closed tags will always include a forward slash in front of the text within the brackets.
Attributes

Attributes are used to place additional information about the HTML element.
For example, an image attribute <img src=”mypic.jpg”> will include characters like src (source file) found within the tag brackets that signify a path to the image source.
Now that you know the basics, it’s time to equip yourself with the right tools. You’ll need the following essentials in order to follow along:
- A free code editor program (like Notepad++ or Sublime Text)
- An internet browser (like Chrome, Firefox, Safari)
- Website content (text and images that you want your web page to display)
Once you have everything in place, it’s time to learn how to make a website using HTML.
1. Define the structure of the webpage
The basic structure of an HTML page is visually represented below. Let’s break down each section individually.
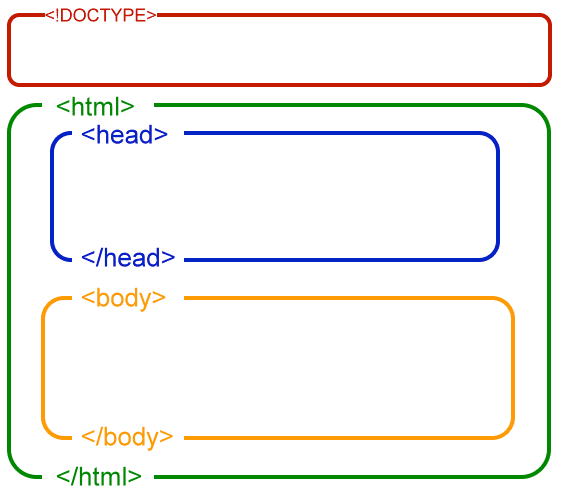
<!DOCTYPE> This is the first tag in your HTML editor. It specifies the language you will write on the page. In the present case, the language is HTML 5.
<html> </html> This tag signals the start and end of HTML code.
<head> </head> In this section all the metadata for the page is inserted. The content in the header section is meant for search engines and other pixel-tracking applications.
<body> </body> This is where the content of the page goes, and it defines the structure and look of the page.
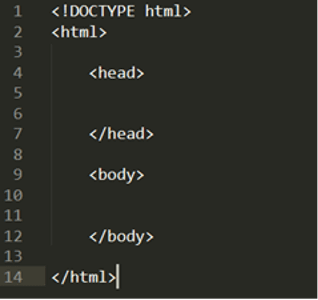
Now that your structure is in place, you can begin building out each element in further detail.
2. Create the header section
There are two tags you’ll want to input within this section. Let’s review them below:
Meta tag
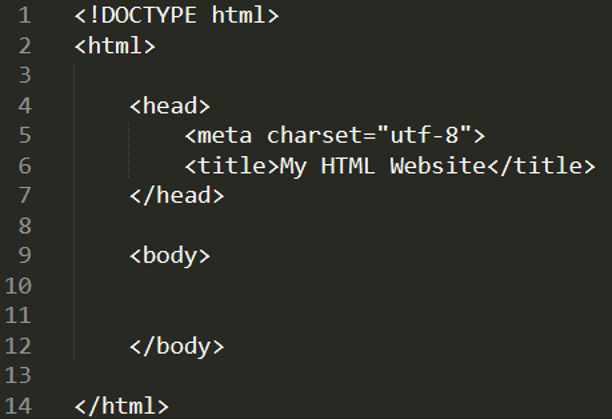
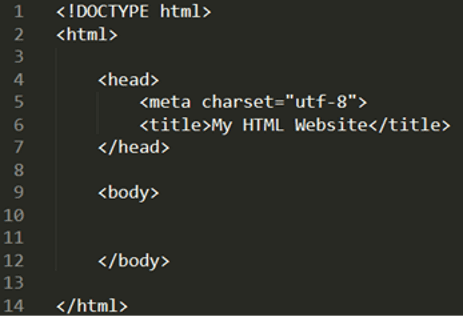
The first tag you should add in your head section is this meta tag. This tag sets the character encoding. UTF-8 is a type of encoding that is needed to translate the letters, numbers, and symbols of the English language into bytes that the computer understands.
Title tag
Another important tag in the header section is the title tag. The title tag sets the title of the web page and is also referred to by search engines for ranking the page.
3. Fill out the body section
When learning how to make a website using HTML, you’ll discover that the body contains the bulk of the information needed for your elements.
The body tags control the content that you see on the web page.
Some of the most commonly used HTML elements are mentioned below:
Header tags
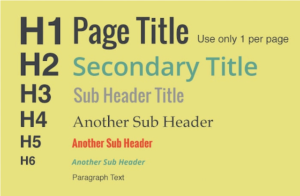
Header tags range from <h1> to <h6>. The <h1> tag is the highest in priority.
Now, let’s add an <h1> tag with the words “HTML is FUN” to our web page. We’ll also add a subtitle and use the phrase “Let’s Learn HTML” using the <h2> tag.
These header tags are similar to the headlines of the Microsoft Word document.
Paragraph
The <p> tag is used to add a text paragraph or block of text on the web page. You can also choose to add line breaks with the help of the <br> tag.
Anchor link
Links are very important and help the user jump directly onto the reference page. They also help your website rank better in search engines.
In HTML, link tags are written as an <a> tag. You must put an open <a> and closed </a> tag around the link text that you want to make a hyperlink.
The <a> tag also requires an attribute that is called href, which is short for hypertext reference. The href attribute is used to place the value of the URL for the destination website.
For example, if you want to link text with the GoDaddy India website, then you would use the URL and it would look like this:
<a href=“https://www.godaddy.com/en-in>GoDaddy India</a>
Your final anchor link will include both the URL destination and the desired text within the <a> brackets.
Images
Photos, graphics and images make your webpage look stunning and make it more engaging.
To place an image on the webpage you can add an HTML image tag <img> to your element. An <img> requires an src attribute for placing the value of the image location (or URL path).
Example:
<img src=”https://www.placecage.com/640/360”>
One thing to note is that the <img> tag doesn’t need a closing tag at the end. It only requires a closing bracket after the image URL and closing parenthesis.
List
You can make your webpage content easy to read and consume by placing lists on your web page. HTML lists allow web developers to group a set of related items. These lists can be either an ordered HTML list or unordered HTML list.
Ordered list
An ordered list starts with the <ol> tag. Each list item starts with the <li> tag.
Example:
<ol>
<li>Item 1</li>
<li>Item 2</li>
<li>Item 3</li>
</ol>
Unordered list
An unordered list starts with the <ul> tag. Each list item starts with the <li> tag.
Example:
<ul>
<li>Item 1</li>
<li>Item 2</li>
<li>Item 3</li>
</ul>
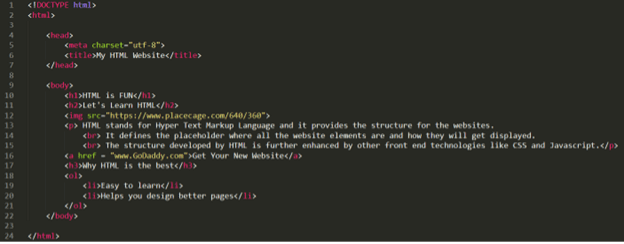
The image below will show how your code should look after incorporating all of the above HTML elements:
4. Saving and opening the HTML code
Now it’s time to view the results of your hard work. Save your file with an extension of .html on your computer. Select the file and open it with your browser (Chrome, Firefox, Safari, etc.).
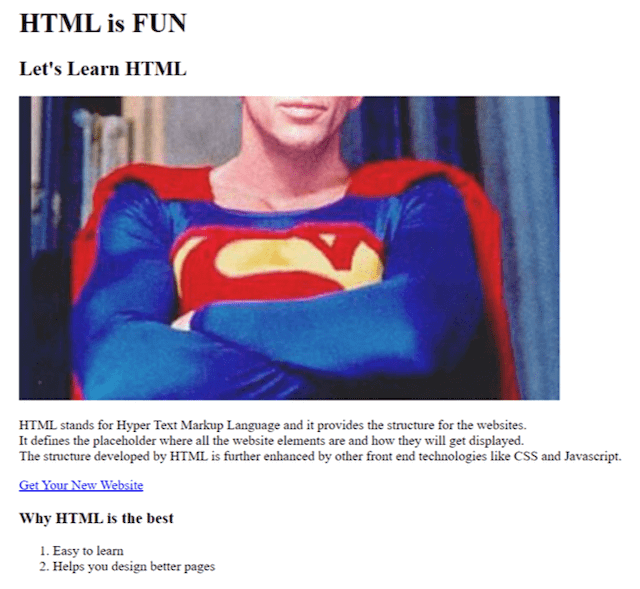
And this is how your page should look in the browser – granted your image choice may be slightly different.
Editor's note: Start a career in web design and development with a web certificate from GoDaddy Academy. Taught online by industry experts, the three video-based certifications end with a live project-based assessment.
Go forth and code
Congratulations! Now you know how to make a website using HTML. By now you should be familiar with:
- HTML page structure
- Tags
- Attributes
- Adding content on the web page
From here, you can continue to modify your web page and add additional content or style.
There are no limits to customization — you can add more sections to your page, play with different colors or add background images.
Feel proud to share your work on social media and seek out feedback to grow even more.
________________________________
Meet the 27-hour day
We built the Hub by GoDaddy Pro to save you time. Lots of time. Our members report saving an average three hours each month for every client website they maintain. Are you adding that kind of time to your day?


