Hosting an event for your business is a great way to not only promote your business but also to establish a better relationship with your audience and drive sales. But, if you want to host a successful event and ensure people show up, you have to promote it. And what’s the best way to promote your event? With a poster of course. Luckily, Microsoft 365’s Publisher makes creating an event poster easy.
First of all, you don’t even have to spend money on expensive software to create your poster. If you already have Microsoft 365, then you have Microsoft Publisher. This post will walk you through the steps to create a great poster for your event.
How to use Microsoft 365 Publisher to create an event poster
To get started with your poster design, launch Publisher in Microsoft 365. The first screen that loads will show you all the different page sizes and built-in templates.
For the purposes of this tutorial, we’ll start by selecting More Blank Page Sizes.
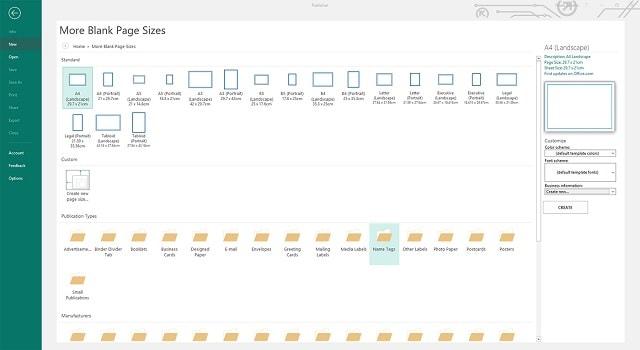
On the next screen, scroll down to Publication Types > Posters and then select the size you want your poster to be in. For the purposes of this tutorial, I’ve chosen the standard A2 size.
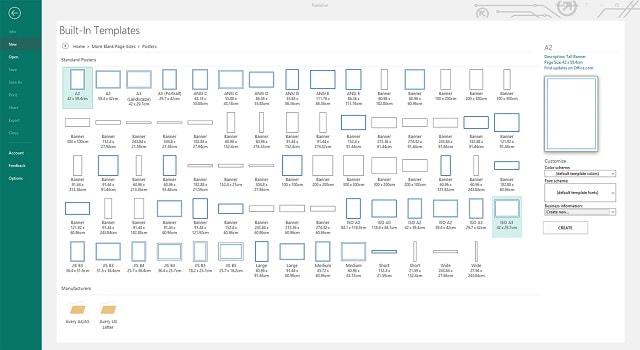
Once you’ve selected your document size, you’ll see the familiar Microsoft Office interface.
You can now start creating a poster for your event.
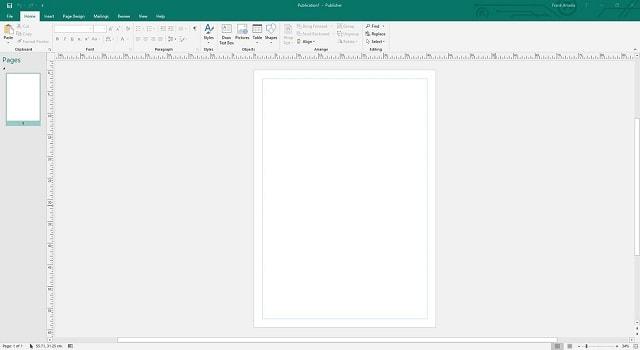
Using the tools available in the ribbon, you can add text, insert images, add shapes, background color and more. In this example, I’m creating a poster that will promote a weekend sale for a fictional florist boutique.
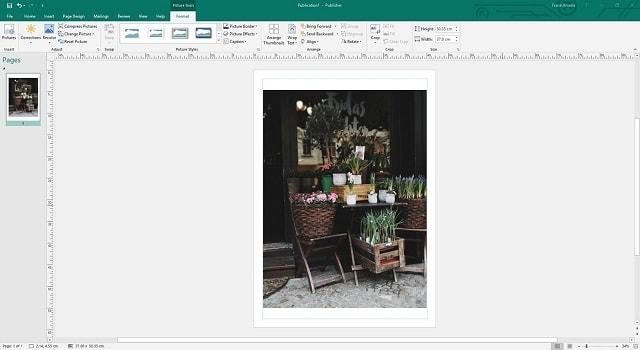
Let’s start by adding an image that will help us promote our event. Click Insert > Pictures and insert an image that you want to use for your event.
Using the guides, resize the image to fit your document and fill the entire background so that you’re not left with white edges when printing the document.
Related: How to use a stock photo 8 different ways
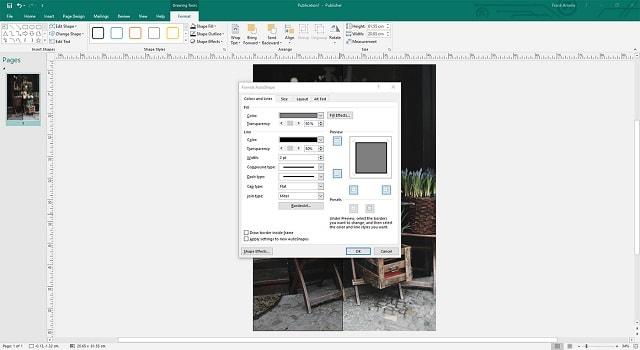
Next, let’s add a shape that’s going to serve as a background for the text. Click Insert > Shapes and select the rectangle shape. Using the shape guides, resize the shape so it covers the left half of the image. You can also change the shape’s color so that it matches the color scheme of the image or your brand’s colors. To change the color, select the Format tab and click Shape Fill and Shape Outline.
If you want to make the shape transparent, make sure it’s selected, then right-click on it and adjust the transparency to your liking.
Related: 3 must-know Photoshop tricks for beginners
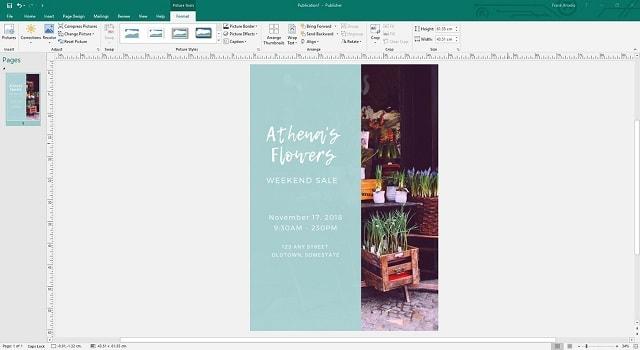
Once you’ve customized the shape to your liking, it’s time to add the text with information about your event. Click on the Home tab and select Draw text box tool. Drag out a text box and then click with your mouse inside the text box to start typing.
You can then enter your event details and modify the text. Use the “Font” tab to change the font and adjust the text size and color. Here’s what your finished poster — created with Microsoft 365’s Publisher — looks like.
Related: Know the ins and outs of fonts for better websites
How to prepare the document for printing
Once you’re happy with the design, you need to prepare the document for printing.
To do this, you’ll need to save a couple of versions of your document.
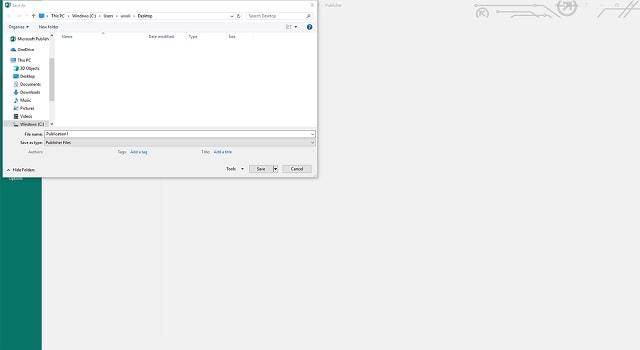
First, save your document in the Publisher format so you can easily edit it later on. Click File > Save and then select the location where you want to save it. When the Save as dialog appears, name your poster and make sure the file type is set to Publisher files.
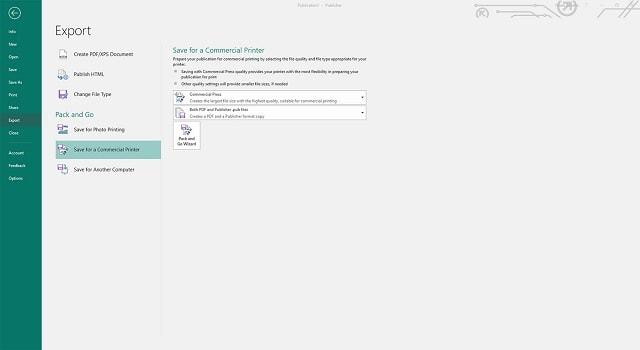
Next, you need to save it for printing. Click File again and this time select Export > Save for Commercial Printer. Select High-Quality Printing from the drop-down menu, click Pack and Go Wizard, and follow the prompts to export the file.
5 examples of using event posters to promote your business
The beauty of hosting events and using event posters to promote the event and your business at the same time is that it works for any type of industry. Below, you’ll see five examples of different types of businesses that have used events to raise brand awareness and connect with their audience.
-
San Francisco’s AIGA Chapter.
-
Local bar and coffee shop.
-
Rental company.
-
Bridal boutique.
-
Nonprofit organizations.
Let’s take a closer look at the examples and start thinking about how you might create an event poster with Microsoft 365’s Publisher for your business.
1. San Francisco’s local AIGA Chapter
The first example comes from Manual, a San Francisco design and branding studio. The studio designed a poster to raise money for their local AIGA chapter while celebrating San Francisco’s design community in 2013.
2. Local bar and coffee shop
In this example, you can see how a local coffee shop or a bar can use an event poster to promote a special event for their patrons. You can easily see who the event is for and when it’s happening.
Related: 6 ways to encourage regular customers at your local bar
3. Rental company
The next example shows a poster designed for a real estate company and their rental division. The poster offers plenty of details on what the event entails. It’s a great example of a simple design that shows even a solid color background paired with great typography can convey the right message.
4. Bridal boutique
Take a look at this lovely poster for a bridal showcase. The colors match the image perfectly and the layout of the poster makes it easy to see when and where the event is taking place.
5. Nonprofit organizations
Lastly, if you’re a nonprofit organization, you can see from this example how you can promote an event that will help you raise the awareness about your cause or the needed funds.
Final thoughts
As you can see, creating an event poster is not as difficult as it seems. Use this article to guide you in the process of designing a poster with Microsoft 365 Publisher for your event so you can meet your revenue goals, grow your brand, and connect with your customers.
Editor’s note: Ready to start creating stunning event posters for your business with Publisher in Microsoft 365? Check out Microsoft 365 from GoDaddy and get started in no time. You’ll even get access to 24/7 support.
