Updated Sept. 16, 2018 — If you sell anything online then you know your image game needs to be top notch. And a freelance designer can run you between $25 to $300 per hour. So if you’re a newer business and a professional designer just isn’t in the cards for you, then that means you may need to do it yourself. Using a tool like Photoshop will help make your images look more professional than other cheaper or free tools. And the 5 Photoshop tricks (yes, that’s two new tricks since this article was first published) below will get you started in the right direction.
I’ve been using Photoshop for a long time. Like since Photoshop 2.0. That’s not CS2 or CC that’s TWO DOT O. I don’t think it was even an Adobe product back then! In the years since, I’ve gobbled up knowledge at Photoshop conferences, and stood in the aisle at Barnes & Noble, frantically jotting down info from Scott Kelby’s Hot Tips books — remember those? Well, Photoshop has come a long way, and in that time I’ve tucked away a few must-know Photoshop tricks.
Related: How to set professional, fair and profitable freelance graphic design rates
5 Photoshop tricks for beginners
The five tricks I’m sharing with you today have been so useful that I’ve pulled them out of my sleeve nearly every day of my design career. They’ve become so second-hand in my workflow that I’m surprised when a designer friend is looking over my shoulder and says, “Hey! How did you do that?!”
-
Make things bigger with the crop tool.
-
Save time and effort with Smart Objects.
-
Save out all your design ideas FAST with Layer Comps.
-
Remove white backgrounds from logos.
-
Get Photoshop on the cheap.
I’m always thrilled to share, so let’s dig in!
1. Make things BIGGER with the crop tool
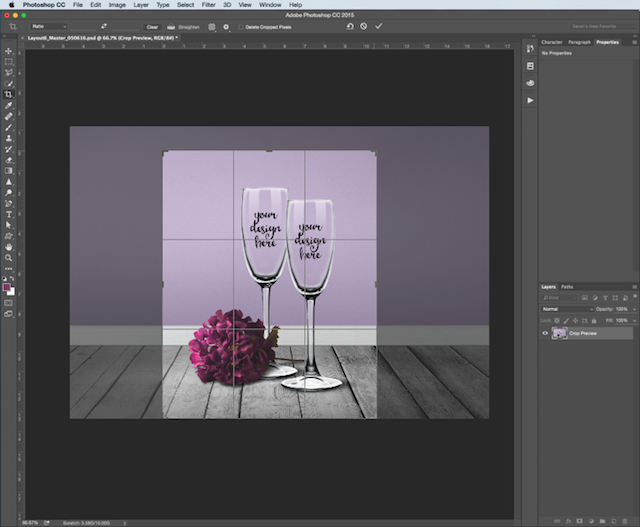
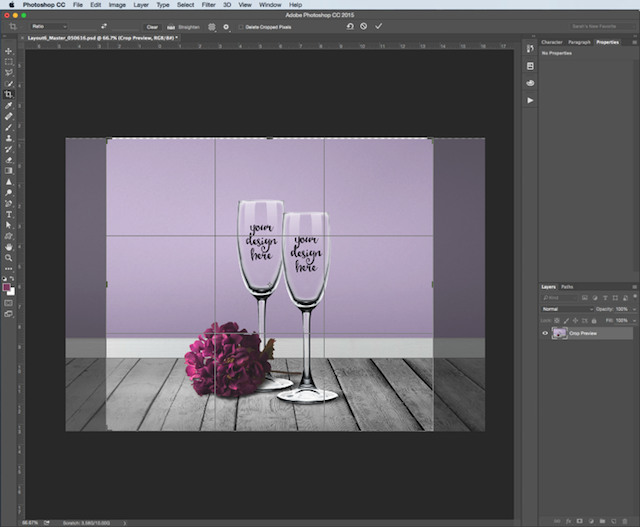
You’re probably shaking your head right now thinking, “Um, Sarah, the crop tool is for cropping. Which means it makes things smaller, not larger, right?” Well guess what? Not true! Actually it is true, but it’s also true that you can crop things larger.
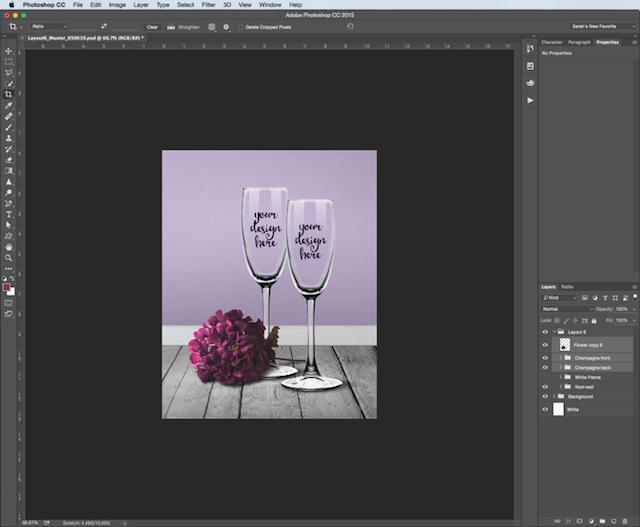
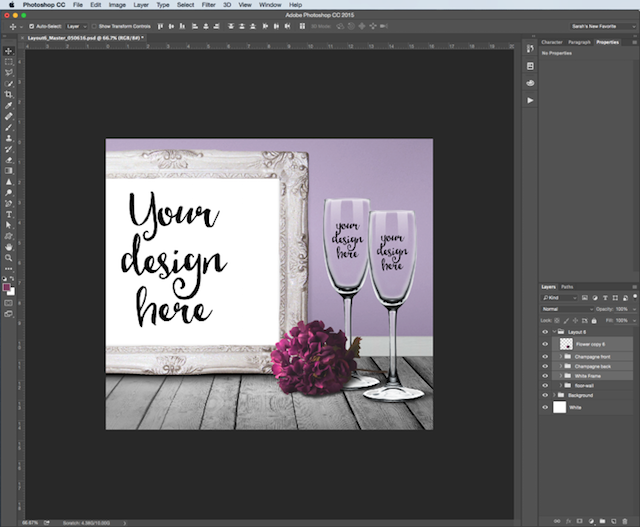
This example file is one of the mockup template files that I teach people to use in their Etsy shops. I want to make my design area larger so I can insert a frame into the scene, next to the champagne glasses.
Resizing the “old” way (Photoshop menu)
If you want to make your image bigger the old fashioned way, here’s what you do:
1. Gather your original image.
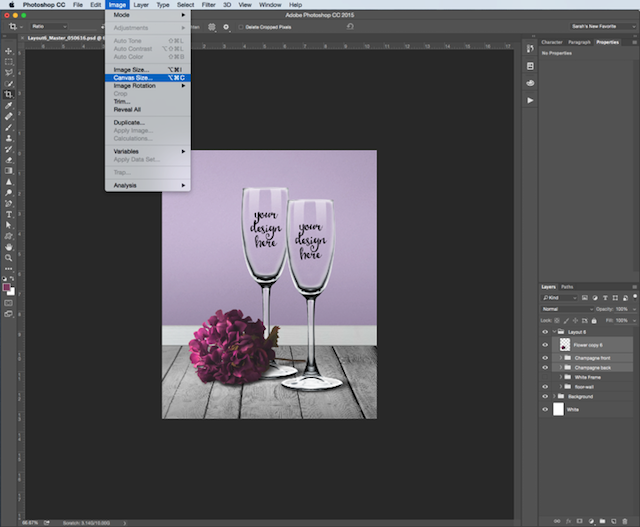
2. Go up to the menu and select Image > Canvas Size.
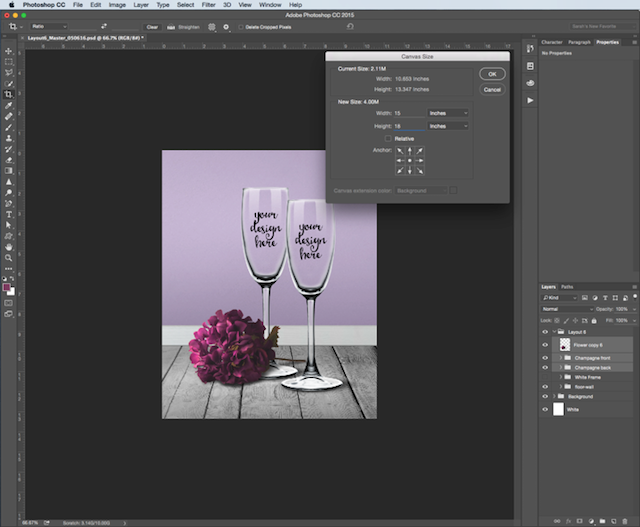
The Canvas size window pops up.
3. Estimate how big you want your canvas to be, and type that into the width and height.
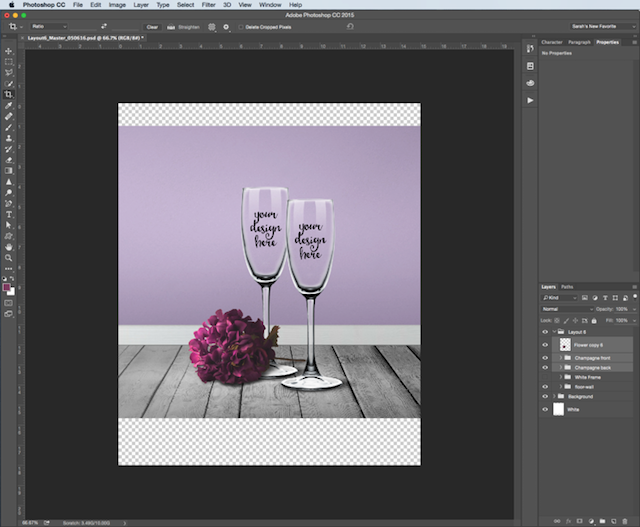
Then you get your result … and realize you estimated wrong and it’s too large.
4. Use your crop tool to fix it.
Then you’re ready to finalize your design. This is an acceptable way of adjusting canvas size — unless you’re in a hurry. Then it’s one step too many!
Resizing the “new” way (crop tool)
If you use the cropping technique all you have to do is hit “C” on your keyboard (to get the crop tool), grab a corner or an edge, and drag it out to wherever you want. The image is instantly larger. Nice!
1. Press “C” on keyboard to get your cropping tool (or choose from left toolbar).
2. Drag out from corners and edges until desired size.
Done! Now you can finalize your lovely new layout.
2. Save time and effort with Smart Objects
Next on my must-know list of Photoshop Tricks is Smart Objects. This is one of the most amazing features of any program that I use. I’d pay the monthly Creative Cloud fee for just this feature alone if I had to. Adobe defines smart objects like so:
“Smart Objects preserve an image's source content with all its original characteristics, enabling you to perform nondestructive editing to the layer.”
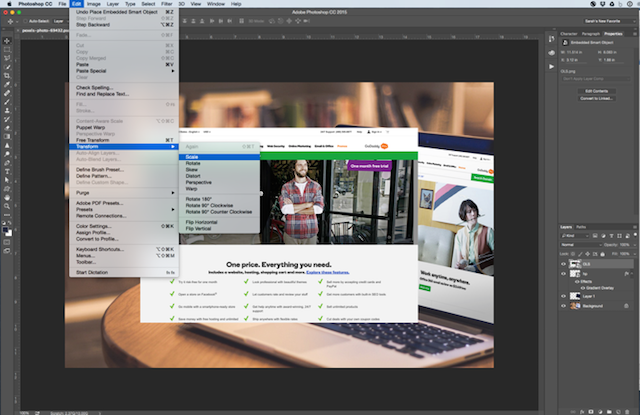
What this really means is that you can create a special layer in your document that has filters applied to it, or blurring, or weird angles and perspectives, and then replace the image in that layer with a new one with just a few mouse clicks.
In 10 Things You Need to Know About Smart Objects in Photoshop you can read even more fun detail about some of the ins and outs of smart objects. And if you want to learn to do this step-by-step for product images (like mugs, and glassware) for your eCommerce shop, head over and enroll in my Photoshop Mockup Mastery course.
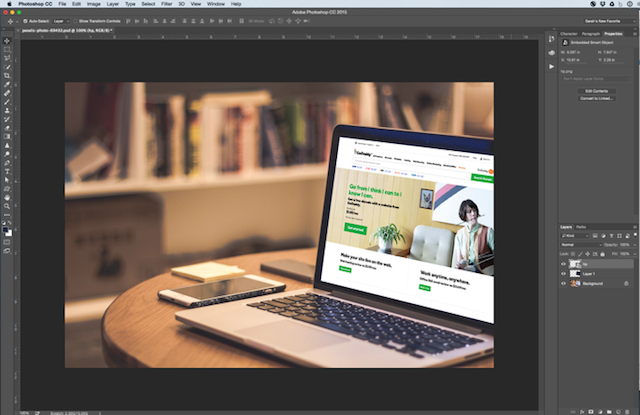
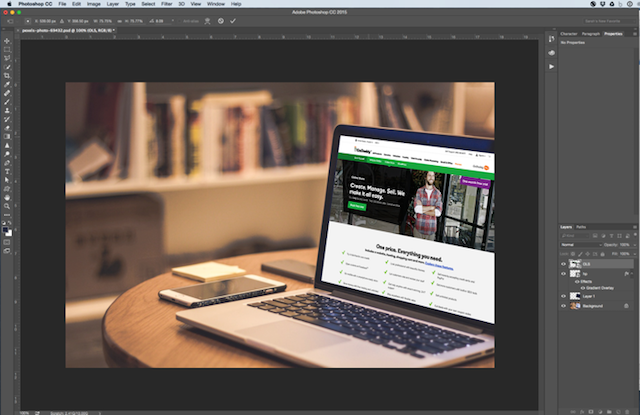
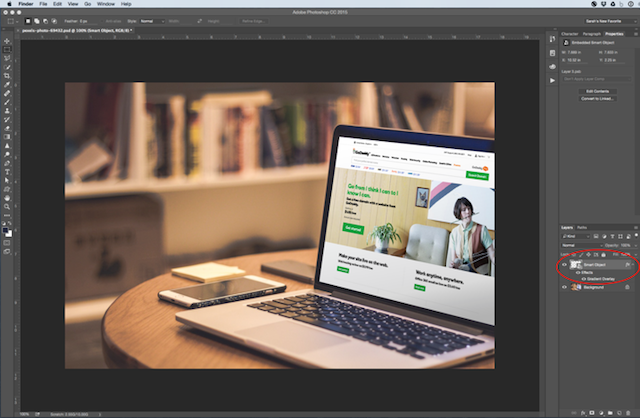
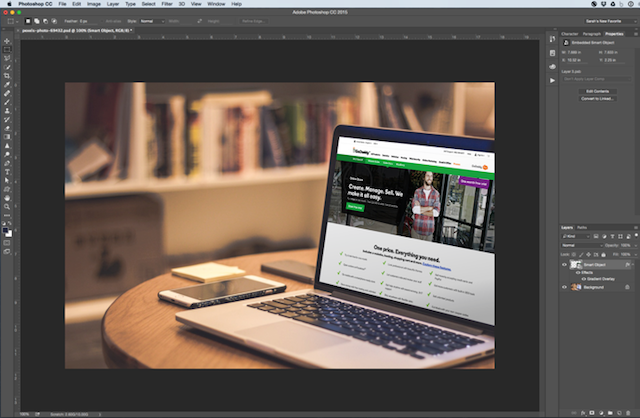
For example: say you want to switch out the image showing on the monitor in this design.
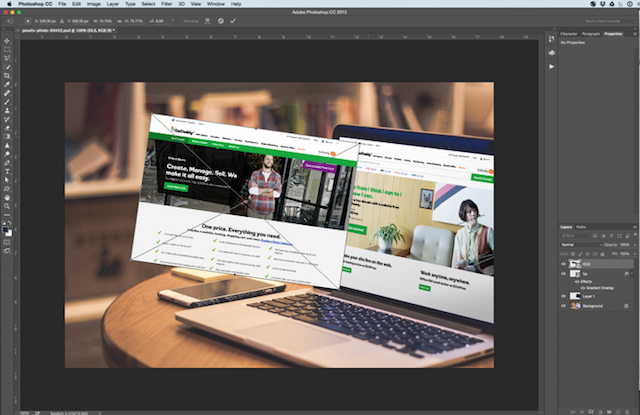
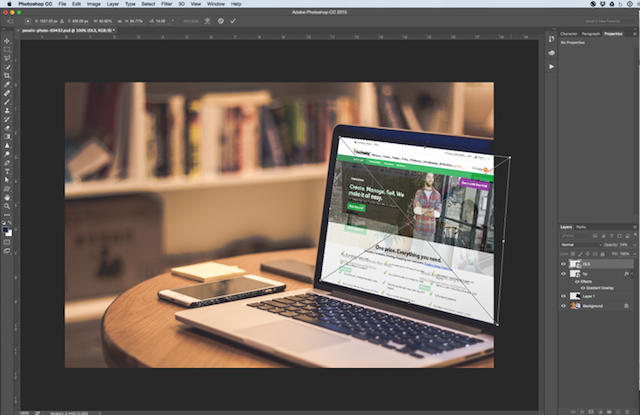
When you first created this design, you brought in a screenshot and angled it, and added effects to it so it looked great in the scene. If you aren’t using Smart Objects, then you have to do these steps all over again:
1. Bring screenshot into design and use transform tool to reduce size.
2. Transform to change angle.
3. Transform to alter perspective.
4. Apply any additional effects, and then you’re done.
We don’t want to have to repeat these steps with every new screenshot that comes along. There’s an easier way! If your screen is a smart object, all you have to do to change out the image is:
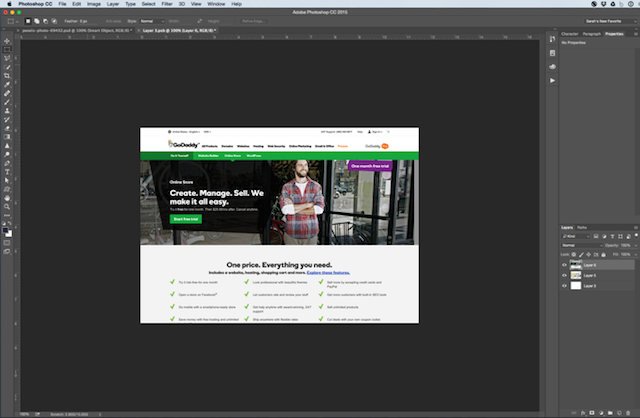
1. Double-click to open the smart object.
2. Paste in your new design.
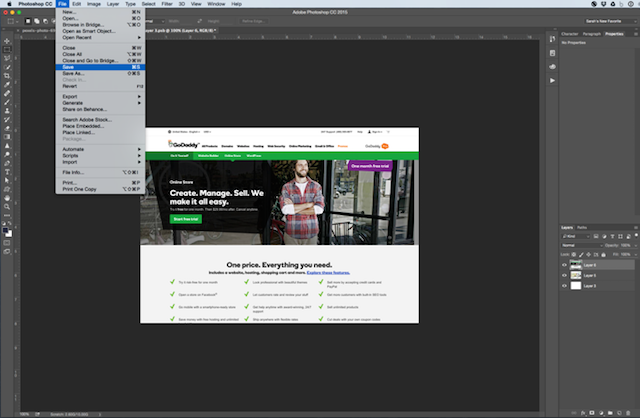
3. Hit save.
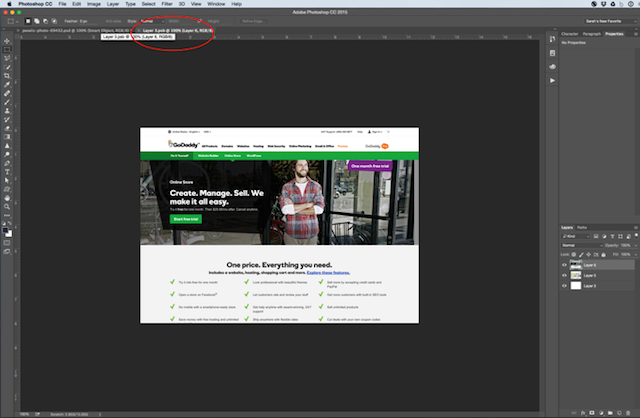
4. Close your smart object tab.
And you’re done!
3. Save out all your design ideas FAST with Layer Comps
Have you ever worked on a design and come up with oh, about 500 ideas for how it should look? Then you make, oh about 1,000 layer combinations for those ideas? Then when you go to show your ideas to your client (or yourself), you can’t remember which layers to turn on and off to see your 500 designs? Yeah. Me, too.
This is where Layer Comps come to the rescue. Layer Comps allow you to click once to turn on and off all the necessary layers to show your designs. You can make a layer comp for every design iteration you have tossed into your layers palette :D
This is useful for two reasons:
- Now you can quickly view your design iterations by clicking on them in the Layer Comps palette and letting Photoshop turn on and off the requisite layers for you.
- And you can even use Photoshop automation to save out all the Layer Comps to a folder for you so you can send them to a client for review!
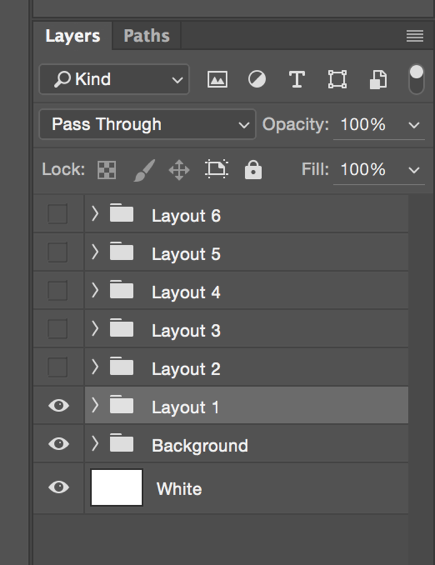
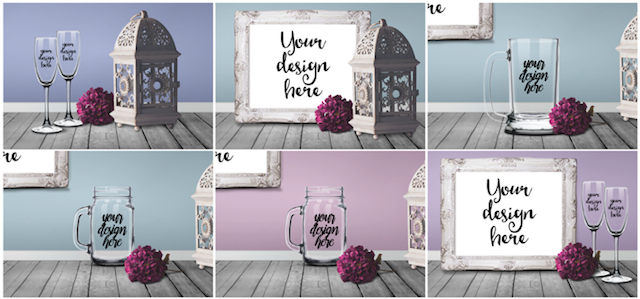
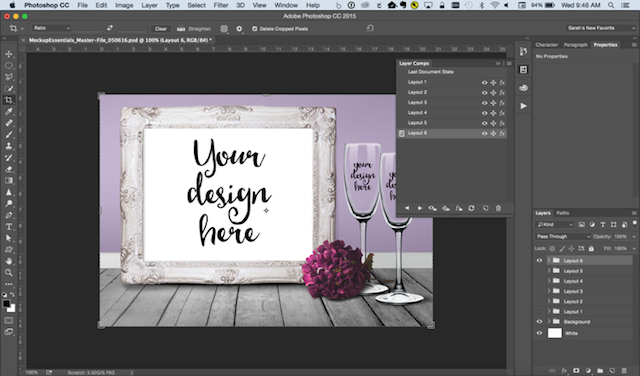
For example, this document has six layers in it, showcasing my six designs.
We want to be able to click through each of those designs without turning on and off layer visibility on each layer. So the first step is to make layer comps for each of them.
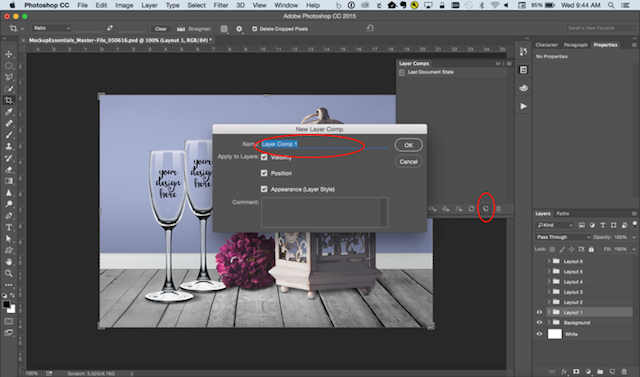
1. Turn on your layers palette by going to Window > Layer Comps.
2. Turn on visibility for the first layer (“Layout 1”) by clicking the “eye” icon next to it.
3. In the Layer Comps menu, click the little dog-eared page icon that’s next to the trashcan to make a new Layer Comp.
4. Click in the box to name it.
We’ll call it “Layout 1” to match the Layer name. Now it will appear in your Layer Comps palette.
5. Repeat this step until you have six layer comps representing the six layers.
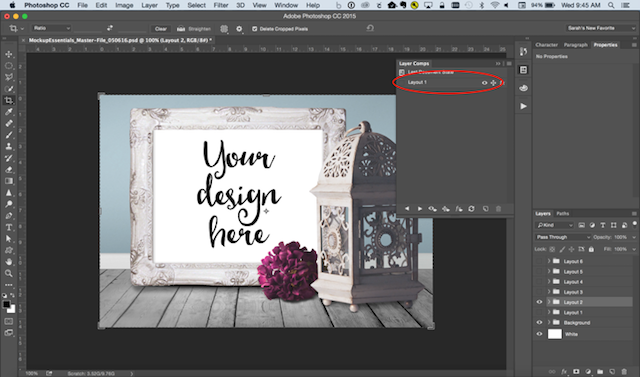
Now when you want to see a layout, just click it in the layer comps and it will turn off the visibility of the layer you’re on (ie: Layout 6), and turn on the visibility of the layer you want to see. (ie: Layout 2):
You can see how this is a speedier way to see different iterations of your designs. But the excitement doesn’t stop here — you can also have Photoshop automatically save all your designs out to a folder with just a click or two.
Saving out Layer Comps
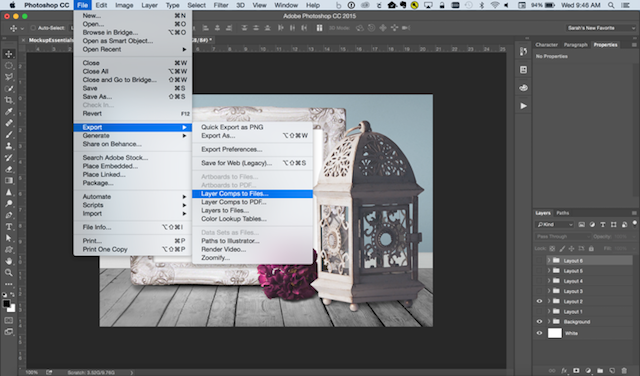
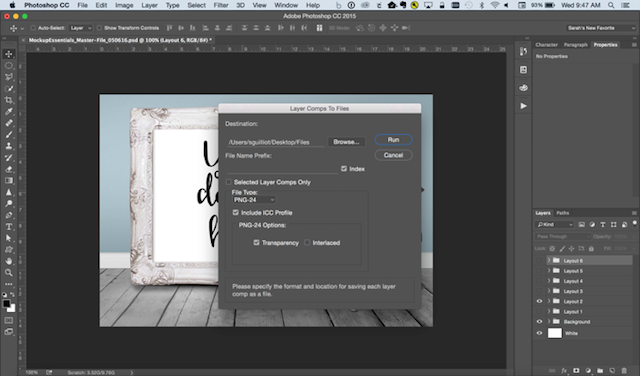
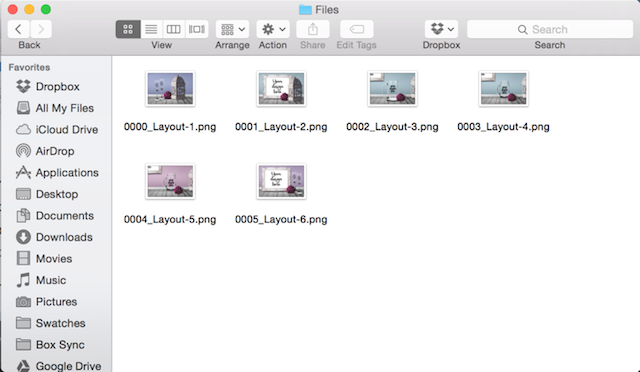
1. Go to File > Export > Layer Comps to Files, and choose a folder for them to save into.
2. Then hit Run and sit back while Photoshop does all the work.
All the files export into the folder you chose, ready and waiting for you!
4. Remove white backgrounds from logos
Sometimes when you create images for your website, you’ll want to add your logo to it. Like if you have a T-shirt, or a water bottle in a photo, and you want it to look branded to you. This is called a mockup, and is similar to the idea I showed above where we put a screenshot of a website into a photo of a computer monitor.
It’s really easy to do if you have a transparent version of your logo, but what if it’s flattened onto a white background?
There are many ways to fix this, but one of the fastest is by using a tool inside Photoshop called multiply. Here’s how you can do it, step-by-step:
1. Start with your base photo.
This one features a background image and a skinny acrylic tumbler mockup file. We want to add my logo on top.

2. Drag the logo into your Photoshop window and place it into position on the bottle.

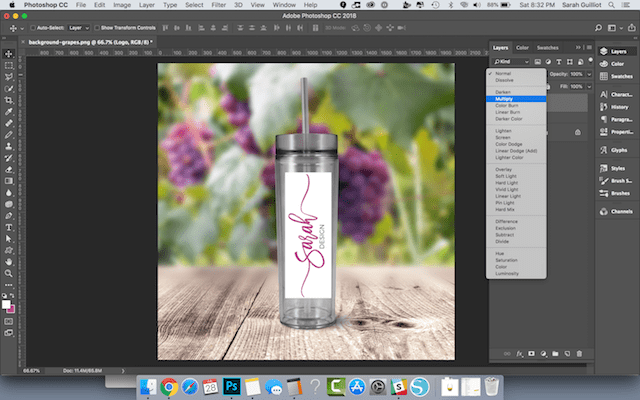
3. In the layers palette on the right (if this isn’t showing, go to your top menu and look in the “Window” tab), make sure your logo layer is selected.
Go up to the drop-down menu just above. It should say “Normal”.
4. Open that menu up and choose Multiply from the list of options.
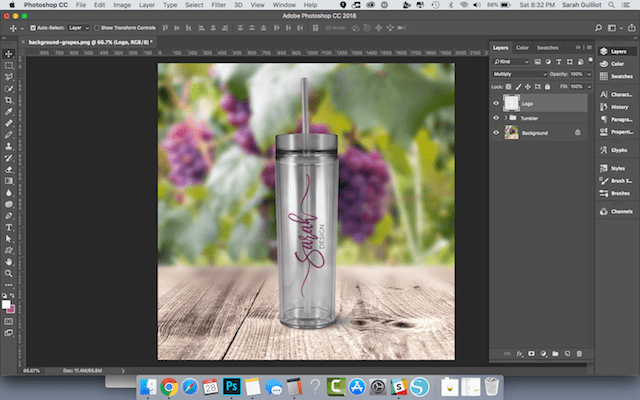
And just like that, your white background disappears! And the logo looks like it’s fitting right into the scene.
Related: How to use Canva to create branded images in less than an hour
5. Get Photoshop on the cheap
If you don’t have Photoshop yet, and this article has you just about convinced to get it, but you aren’t sure if you have the funds, I have a well-kept secret to share with you. You can get Photoshop Creative Cloud for a very affordable monthly fee on the Photography Plan — and it includes Lightroom, too! Plus, there’s a free trial so you can give these tricks a whirl before you totally commit. Just head over to this page to sign up for the Photography Plan.
For the free trial, just click the button that’s up in the top navigation:

And if you click the “Choose a Plan” button under the image, that will bring up a window where you can find the plan I’m talking about. Or, if you’d rather get the whole suite of Adobe tools, there’s an option for that as well.
No more waiting — it’s time to have fun! Head on over, and sign up for Photoshop today, so you can try out all these Photoshop tricks for yourself.
If you need images to play with, be sure to head to my website and sign up for some free mockups and get access to my newsletter for the free resource library. It’s perfect for crafters who sell customized drinkware, clothing, printables and wood signs.

