Depending on the niche, events can be an important part of a business, organization or even trade shows. Whether events need to be integrated into an existing website or the need is for a fully dedicated website, WooCommerce makes events and admission pretty easy to set up with the use of plugins. You could also sell tickets or charge admission. The best part is it is all free If you or your client simply require the basics. Features and functionality can of course be taken up a few notches for a fee.
Launch your business in minutes with GoDaddy Airo™
Save time getting online
With GoDaddy Managed WooCommerce Stores, you save time getting online. It includes the features to help you with the strategies we’re about to cover — it’s not just about getting a domain and hosting.
This high-performance platform optimized for WordPress also includes tools for security, shipping, payments and site performance.
Once your WooCommerce store is up and running, it’s easy to track orders with customizable sequential order numbering, keep an eye on profitability with native COGS tracking, and monitor store performance using advanced and integrated Google Analytics.
The main plugins I’ll be using for this article are The Events Calendar, Event Tickets, and WooCommerce. With the exception of WooCommerce, you don’t have to use these plugins specifically. If you search for the word “events” in the WordPress Plugins section you’ll find plenty of other plugins that serve a similar purpose.
I’ve used The Events Calendar since way back when they were called Modern Tribe Events Calendar. Many WordPress themes used to come bundled with this plugin, and still do. It has a current rating of 4.5 stars with over 800,000 installs on WordPress. They do a pretty good job of keeping their plugin up to date, too, so that’s why I chose them. The same team that created The Events Calendar also created the Event Tickets plugin, which we'll also be using here.
For this article I’m just going to use the Storefront theme by Woocommerce. I’ll also be using the built-in Gutenberg editor. Why? Why not? It's free, it works out of the box and can be upgraded later if needed. In fact, everything we’re using here outside of hosting is free and can be upgraded later for more advanced features.
Working with events in WooCommerce
With The Events Calendar creating an event is just about as straightforward as creating a post in WordPress, but with a few more options. I’ll go over a few of those options before actually creating an event.
Categories can be created if there are going to be a lot of different event types.
For example, a business might be involved in expos and trade shows. It might make sense to create a category for each of those even types. Maybe the website is entertainment-based and sells tickets to movies and concerts. Again, it would make sense to create categories for each type.
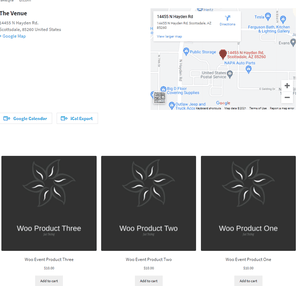
Venues and organizers can be created either on the fly while creating an event. Each time a venue or organizer is created from within an events post those venues/organizers are saved to the Venue or Organizer sections of The Events Calendar and can be used again for other event listings.
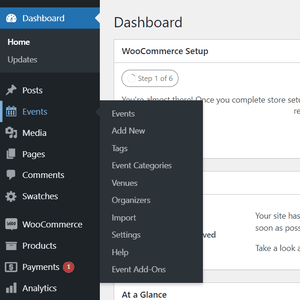
From the WordPress Admin Dashboard, you can mouse over Events in the main left menu where you’ll find the different sections like Event Categories, Venues, and Organizers.
It is worth noting that The Events Calendar enables the Classic Editor plugin by default instead of Gutenberg. Using the classic editor is a bit simpler than Gutenberg for this application, but with Gutenberg enabled for The Events Calendar, blocks can be added to the default events layout.
Later in this article, I’ll explain how to sell products or admission to an event with WooCommerce, but before that can be done Gutenberg will need to be enabled in The Events Calendar settings. Here’s how to do that:
- From the WordPress Admin Dashboard, mouse over Events in the main left menu, and then click Settings.
- Scroll down to General Settings and ensure Activate Block Editor for Events is ticked.
- Scroll down, and then click Save Changes.

Now is probably a good time to point out that The Events Calendar provides a Google Maps API key by default which is used to display a map for venues. You may want to use your own API key if you or your client require additional functionality.
To view the Google Maps API Key settings just mouse over Events in the WordPress admin dashboard main left menu and click settings. From there, click on the Integrations tab. There will be a link and instructions on this page for using a custom key.

Create an event in the Gutenberg Editor
- To create a new event, simply mouse over Events, and then click Add New.
- Fille out event-related data, including Title, Date & Time, Description, Price, Organizer, Venue, Event Website (if external), and sharing options for Google Calendar or iCal.
- Set a featured image for archives in the right sidebar under the Event tab (16:9 ratio works best).
- Select a category under the Events tab (if you’re using categories).
- Click Save Draft or Publish when your event is ready for public viewing.
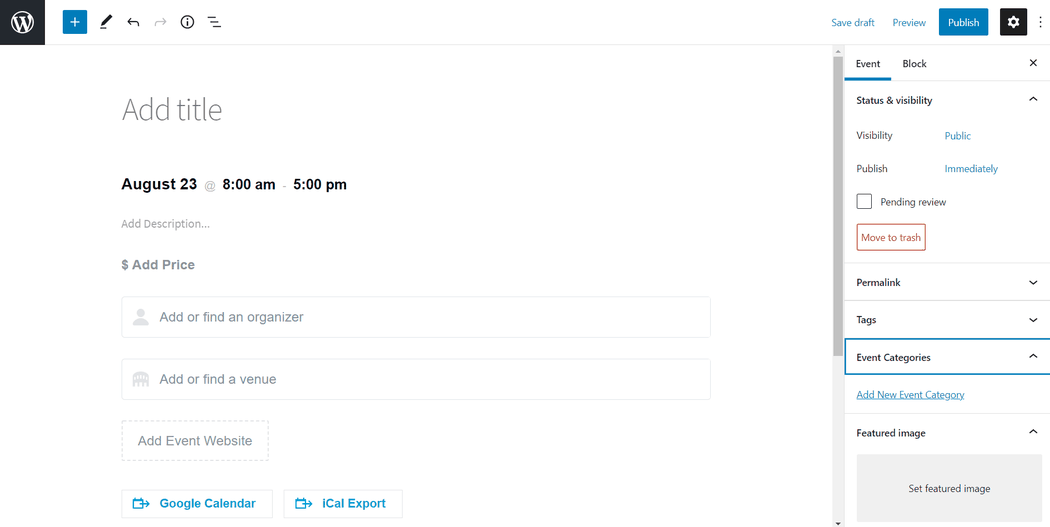
A quick note on the featured image: When you set a featured image on an event it will be displayed in archives. It will not, however, be displayed at the top of the event page. To display the featured image on the page itself, just add a new block, and then add the Featured Image block.
I’ll cover how to add blocks in Gutenberg in just a moment.
Creating an event in the Gutenberg editor is fairly straightforward. Just be sure to fill out as much information as possible in each section to ensure your event pages populate information properly. When using the Gutenberg editor, additional blocks can be added to an events page. Any available block can be added to the page making it possible to enhance layouts and information.
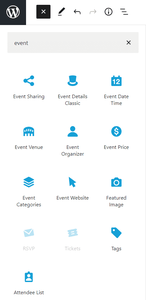
The Events Calendar even comes with its own set of blocks that can be added to any page. Take a look at my post How to create beautiful WooCommerce pages using only the free storefront and Gutenberg editor, and scroll down to the section titled Adding blocks for a quick primer on adding blocks using the Gutenberg editor.
Selling tickets & admission with WooCommerce
Because WooCommerce allows for the sale of virtual products, this makes selling admission pretty easy. Just create the product as usual, but make sure the Virtual box is ticked in the Product data section. This prevents shipping or other charges that may be associated with physical products.

Since any available block can be added to an event’s page, WooCommerce products can be inserted directly into event pages. I’ve used this method for my own clients. Customers get an email copy of their order complete with an order number for verification. Admins can manage all orders via the WooCommerce Orders page.

See How to create beautiful WooCommerce pages using only the free storefront and Gutenberg editor and scroll down to Adding Product Sections to get some ideas for adding WooCommerce products to even pages.
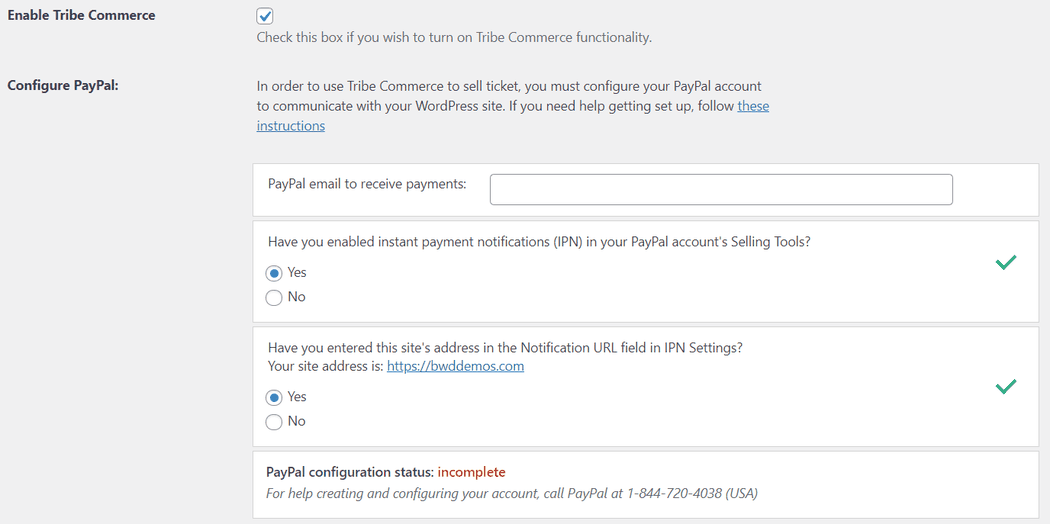
The premium version (paid) Event Tickets plugin allows for the selling of tickets via WooCommerce. The free version of Event Tickets allows for the selling of tickets without WooCommerce, though you’ll need a PayPal account and Tribe Commerce will need to be enabled.
Here's how to set it up (assuming you have Event Tickets installed).
- From the WordPress Admin Dashboard, mouse over Events, and then click Settings.
- Click the Tickets tab.
- Scroll down to the Tribe Commerce section and make sure the Enable Tribe Commerce box is ticked.
- Complete the Configure PayPal section just below the previous section.
- Adjust additional settings as needed.
- Click Save Changes at the bottom of the page.
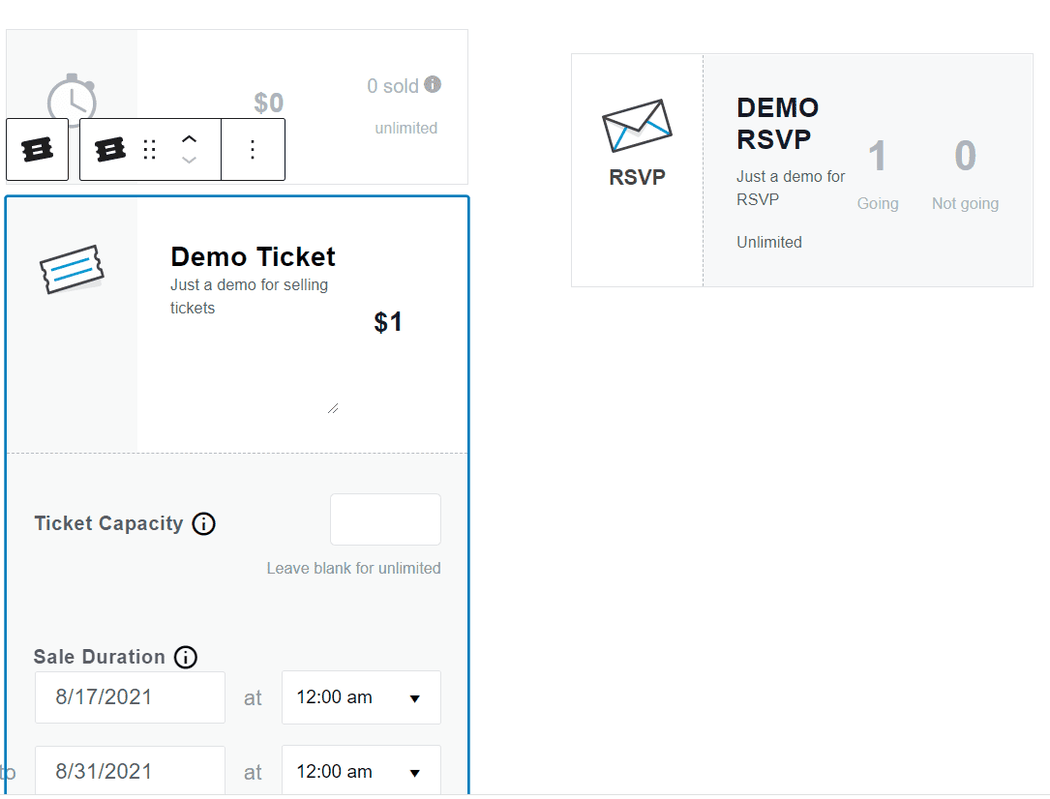
After the Event Tickets settings have been configured, the Tickets block can be added to the events page. Just add the Tickets block the same way any other block is added and fill in the information. As a bonus, the Event Tickets plugin comes with an RSVP block which provides additional features for events. It isn’t necessary to sell tickets, though it is a nice additional feature.
A dedicated events website
The free version of The Events Calendar doesn’t come with a lot of blocks for use on pages. In fact, there are only three by default that can be used globally. Those are RSVP, Tickets, and Attendees list.
I say this because without upgrading to the pro version, they don’t offer a lot of ways to spruce up your homepage for a website fully dedicated to events.
When creating a website dedicated to events, I would recommend purchasing a theme with The Events Calendar Pro Bundled in. These can be found on marketplaces like ThemeForest. Purchasing a theme that includes the plugin often expands the functionality without actually paying for the upgrade to pro.
If the annual subscription cost won’t be an issue, by all means, upgrade to unlock the full potential and enhance homepage layout capabilities with additional blocks included with the pro version.
That isn’t to say there’s no way to create a good homepage using the free version of The Events Calendar. It just takes a little more work and thought than simply using widgets.
If you would like to start out with the free version and let your clients decide whether or not to upgrade, you can take advantage of Gutenburg’s built-in blocks like the Cover block which will allow for buttons and custom links to be inserted. Covers can be created to link to single events and event categories.
If you’ve looked at the article I linked to previously when discussing blocks, you’ll see how to work with the cover block. A suggestion might be creating a header cover block that links to the newest event. You might use multiple columns with a cover block in each to link to single events or event categories sprinkled across the homepage.
Integrating events into an existing website
This is mostly a no-brainer. Just set up the events and add the categories or important events to the website’s menu. By default, The Events Calendar plugin creates an archive page with a slug called “events”. The archive can be viewed by going to the site url followed by /events/.
The slug can be changed in The Events Calendar General settings.
To do that, mouse over Events from the WordPress Admin Dashboard main left menu and click Settings. From there, scroll down to Events URL slug and add the slug of your choosing. As an example, if the website is dedicated to concerts the slug could be changed to “concerts." This would, of course, show an archive of concerts.
The basic functionality of The Events Calendar plugin is pretty good and gets the job done especially for just integrating events into an existing website. The premium version offers a lot more in the way of customization and features.
I didn’t get into the advanced features of the premium version since it is really beyond the scope of this article. As I’ve said in the past there’s no harm in starting with the basics and upgrading later should you or your clients require it.
Even with the basics your clients will be thrilled with the ability to highlight events, and sell tickets and admission.


