As a small business owner, one of the best ways for you to reach more customers is to meet them where they are — and increasingly, this is on social media. Facebook remains one of the most popular social media platforms, with over 2 billion visitors each day, so it can be an incredibly powerful channel for your business. With a Facebook business Page, you can promote your store and increase your sales by getting your content in front of a global audience.
In this article, you’ll learn everything you need to know to create, manage, and promote your Facebook business Page.
Launch your business in minutes with GoDaddy Airo™
What is a Facebook business Page?
A Facebook business Page is a special type of Facebook profile dedicated to businesses. Like other Facebook profiles, business Pages are free to create. When you create a Facebook business account, you can share content about your business, promote your store, and interact with your customers. You can also leverage additional ecommerce tooling, such as Facebook Ads and Facebook Shop, to promote and even sell your products through Facebook.
Facebook users who are interested in your store can “like” your business Page to follow your activity more closely — but since business Pages are typically public, customers don’t have to actively follow you in order to see your Page.
How to set up a Facebook business Page
In this section, we’ll go over all the steps required to create a Facebook business Page.
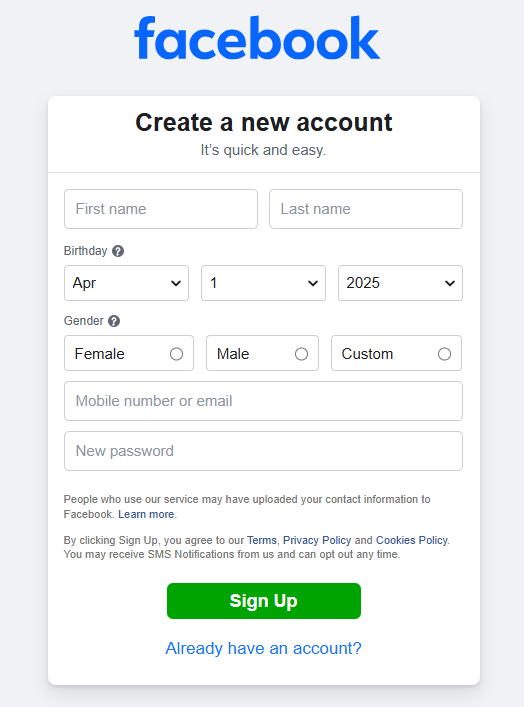
Step 1: Create a personal Facebook account
Before creating a business Page, you must have a personal Facebook profile. Even if you already have a personal profile, you may want to create a separate profile specifically for your business. However, your personal profile and your business Page are considered separate, so you don’t need to worry about information or activity from your personal profile accidentally appearing on your business Page.
To create a Facebook account:
- Go to Facebook.com.
- Click Create new account.
- Enter your name, email, password, and a few personal details.
- Click Sign Up.
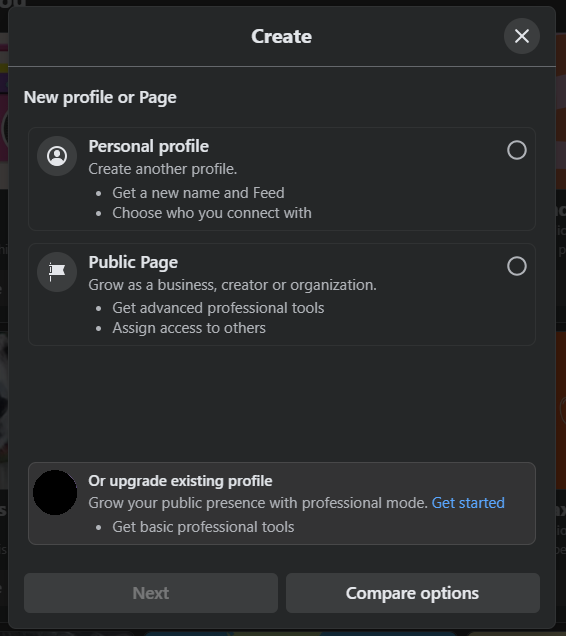
Step 2: Create your new Facebook business Page
Once you’ve logged into your Facebook profile, you’re ready to create a Page:
- In the left-hand toolbar, click the See more link to expand the full menu.
- From the expanded menu, click Pages.
- Then, at the top left corner, click Create new profile or Page.
- From the popup window, select the Public Page option.
Step 3: Provide basic details about your business
Next, it’s time to add some general details about your business, which you will see populate in the preview as you work:
- Page Name: Enter the public title for your Facebook business Page. Most commonly, this will be the name of your business.
- Category: Choose one or more categories that best describe your business.
- Bio: Enter a brief description of your business. Treat this like a headline that gives visitors insight into your business and what makes you special. You can modify this bio later.
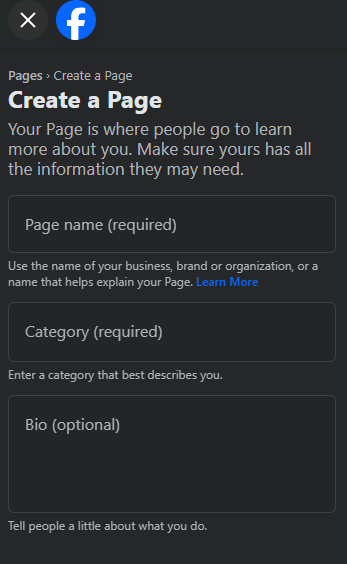
Once you’re satisfied with this information, click Create Page.
Step 4: Fill out contact and location info
You can now share the various ways that customers can contact your business. Be sure to include a website URL, so customers can visit your online store to learn more about you.
If you don’t have a website yet, you may want to build an online store to help establish a more permanent presence beyond your Facebook Page. To get started quickly, use a website builder tool to get up and running without having to invest in expensive and time-consuming web development services.
If your business has a brick-and-mortar location, you can also enter your address and share hours of operation.
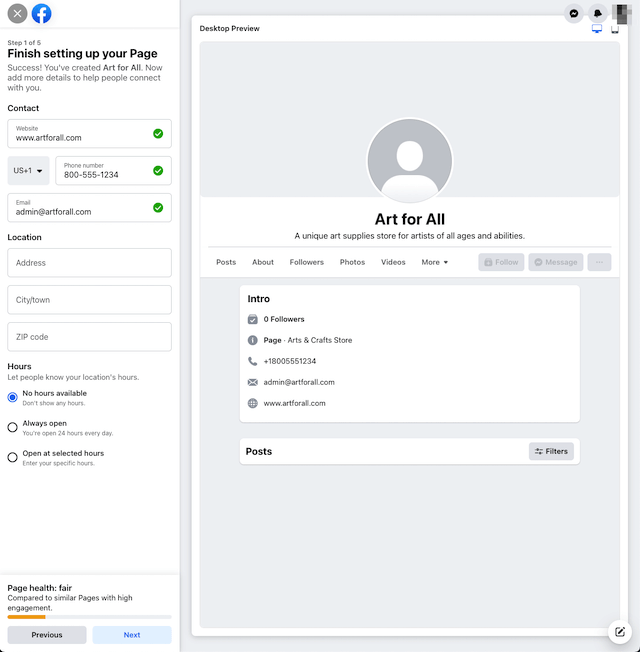
Click Next to proceed with setup.
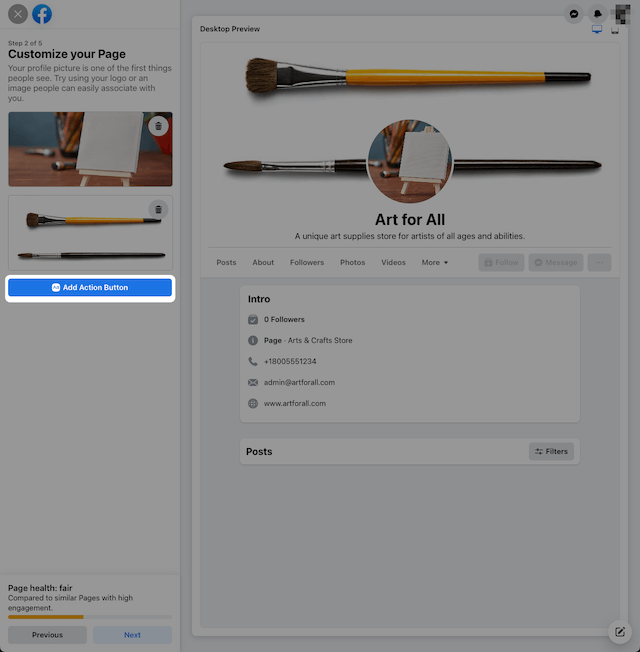
Step 5: Customize your profile picture, cover photo, and action button
You can update the profile picture and cover photo to customize the appearance of your Facebook business Page. To get started, you use your business logo as the profile picture and an image of some of your products or your brick-and-mortar location as your cover photo. Before uploading any photos, consult the recommended image sizes to avoid unpleasant distortion of your logo or other images.
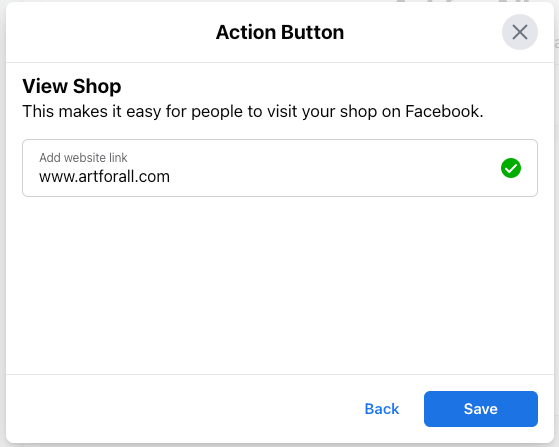
You can also add an action button to your Page, which is a call-to-action (CTA) for visitors to your Page. To add an action button:
1. Click Add Action Button.
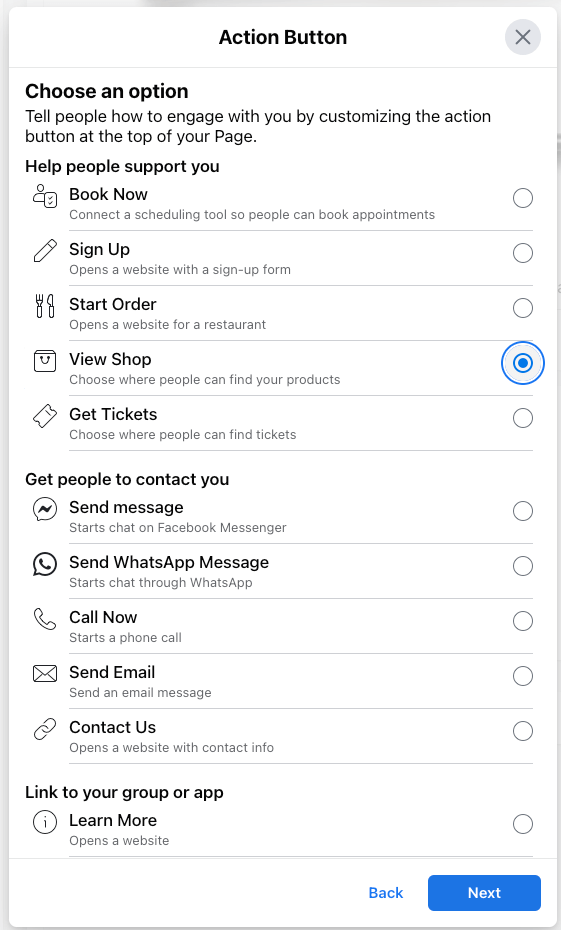
2. Choose from the various options for customizing the button text, such as asking users to visit your website, contact you via Messenger, and more.
3. Choose where the button sends users (i.e. what happens when people click the button) — you can direct users to your Facebook Shop, connect them to another tool that integrates with Facebook (such as your ecommerce site of choice), or link to a website.
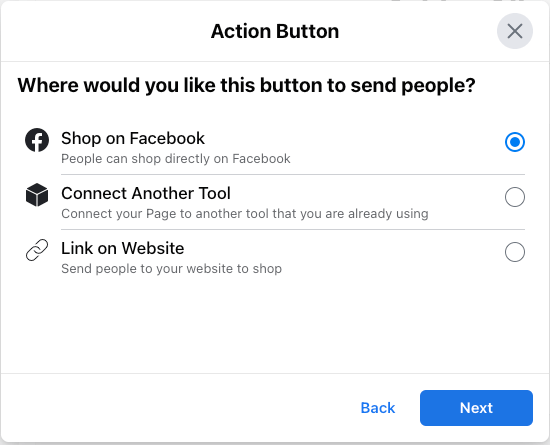
4. Next, finish setting up the button. The specific steps will vary based on your previous selection. In this example, we are directing the user to a website.
When you are happy with your photos and action buttons, click Next to proceed.
Step 6: Update privacy settings
Facebook allows Page owners to set multiple privacy guardrails for their businesses, including who can comment or like your Page, block various words, hide comments, etc.
For a full list of the privacy options available to Facebook Page users, check out the Facebook Help Center for more information.
Step 7: Add finishing touches
Before finishing up your Page setup, you can add a few optional finishing touches, such as:
- Connecting WhatsApp to your business Page to make it easier for customers to get in touch with you.
- Invite your friends to follow your page to jumpstart your following by inviting your Facebook friends network to follow your page.
- Opting into notifications and promotional emails to make sure you’re aware of activity on your Page and receive information about other related Meta services.
You can always complete these steps at a later time if you’re in a rush!
Step 8: Claim any duplicate Pages
If you have multiple business Pages, you may be able to merge them under certain conditions, including:
- They have the same name and represent the same business.
- They have the same physical address.
- They belong to the same Business Manager account.
You can check on Facebook’s Merge Request page to see if you have any Pages that can be merged.
Step 9: Add collaborators/admins
To make it easier to keep up with posting content and responding to customer inquiries, it can be helpful to give others access to manage your Facebook business Page. To add a collaborator:
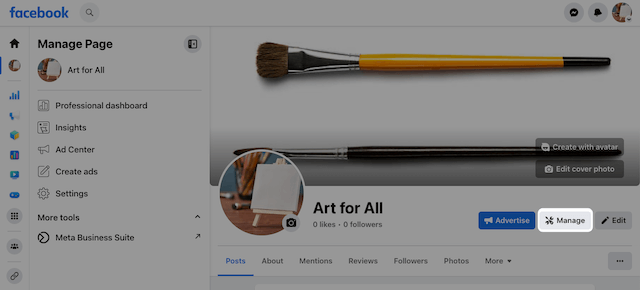
1. Go to your business Page and click Manage.
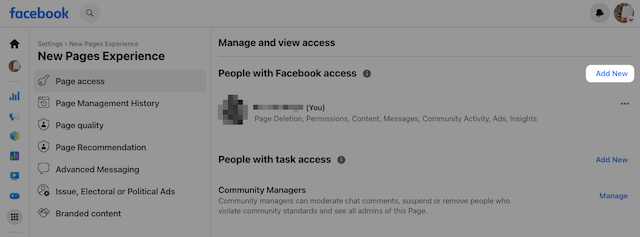
2. Click Page access and then select Add New.
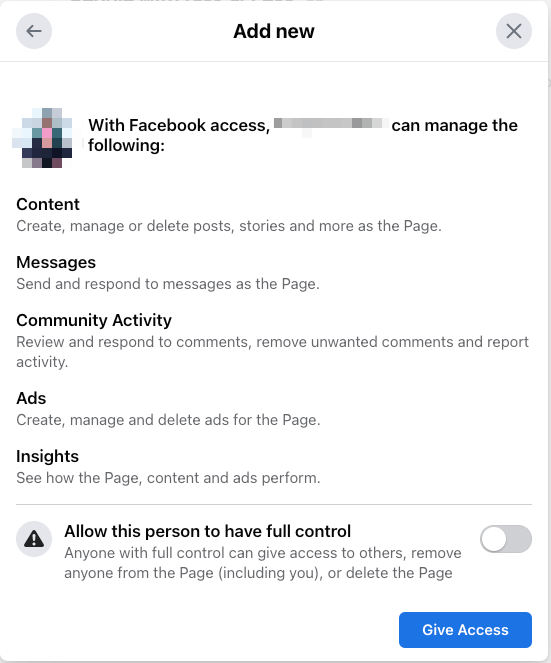
3. Follow the prompts and enter the name or email address of the person who should have access to manage the Page.
4. You can choose to give this person partial or complete control over your Page. Partial access covers most day-to-day activity, like posting content or messaging customers. With full control, this person can add other Page managers or even delete the Page. Click Give Access once you’ve made your selection.
Step 10: Review, polish, and publish
Your Page is now ready to go. Take another look at the Page itself and make any additional updates. Otherwise, you’re ready to start posting!
What is the difference between a Facebook Page and a business Page?
There's no real difference between a Facebook Page and a business Page. A Facebook Page is a general term for any Page on the platform, while a business Page specifically refers to Pages created for businesses, brands, or organizations. All business Pages are Facebook Pages, but not all Facebook Pages are business Pages.
Is it better to create a business Facebook Page or a personal account?
Creating a business Facebook Page is required for accounts doing business on Facebook. Beyond being required, though, a business Page offers greater professionalism, visibility, and credibility for a business. It provides access to valuable features like analytics tools, advertising options, and business-specific functions. Additionally, it allows for team management and keeps your personal and professional lives separate, all while complying with Facebook's terms of service.
Things to know about managing a Facebook business Page
Creating a Facebook business Page is only the beginning — there’s a lot more you need to know to really make the most of using Facebook for business. In this section, we’ll review some common management tasks you might encounter while running your Page.
First, if you plan on using Instagram for your business as well, we recommend getting familiar with Meta Business Suite. This free tool from Meta allows you to manage both your Facebook and Instagram business accounts from a single location.
For a deep dive into managing a Facebook business Page after the setup is complete, we recommend checking out our full guide on using Facebook for business here.
Share your business with the world
With its massive, global user base, Facebook is a smart choice for promoting your business and connecting with new and existing customers. After reading this article, you are ready to set up and manage a Page, create compelling content, and grow your followers. Remember to keep learning from data and analytics that Facebook makes available to you, so that you can learn more about what resonates best with your audience, stay on top of trends, and reach even more customers.
FAQ for Facebook for business
Does a Facebook business Page have to be linked to a personal account?
Yes, a Facebook business Page must be linked to a personal Facebook account. However, these are separate entities — you can easily switch back and forth between your personal profile and business profile. If desired, you can create a new personal account for your business Page, if you would like to add another layer of separation.
Is a Facebook business Page free?
Yes, it is completely free to create a Facebook business Page and post content. There are fees associated with running ads or boosting your Facebook content, but these are optional services.
How do I create a business Page on Facebook if I already have one?
There are no limits to the number of Pages you can create on Facebook. With that said, you should use only one Page per business, so that you can invest your time and effort in growing and maintaining a single Page presence and avoid confusing followers.
What is the difference between personal and Facebook business accounts?
All users on Facebook must have a Facebook account, which lets you create a personal profile, engage with other users, and create Pages.
However, a business manager account is required to interact with some business or ecommerce-specific tooling, such as running ads or accessing Facebook pixels to monitor traffic between your Page and your website. If you are running a business at least in part through Facebook, you’ll likely need a business manager account.
Can I separate my business Page from my personal account on Facebook?
Facebook considers personal profiles and business Pages separate — you can switch between these two profiles to distinguish between your personal behavior and business activity. If desired, you can further separate the business and the personal by creating a separate account using a business email address just for your business Page.
Resources on growing your business presence on social media
GoDaddy Resources features other helpful guides on growing your business on social media, so if you'd like more information, check out these guides to learn all about it.