First things first: What is website typography? I know the word “typography” sounds fancy, like only famous designers or college art professors would ever really know what it means, but you can understand it, too, I promise. Wikipedia defines typography as “...the art and technique of arranging type to make written language legible, readable, and appealing when displayed.” If I boil that down even further and more simply, website typography is just text on a web page, arranged nicely.
It’s the ability to arrange it nicely which is intimidating to most people, but if you follow a few basic website typography rules, you can do it and you don’t even need to be an artist.
6 website typography terms to help you master web design
We’ll start by understanding some different typography terms. Then we can get into how to use them to create a well-designed page or document for your online business.
-
Typeface vs font.
-
Leading.
-
Tracking.
-
Kinds of fonts.
-
Readability and balance.
-
Consistency.
Now that you’re familiar with the main points of website typography, read on to gain a better understanding.
Editor’s note: Looking for expert web design help? The pros at GoDaddy can build you a mobile-friendly, beautiful site that reflects your industry while following your lead and input. Call for a free consultation for a web design project.
1. Typeface vs. Font
The words typeface and font are used interchangeably these days, but there’s actually a difference, technically. For example, “Arial” is a typeface. “Arial Bold” is a font.
Fonts describe the style of typeface that you use.
This terminology all got muddied with the rise of modern day computers, but for you as a new business wanting to learn about typography, it doesn’t really matter. Call it what you want! Just make it look nice and readable. I’ll be using the word “font” in this article, but you can tell by context when I actually mean typeface.
If you want to dig deeper, read this Fast Company blog post: What’s The Difference Between A Font And A Typeface?.
2. Leading
“Leading” (pronounced “ledding”) and also called “line tracking” is another term which is best described by its historical origins. When typesetters would lay out the type by hand on their printing presses, they used strips of lead at different thicknesses to set the space between lines of type. This added vertical space and made it easier to read.
How to use leading
You want to keep the space between lines of type at a reasonable distance. I suggest you start by making the leading number be the same as the font size. So if your font is 30, make leading 30, and then increase that if needed to ensure that the bottom of your letters on the top row aren’t bumping into the tops of your letters on the bottom row.
3. Tracking
“Tracking” or “letter-spacing” refers to the spaces between letters. If the letters are close to one another, that’s “tight” tracking. If they are spaced out, it’s “loose.” Sometimes tracking can result in some unintentionally disastrous, or hilarious, results when one letter pushes too close to another letter and looks like they’ve morphed into an entirely new one and changed the whole word. Just do a search for funny letter spacing fails and have yourself a laugh!
How to use tracking
The main goal here is to look at your tracking and make sure the text is readable. It can’t be too close together, or too far apart. Get a second opinion if you’re not sure. But generally, the default settings for tracking on a font are safe to use without modification.
Related: Quiz — Are you making these 15 website design mistakes?
4. Kinds of fonts
Fonts are the main element for adding typographic personality to your website. There are four main kinds of fonts that you’ll encounter and some anatomy that helps you differentiate between them.
It’s good to have a general understanding of how these work together and where they’re used most often.
So I’ll make some recommendations for you to follow as you dig into this whole website typography thing. But keep in mind that these aren’t unshakeable rules. You can experiment and you can veer from most of these tips.
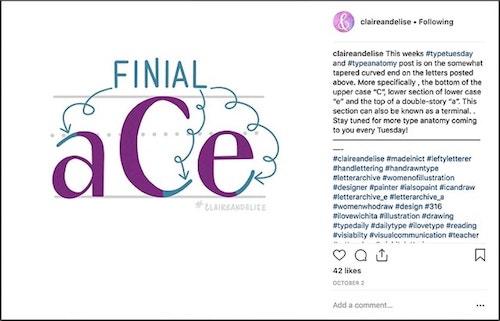
If you want to see some beautiful examples of the anatomy of type, check out this Instagram feed by Claire and Elise, a SoFontsy designer. She puts out new type anatomy posts every Tuesday in her IG account.
Two important rules for font usage
Before we get into the four types of fonts I want to make sure you understand two important rules:
- Don’t use too many fonts in your design. One or two usually are plenty. Or pick a single typeface and use the various font styles included, to break up the hierarchy of your design.
- Be careful with ALL CAPS. Sometimes it feels like you’re shouting when you don’t mean to. And sometimes it’s hard to read — like with script fonts (I dig into this more below.) So just make sure that if you decide to use all caps, you’ve thought it through and it is readable and balanced.
Related: eCommerce website design tips for do-it-yourselfers
Four main types of fonts
When it comes to fonts, there are four main types. Read on to learn when and how to use them.
1. Serif fonts

Serif fonts have a little “foot” on the ends of the letterforms. If you’ve ever seen a computer in your life, and I know you have as you are here right now, then you’ve seen Times — a serif font.
Serif usage:
Use serif fonts for the body portions of larger documents, paragraphs on a page, and printed things. Most people are accustomed to seeing paragraphs with serif fonts in traditional settings such as in printed books, so will find them comfortable and easy to read.
Serif fonts also work well as headlines.
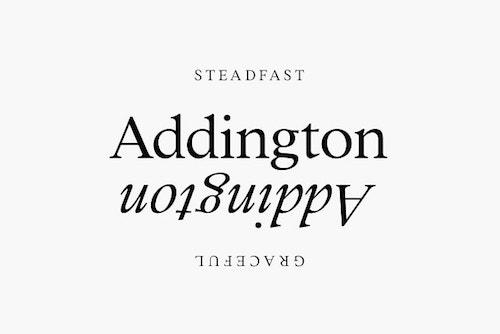
Addington CF is a lovely serif font from Creative Market.
2. Sans serif fonts
“Sans” means “without.” So these are fonts that don’t have serifs. They are “without” serifs. Arial is a classic example of a sans serif font.
Sans serif usage:
These can also be used for body copy. We generally see them used in more modern settings, such as on-screen on a website, or in documents discussing modern subjects. Sans serif fonts also work well as headlines.
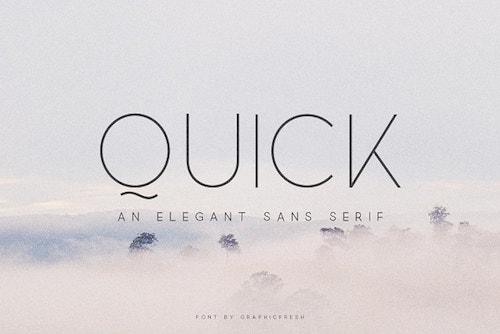
Quick is an elegant sans serif option from Creative Market.
3. Script fonts

This style of font has had a huge resurgence in popularity over the last 10 years or so. I believe this is due to the rise of sites like The Hungry Jpeg, where independent designers supply affordable fonts for sale. Plus, there has been a growing trend of hand-lettered design in commerce both online and offline. You’ve no doubt seen all sorts of fanciful script fonts on mugs for sale at your local Starbucks. Or on nearly every Pinterest pin in the world, it seems!
And sites like Canva, make designing so easy, that pretty much anyone with internet access can have beautiful typographic layouts in minutes with pretty scripts included.
Script usage:
My biggest tip for using script fonts is to never use them in all caps. I’ll say it again, it’s so important … NEVER USE SCRIPT FONTS IN ALL CAPS. LOL!
It’s a disaster of completely unreadable sentences.
Scripts were not designed to look good with repeated capital letters. Their true beauty comes from how each letter combines with the next in a mix of capital and lowercase, and beautiful swashes. Scripts work well for short headlines. Or for a single word in a headline where the other words are sans serif or serif.
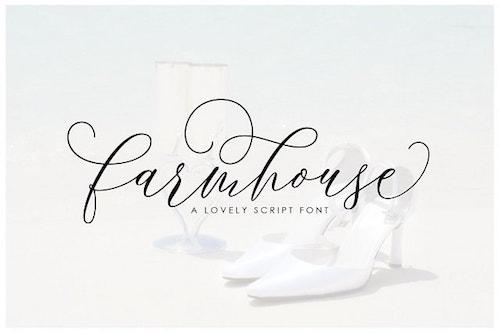
Farmhouse is a beautiful calligraphy style script font option from Creative Market.
4. Slab fonts

Slabs are fonts that are very thick and heavy. They’re fantastic as large headlines with strong messages. They’re bold and can sometimes seem to be shouting at the user. So they are not appropriate for designs where you want to speak softly or gently to your customer.
Slab usage:
These are best used for larger fonts sizes, not the itty bitty ones. And they pair really well with a serif or sans serif font. I don’t normally recommend them alongside script fonts because they are kind of “showy” and that’s the purpose of script fonts, too. It’s all about balance between plain/quiet, and bold/loud.
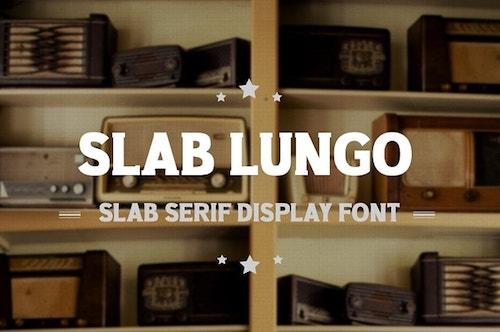
Slab Lungo is a unique vintage slab font option from Creative Market.
Readability and balance
The purpose of this information is to get you closer to beautiful, readable copy. I’ll sum up the guidelines in a handy short-list:
Readability tips
- Balance the fancy (slabs and scripts) with the plain (serifs and sans serifs).
- Minimize how many different kinds of typefaces you use (one-two).
- Use even spacing between letters (no embarrassing leading mistakes).
- Ensure spacing between lines is balanced (no lead strips required!)
You’ll also want to make sure you take a step back and look at your design with fresh eyes.
Sometimes this means you need take a few steps back from your computer, or print it out and see it on paper, or even look at your design in a mirror. Yes, I really do that! It’s amazing what you discover when you view your page backwards.
Take a fresh look and ask yourself:
- Are there any huge gaps?
- Is the text too crowded?
- Are margins around the edges too small or too big?
- Is there too much copy?
- Is there too little copy?
It takes practice, but you can do it! Double-check with a friend, or come back to your design a day later.
Consistency
Once you get a feel for what fonts you enjoy using in your brand, use them every time. Be consistent. It makes your business look more professional, and it’s way easier on you to create a balanced page because you’re used to working with those particular typefaces for all your projects. You’ll be a master of website typography in no time!


