Grouped products are a very useful feature for stores, as they give store owners a way of showing customers multiple products on the same page. Using a grouped product is helpful to:
- Show cross-sells or related items immediately together on one page, such as batteries for a camera or a screen protectors for a cell phone case
- Show various versions or options available for a product, such as a subscription
The changes to grouped products in the newest versions of WooCommerce have been welcome in my eyes, as they may setting up grouped products much easier for merchants who are just getting started with WooCommerce, but the new system is definitely a departure from the old one. Here’s the main difference:
- Create the parent grouped product, which just served as a “holder” or shell for other products that will belong in the group
- Create each product that will belong to the group. For example if you wanted to offer a set of camera, batteries, and case, you would first create a “holder” product for the group, then the product for the camera, batteries, and case separately.
- You’d then add each item to the group under “Linked products” when creating the group.
So it’s definitely a new concept, but I think it makes more sense for new store owners to think this way — “I’ll create my products and group them together” — instead of “I’ll create the placeholder group, then add the products to it”.
So here’s what the new process looks like to create a grouped product with new versions of WooCommerc.
WooCommerce grouped products in version 3.0+
The first thing you’ll now do is create each product that will belong to the group. I’m going to stick with my camera example, and add each camera item and related product as a separate product listing in my store.
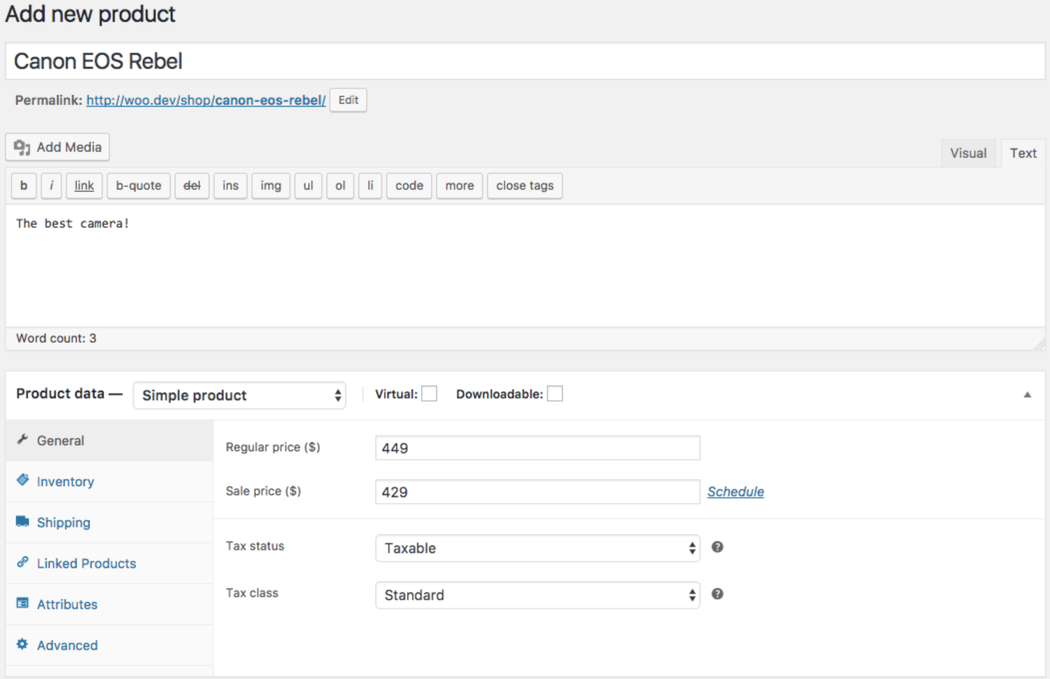
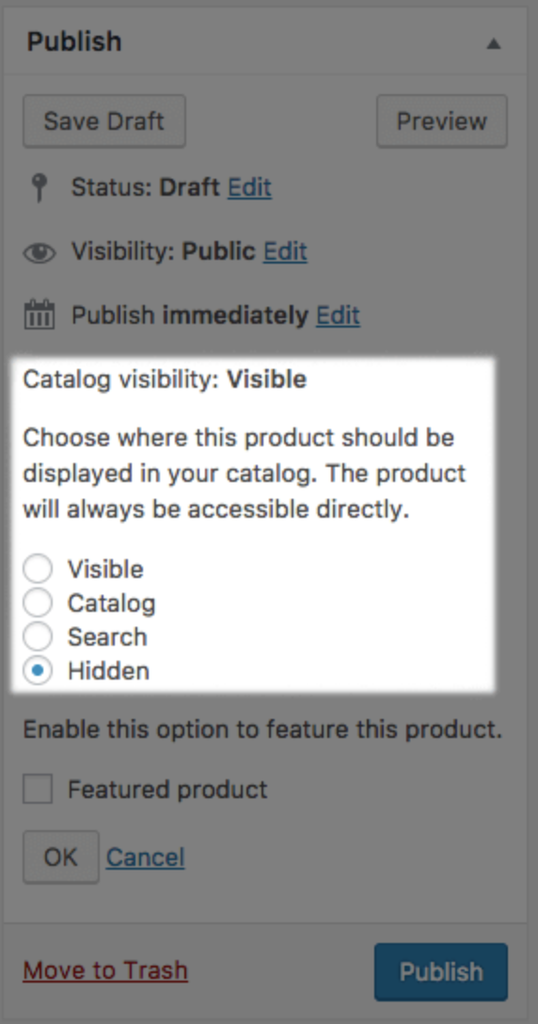
If you want these items to show up individually in your catalog, you can publish them and leave the items alone. If you only want to show the item as part of your group, you should consider changing the catalog visibility of each item to make them “hidden” from the catalog:
Once you’ve added all products that will belong to the group and determined whether they should be shown individually in your shop or not, you’re now ready to group them together.
Here’s the most powerful thing about the changes to grouped products: because you no longer have to add the group on the individual item; but rather, products are added to the group, well, through the group, you can add more product types into a group. This means that, while you couldn’t add a variable product to the group in previous versions, you can with WooCommerce 3.0+.
So you can prepare your group by adding your final product: a grouped product. You’ll then add all of the items you just made to the group under “Linked products”.
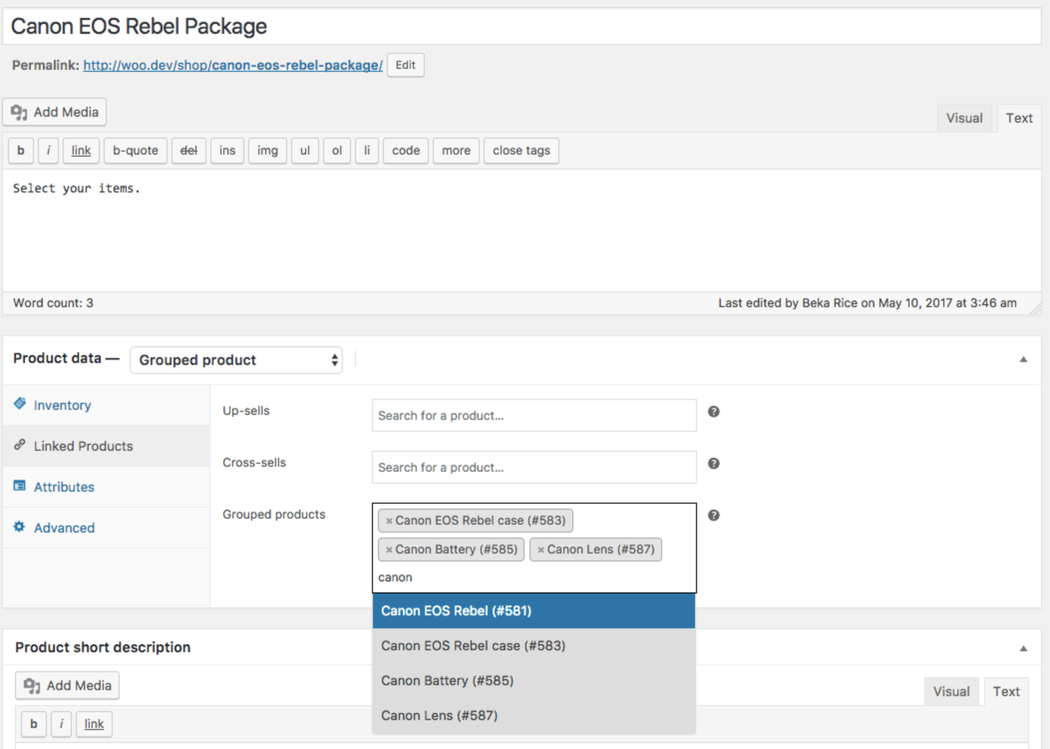
Once you’ve added all items to the group, you’re done smile
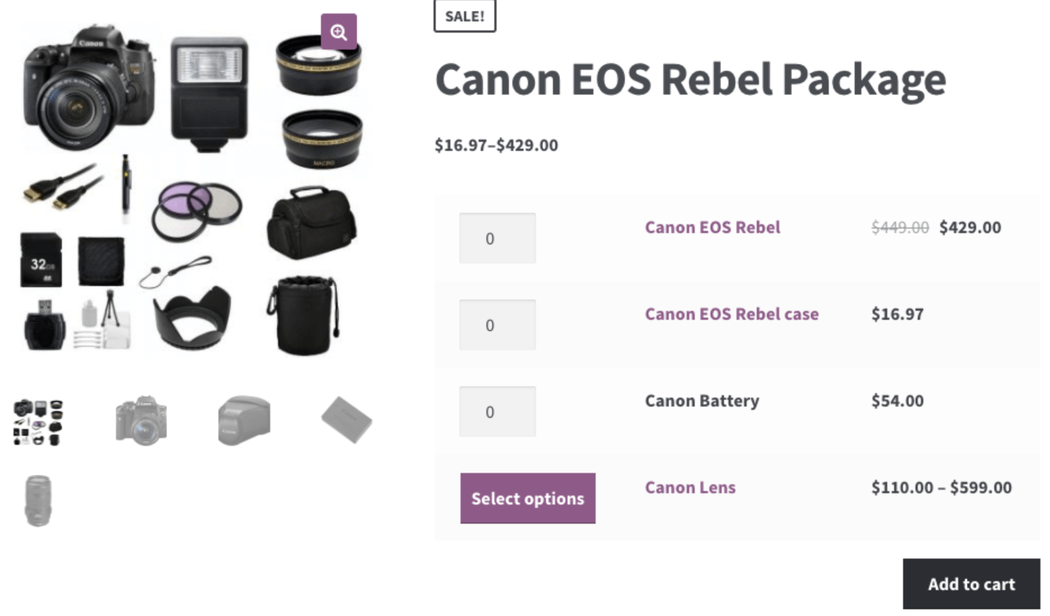
You’ll now see the ability to add any item in the group, and if you’ve added a variable product to the group, you’ll see that it shows “Select options” like the shop page instead of a quantity selector (to ensure customers add a specific variation to the cart).


