NFT marketplaces are becoming a popular place for artists, designers and other types of creatives to monetize their work. With an NFT, creators can sell unique items, digital or physical customers who get verifiable proof of their ownership rights.
In this guide, we will examine how you can use several WordPress and WooCommerce plugins you can use to create a marketplace for selling NFTs and NFT collections.
What are NFTs?
Non-fungible-tokens (NFTs) represent digital or physical assets that cannot be divided. Each item is a single unique asset meaning that it can not be exchanged with or replaced by another version.
NFTs are stored in a decentralized way using services such as InterPlanetary File System and blockchain technology. Because of this, no one can delete the assets. This safeguards the rights of the owner and makes the asset’s details and history public for all to see.
The programmability of the blockchain allows NFT creators to execute different functions for their tokens. The underlying function for the token is enforced by smart contracts. Once programmed, the specific rules are automatically enacted so that nobody can change them.
Some NFT platforms accept payment fiat currencies such as the US dollar. Most are bought and sold using the cryptocurrency native to the token’s blockchain. Ether (ETH) is the most commonly used crypto on NFT marketplaces as Ethereum is the most popular blockchain for launching NFTs.
For NFTs exchanged using cryptocurrencies, users must create a wallet to complete their purchases. These wallets store the keys to access the respective coin needed in the transactions. The wallet is also usually where the NFT token is stored once the sale is complete.
Many NFT marketplaces have implemented royalty functionality that enables the NFTs creator to receive a residual payout from each subsequent sale of their creations. Unfortunately, there isn’t a way to keep these residuals if the asset is moved. Once the token leaves the market where it was originally sold, the creator can no longer earn royalties.
Save money selling products, your way
Our Managed Hosting for WooCommerce includes more than $5,000 in free premium WooCommerce extensions, empowering you to sell products, your way, with additional customization.
Specialized store extensions can cost hundreds, even thousands of dollars per year once you get them all added to your store.
But with our Managed Hosting for WooCommerce, you can build the exact store you needed to sell subscriptions, book appointments, enable digital downloads and much, much more — with free access to more than $5,000 in premium WooCommerce extensions.
Most popular types of NFTs
Digital Artwork
Today, the most popular kind of NFTs are digital art pieces. You have likely seen NFT art pieces selling for insanely high prices. These pieces are often parts of a collection with a predefined amount.
Some projects add value to holding the token by providing additional benefits and utilities. For example, collections will give holders access to exclusive events or a private discord.
Gaming NFTs
Gaming NFTs give players the ability to own various digital in-game assets. It could be an item, a character skin or even a character itself. There are also virtual land NFTs that allow you to own a piece of land in the VR metaverse for various blockchain-based video games.
Texts and social media posts
NFTs have enabled creators to sell all sorts of objects and content that could be previously monetized. One common is messaging such as texts or social media posts like tweets. People with a following can create an image of one of their previous communications and sell it as an official NFT.
Sports
Another popular type of NFT is sports collectibles. These can function like digital trading cards. The NBA has launched its own digital collection line and future Hall of Fame quarterback Tom Brady has launched his own NFT platform to sell sports collectibles.
Setting up your NFT shop
To turn your WooCommerce store into an NFT marketplace you will need to get a WordPress plugin. Below we walk through how to set up your shop using two different solutions, Tatum NFT and WP Smart Contracts.
Tatum NFT
Tatum is a development platform that allows you to connect with various blockchains using APIs. With their WordPress NFT plugin and the help of WooCommerce, you can create, mint, and sell your NFTs from your site. The different blockchains the app supports can be found here.
There are two things you’ll need to do to get started; download the WordPress plugin and create your API key.
After you download the extension, you will go to the Tatum homepage to create your account and API key. From there, click Get API key.
On the next page, you will be prompted to create an account. You can do so by providing your email address or using an SSO for your Google or Facebook account.
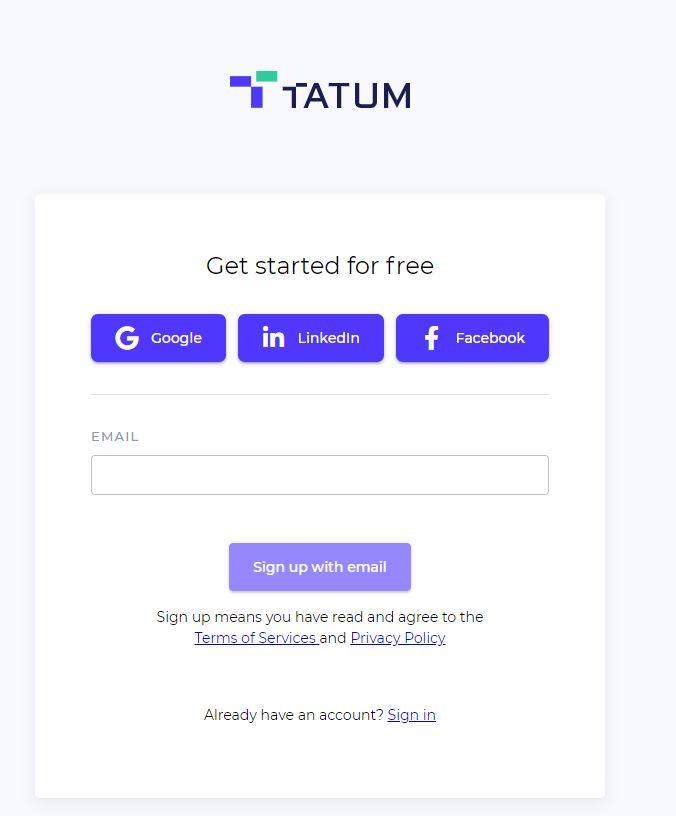
Once you are in the account, select Create API key. You will then receive a prompt to choose a plan. Pick the one that fits your needs, and a box will appear for you to generate your API key. Enter the name for the API, choose a network and a region.
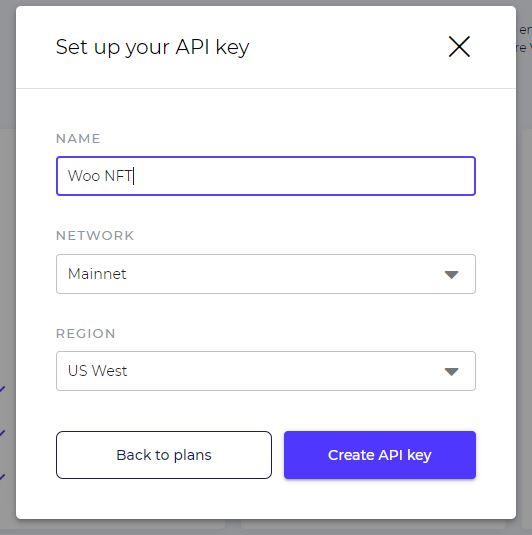
The API key will appear on the following page.

After you create your key, return to your WooCommerce store and go to NFT Maker. In the section for Get your API key, select the plan level that you want. You need to enroll in a paid plan to be able to pay the gas fees required to mint your tokens.
The number of tokens that you are able to mint each month will depend on which blockchains you use. Various blockchains will have different fees. Some are notably higher than others. If you use a blockchain with high gas you will have fewer tokens available to mint.
Selecting a plan will take you to your Tatum dashboard where you can provide your payment details. After you confirm the details, a new API key will be created for the plan. You can find it by navigating to the API keys section of the Tatum dashboard.
Under Your API keys, you will find the recently created API. Click Show to reveal and copy the code. Return to WordPress and scroll down to step 2. Paste in your API key.
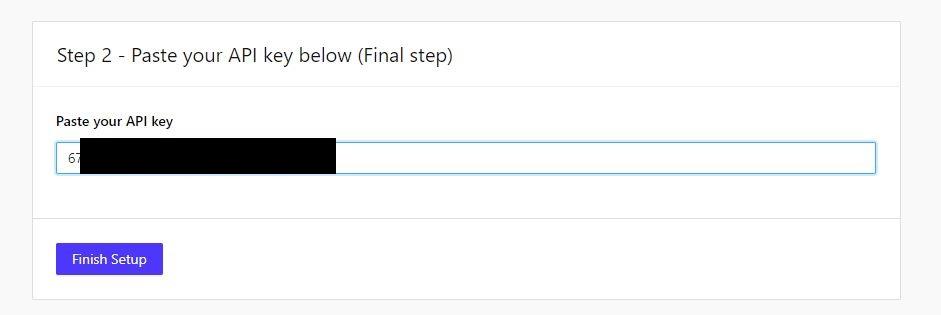
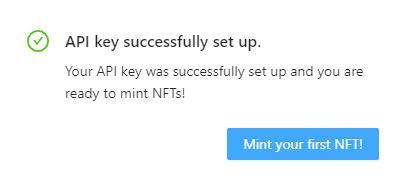
Click Finish Setup and your WordPress backend will be successfully synced to the platform.
Creating NFT product
To create an NFT product go to the WooCommerce product catalog and select Add product as you would for any other item. Scroll down to the product data tab and find the NFT Maker section and choose the blockchain to mint your NFT. When you publish the product a new token will be minted.

After your products are live, customers can complete their purchase by adding the product to their cart and beginning the checkout process. When providing their details, they will need to include the blockchain address of which they want to receive the NFT.
After the order has been paid, the tokens will be transferred to the customer’s address. On the order confirmation page, the customer will receive a link to the blockchain explorer. There, they can view and verify the transaction details.
To create and deploy royalty NFTs you can do so with an API call. This will deploy a standard, validated NFT smart contract to the blockchain you selected. The parameters include the name and symbol of the deployed token, the initial supply of the tokens, and the recipients.
Create a fixed price asset listing
After you have set up your marketplace, you can enable listings so that customers browse and buy your NFTs. You’ll need to get your NFT assets to the seller addresses before they create the NFT listing. The seller can then choose the price of the listing. Each listing must contain a unique listingId as it is used to identify the listing and is used for other operations.
Below is an example of the API to create a fixed-price listing:
curl --location --request POST 'https://api-eu1.tatum.io/v3/blockchain/marketplace/listing/sell' \
--header 'Content-Type: application/json' \
--header 'x-api-key: YOUR_API_KEY' \
--data-raw '{
"contractAddress": "0x4153B909f55B0Ec43c11e980dF09b853477D9F79",
"nftAddress": "0x6d8eae641416b8b79e0fb3a92b17448cfff02b11",
"tokenId": "12",
"listingId": "1",
"isErc721": true,
"price": "0.001",
"seller": "0x80D8BAc9a6901698b3749Fe336bBd1385C1f98f2",
"chain": "MATIC",
"fromPrivateKey": "0x37b091fc4ce46a56da643f021254612551dbe0944679a6e09cb5724d3085c9ab"
}'
With this, the listing will be in the marketplace. The seller will then need to send the NFT asset to the marketplace to activate the listing. The NFTs are compatible with the standard ERC-721 and ERC-1155.
Mint NFTs
Once your smart contract is deployed, you can issue new tokens using the Mint NFT endpoint Each token needs to have metadata as a JSON schema with extra details about the asset such as the title, description, image URL.
To enable the royalty feature, you need will need to enter the properties authorAddresses and cashbackValues. You can then set the recipients that are to receive the cashback following each time the token is transferred. The values are absolute enabling recipients to earn a consistent residual income. The values are in the blockchain’s underlying.
curl --location --request POST 'https://api-eu1.tatum.io/v3/nft/mint' \
--header 'x-api-key: YOUR_API_KEY' \
--header 'Content-Type: application/json' \
--data-raw '{
"tokenId": "1",
"to": "0x8cb76aed9c5e336ef961265c6079c14e9cd3d2ea",
"chain": "CELO",
"contractAddress": "0xd2A6B389eBE69208636B20b2abAcFC1eE0C3fF57",
"cashbackValues": ["1"],
"authorAddresses": ["0x8cb76aed9c5e336ef961265c6079c14e9cd3d2ea"],
"url": "https://my_token_data.com",
"fromPrivateKey": "0x4874827a55d87f2309c55b835af509e3427aa4d52321eeb49a2b93b5c0f8edfb",
"feeCurrency": "CUSD",
"erc20": "0x1410d4ec3d276c0ebbf16ccbe88a4383ae734ed0"
}'
You can use the Transfer NFT endpoint to transfer your tokens to a different blockchain. To do so, you will need the private key of the address for the destination wallet. You also need to give the value for the transfer transaction. This is the total royalties that should be distributed to the token creator.
WP Smart Contracts
WP Smart Contracts is a WordPress plugin that allows you to deploy an NFT store including assets on the Ethereum, Binance Smart Chain (BSC), Matic, and xDai chain.
After you download the plugin, go to Settings > WP Smart Contracts to configure the plugin.
The Skin section is where you will set the appearance for your marketplace. There are four skins to choose from. The setting is applied globally.
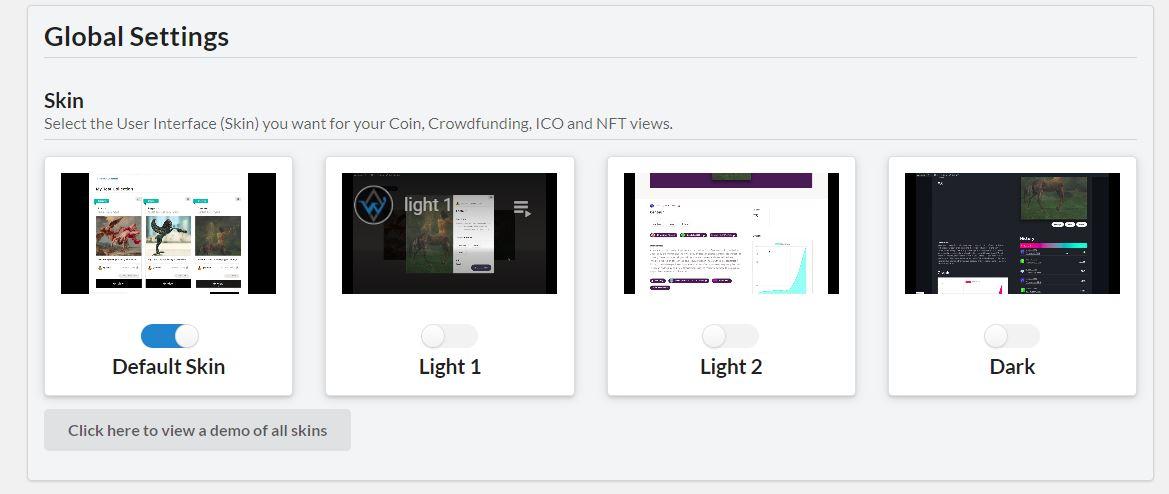
Once the settings are configured you can begin creating your marketplace and listing by going to NFT Collections. Click Add a new collection.
On the next page, scroll down to flavor and choose Matcha. Matcha is an ERC721 marketplace smart contract to deploy on these blockchains.
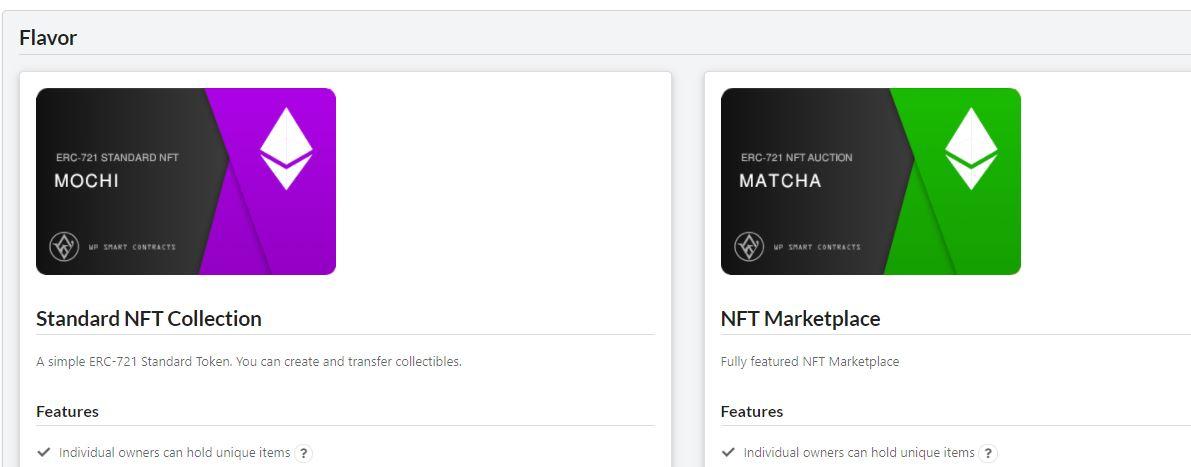
You can then set the required attributes for the smart contract. You’ll need to provide a name, symbol, and percentage for sales and auctions commissions.
Further below, you can configure the security option to determine who can mint tokens on the contract. You’ll also need to define user roles to specify who is able to create tokens on the marketplace.
Next, you can specify the site interface for your NFT marketplace. By default, only the token creator can edit the interface for their asset. You have the option to leave the font-end editing open to anyone who wants to modify the data for any item.
Once you’ve set up the design for your Smart contracts, you can begin to deploy them. Find the network for your contract and click Deployment. Check the boxes and click Yes, please proceed.
When the deployment is finished, you can click on the link to the smart contract address to review the contract information. There is also a permalink to the collection so that you can look at and interact with your chosen UI.
Conclusion
NFTs are only going to grow in popularity as they gain mainstream adoption. New types of digital and physical items will be turned into tokens as people look for ways to sell unique assets. With an NFT marketplace, you can generate sales both now and in the future by creating an ecosystem for continual buying and selling.
