Kişilerin, takvimin, e-postaların ve görevlerin dışa aktarılması veya yedeklenmesi
Not: Bu talimatlar yalnızca referans amaçlıdır. GoDaddy Destekçiniz verileri dışa aktarmanıza yardımcı olamaz.
Outlook yedek dosyası oluşturmak; e-posta mesajlarınızı, kişilerinizi, takvim bilgilerinizi ve görevlerinizi kaydetmenize olanak tanır. E-posta planınıza, e-posta hizmetinize veya yeni Outlook sürümüne yedek dosyanızı içe aktarın. Dışa aktarma dosyasında klasör özellikleri (görüntülemeler, izinler ve AutoArchive ayarları), mesaj kuralları ve engellenen gönderici listeleri gibi meta veriler yer almaz. Microsoft'un artık 2016’dan eski Outlook sürümlerini desteklemediğine dikkat edin.
Gerekli: Tüm posta kutunuzun dışa aktarılmasını sağlamak için, Önbellekli Exchange modunu kapatın, aksi takdirde dışa aktarma yalnızca son 12 ayı içerecektir.
Kullandığınız e-posta platformuna göre uygun sekmeyi seçin.
- Web’de Outlook’a giriş yapın. Microsoft 365 e-posta adresinizi ve şifrenizi kullanın (GoDaddy kullanıcı adınız ve şifreniz burada çalışmayacaktır).
- Sayfanın en solunda,
 Kişiler’i seçin.
 - Kişileri yönet ve ardından Kişileri dışa aktar öğesini seçin.
- Tüm kişileri veya yalnızca belirli bir klasörden kişileri aktarma seçeneğini belirledikten sonra Dışa Aktar öğesini seçin.
Kişileriniz bir .csv dosyası olarak kaydedilir ve bu dosyayı diğer e-posta uygulamalarına (örneğin Gmail) veya Outlook’un diğer sürümlerine içe aktarabilirsiniz.
- Outlook’u açın.
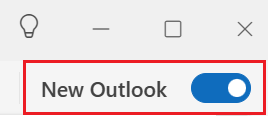
- Yeni Outlook'taysanız, klasik Outlook'a geri dönün. Sağ üst köşede, Yeni Outlook anahtarını kapatın. Geri döndürmek istediğinizi onaylamanız gerekebilir.

- Sol üst köşeden Dosya öğesini seçin.
- Aç ve Dışa Aktar seçeneğini ve ardından İçe Aktar/Dışa Aktar öğesini seçin.
- Dosyaya dışa aktar ve ardından İleri öğesini seçin.
- Outlook Veri Dosyası (.pst) ve ardından İleri öğesini seçin.
- Posta kutusunun tamamını dışa aktarmak için e-posta hesabının adını seçin ve bir sonraki adıma geçin. Ya da yalnızca takvim, kişiler veya görevlerinizi dışa aktarmak için dışa aktarmak istediğiniz klasörü seçin. Aynı anda yalnızca bir tür öğeyi dışa aktarabileceğiniz için bu adımları kişiler, takvimler ve görevler için ayrı ayrı izlemeniz gerekir.
- Alt klasörleri dahil et seçeneğinin yanındaki onay kutusunun işaretlendiğinden emin olun ve ardından İleri öğesini seçin.
- Outlook Veri Dosyasının (.pst) kaydedileceği konumu seçmek için Gözat seçeneğini belirleyin. Dosya adını girin ve ardından Tamam’ı seçin.
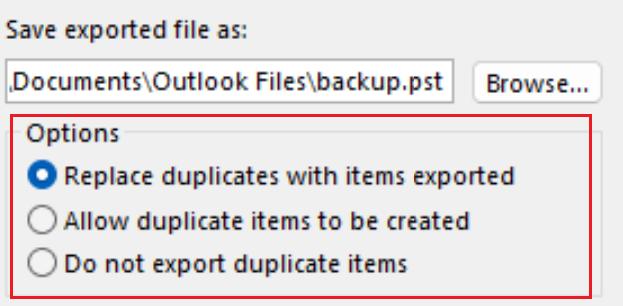
- Mevcut bir Outlook Veri Dosyasına (.pst) dışa aktarıyorsanız, Seçenekler bölümünün altından, dosyada önceden var olan öğeler dışa aktarılırken ne yapılacağını belirleyin.

- Bitir öğesini seçin.
- Aşağıdaki senaryolardan biri geçerli değilse dışa aktarma işlemi hemen başlar:
- Outlook Veri Dosyasını Oluştur iletişim kutusu görüntülendiğinde, şifreyi Şifre ve Şifreyi Doğrula alanlarına girin ve ardından Tamam seçeneğini belirleyin. Bir şifre ayarlamadan devam etmek için, şifre alanlarını boş bırakın ve ardından Tamam seçeneğini belirleyin.
- Mevcut ve şifre korumalı bir Outlook Veri Dosyasına (.pst) dışa aktarıyorsanız, Outlook Veri Dosyası Şifresi iletişim kutusuna şifreyi girin ve Tamam seçeneğini belirleyin.
- Outlook’u açın.
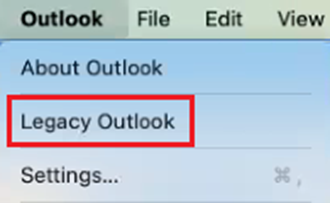
- Outlook’un yeni bir sürümünü kullanıyorsanız Outlook’u eski sürümüne döndürün. Outlook'u seçin ve ardından Eski Outlook seçeneğini belirleyin. Geri döndürmek istediğinizi onaylamanız gerekebilir.

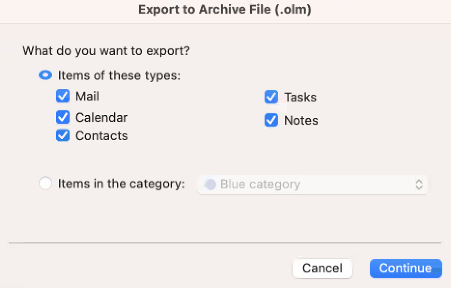
- Dosya ve ardından Dışa Aktar öğesini seçin. Arşiv Dosyasına Dışa Aktar (.olm) penceresi açılır.
- Dışa aktar seçeneğini görmüyorsanız, Araçlar'ı ve ardından Dışa aktar'ı seçin.
- Dışa aktarmak istediğiniz öğeleri seçin. Varsayılan olarak tüm öğeler seçilidir.
- Bu türlerden herhangi birini ayrı ayrı dışa aktarmak için, her öğenin yanındaki onay kutusunu seçin.

- Devam Et öğesini seçin.
- Dosyayı bilgisayarınızda nereye kaydetmek istediğinizi seçin, bir dosya adı girin ve ardından Kaydet'i seçin. Öğeleriniz dışa aktarılır.
- Bitir öğesini seçin.
İlgili adım
- Outlook verilerinizi bir yedek dosyası olarak dışa aktardığınıza göre artık Outlook’ta içe aktarın.
Daha fazla bilgi
- Microsoft'tan bir takvimi .ics dosyasına nasıl dışa aktaracağınızı öğrenin.
- Microsoft’tan Outlook’ta dosya dışa ve içe aktarma hakkında daha fazlasını öğrenin.
- Mac’te Apple Mail’de posta kutularını nasıl içe ve dışa aktaracağınızı öğrenmek için Apple’ın yayınladığı bu makaleye göz atın.